

If someone else looks after your website or pays your invoices – a colleague, your bookkeeper or your web designer – invite them as a user. They sign in with their own e-mail address and password, and you decide what they may see and do. Nobody needs to share your password.
Watch the video (1 min 9 s, with narration) – or follow the steps below.
Step by step
-
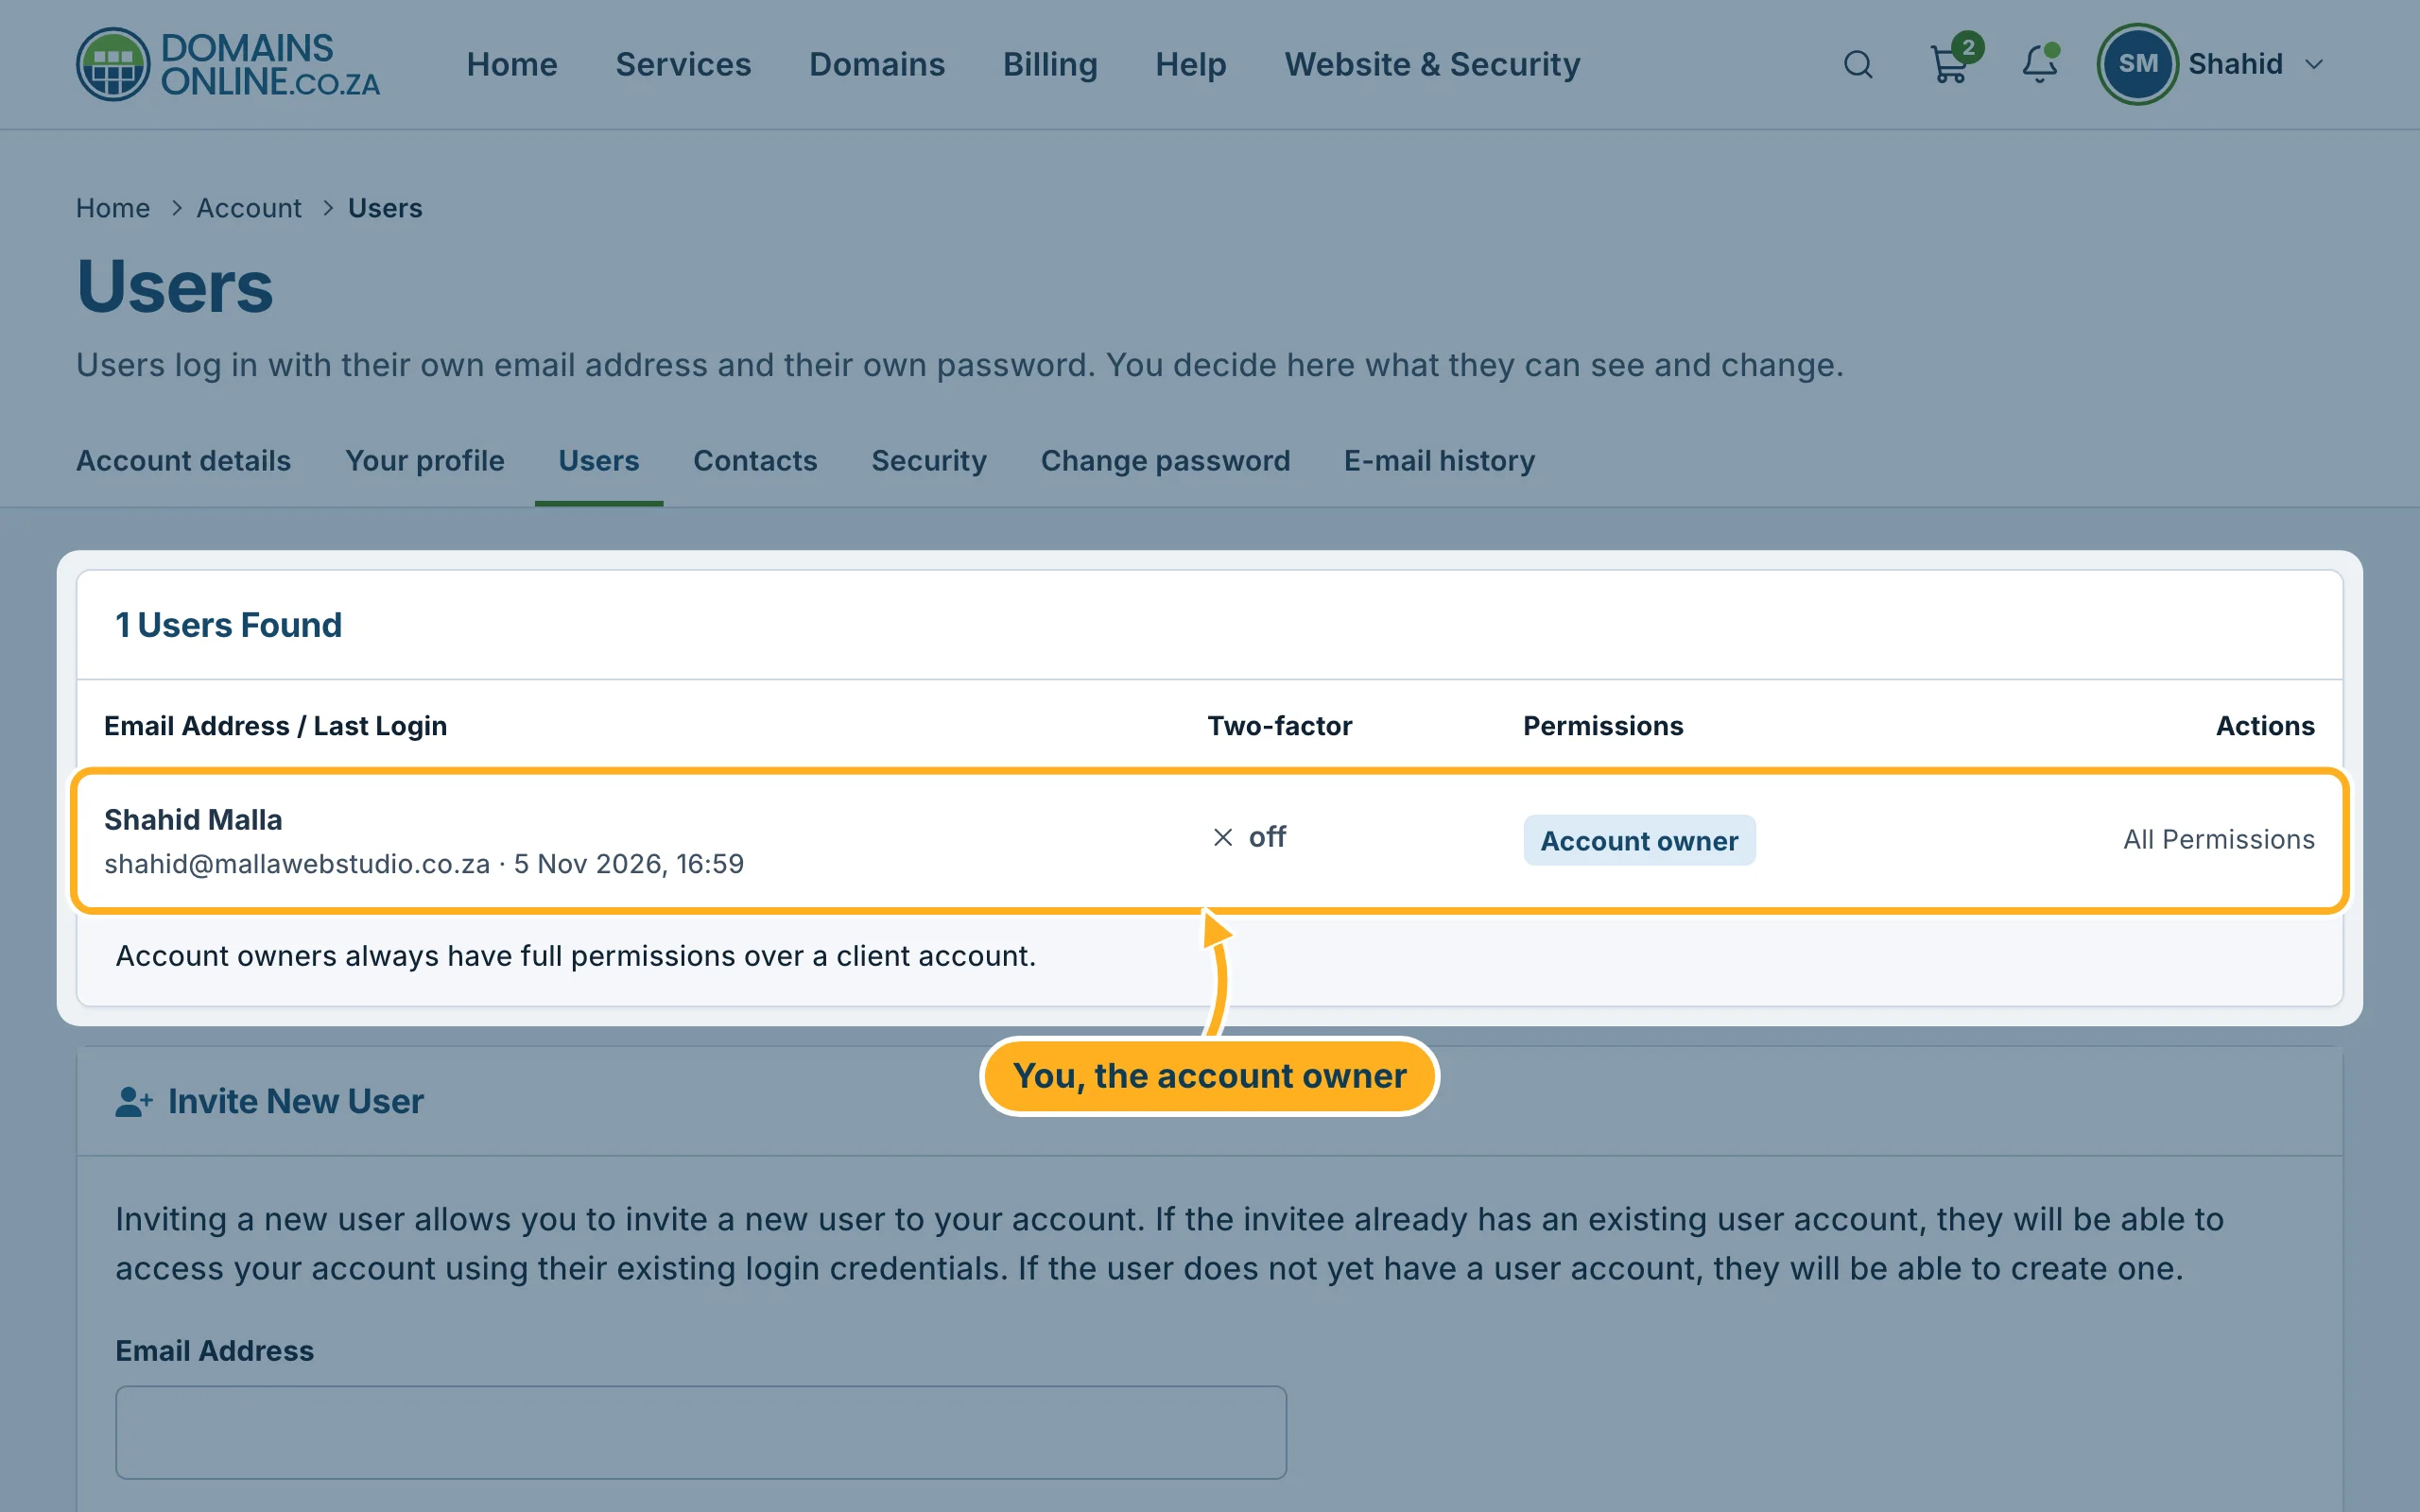
Sign in to the client area, click your initials and name at the top right and choose Users. The list at the top shows everyone with access to your account. You are the Account owner: account owners always have full permissions.
-
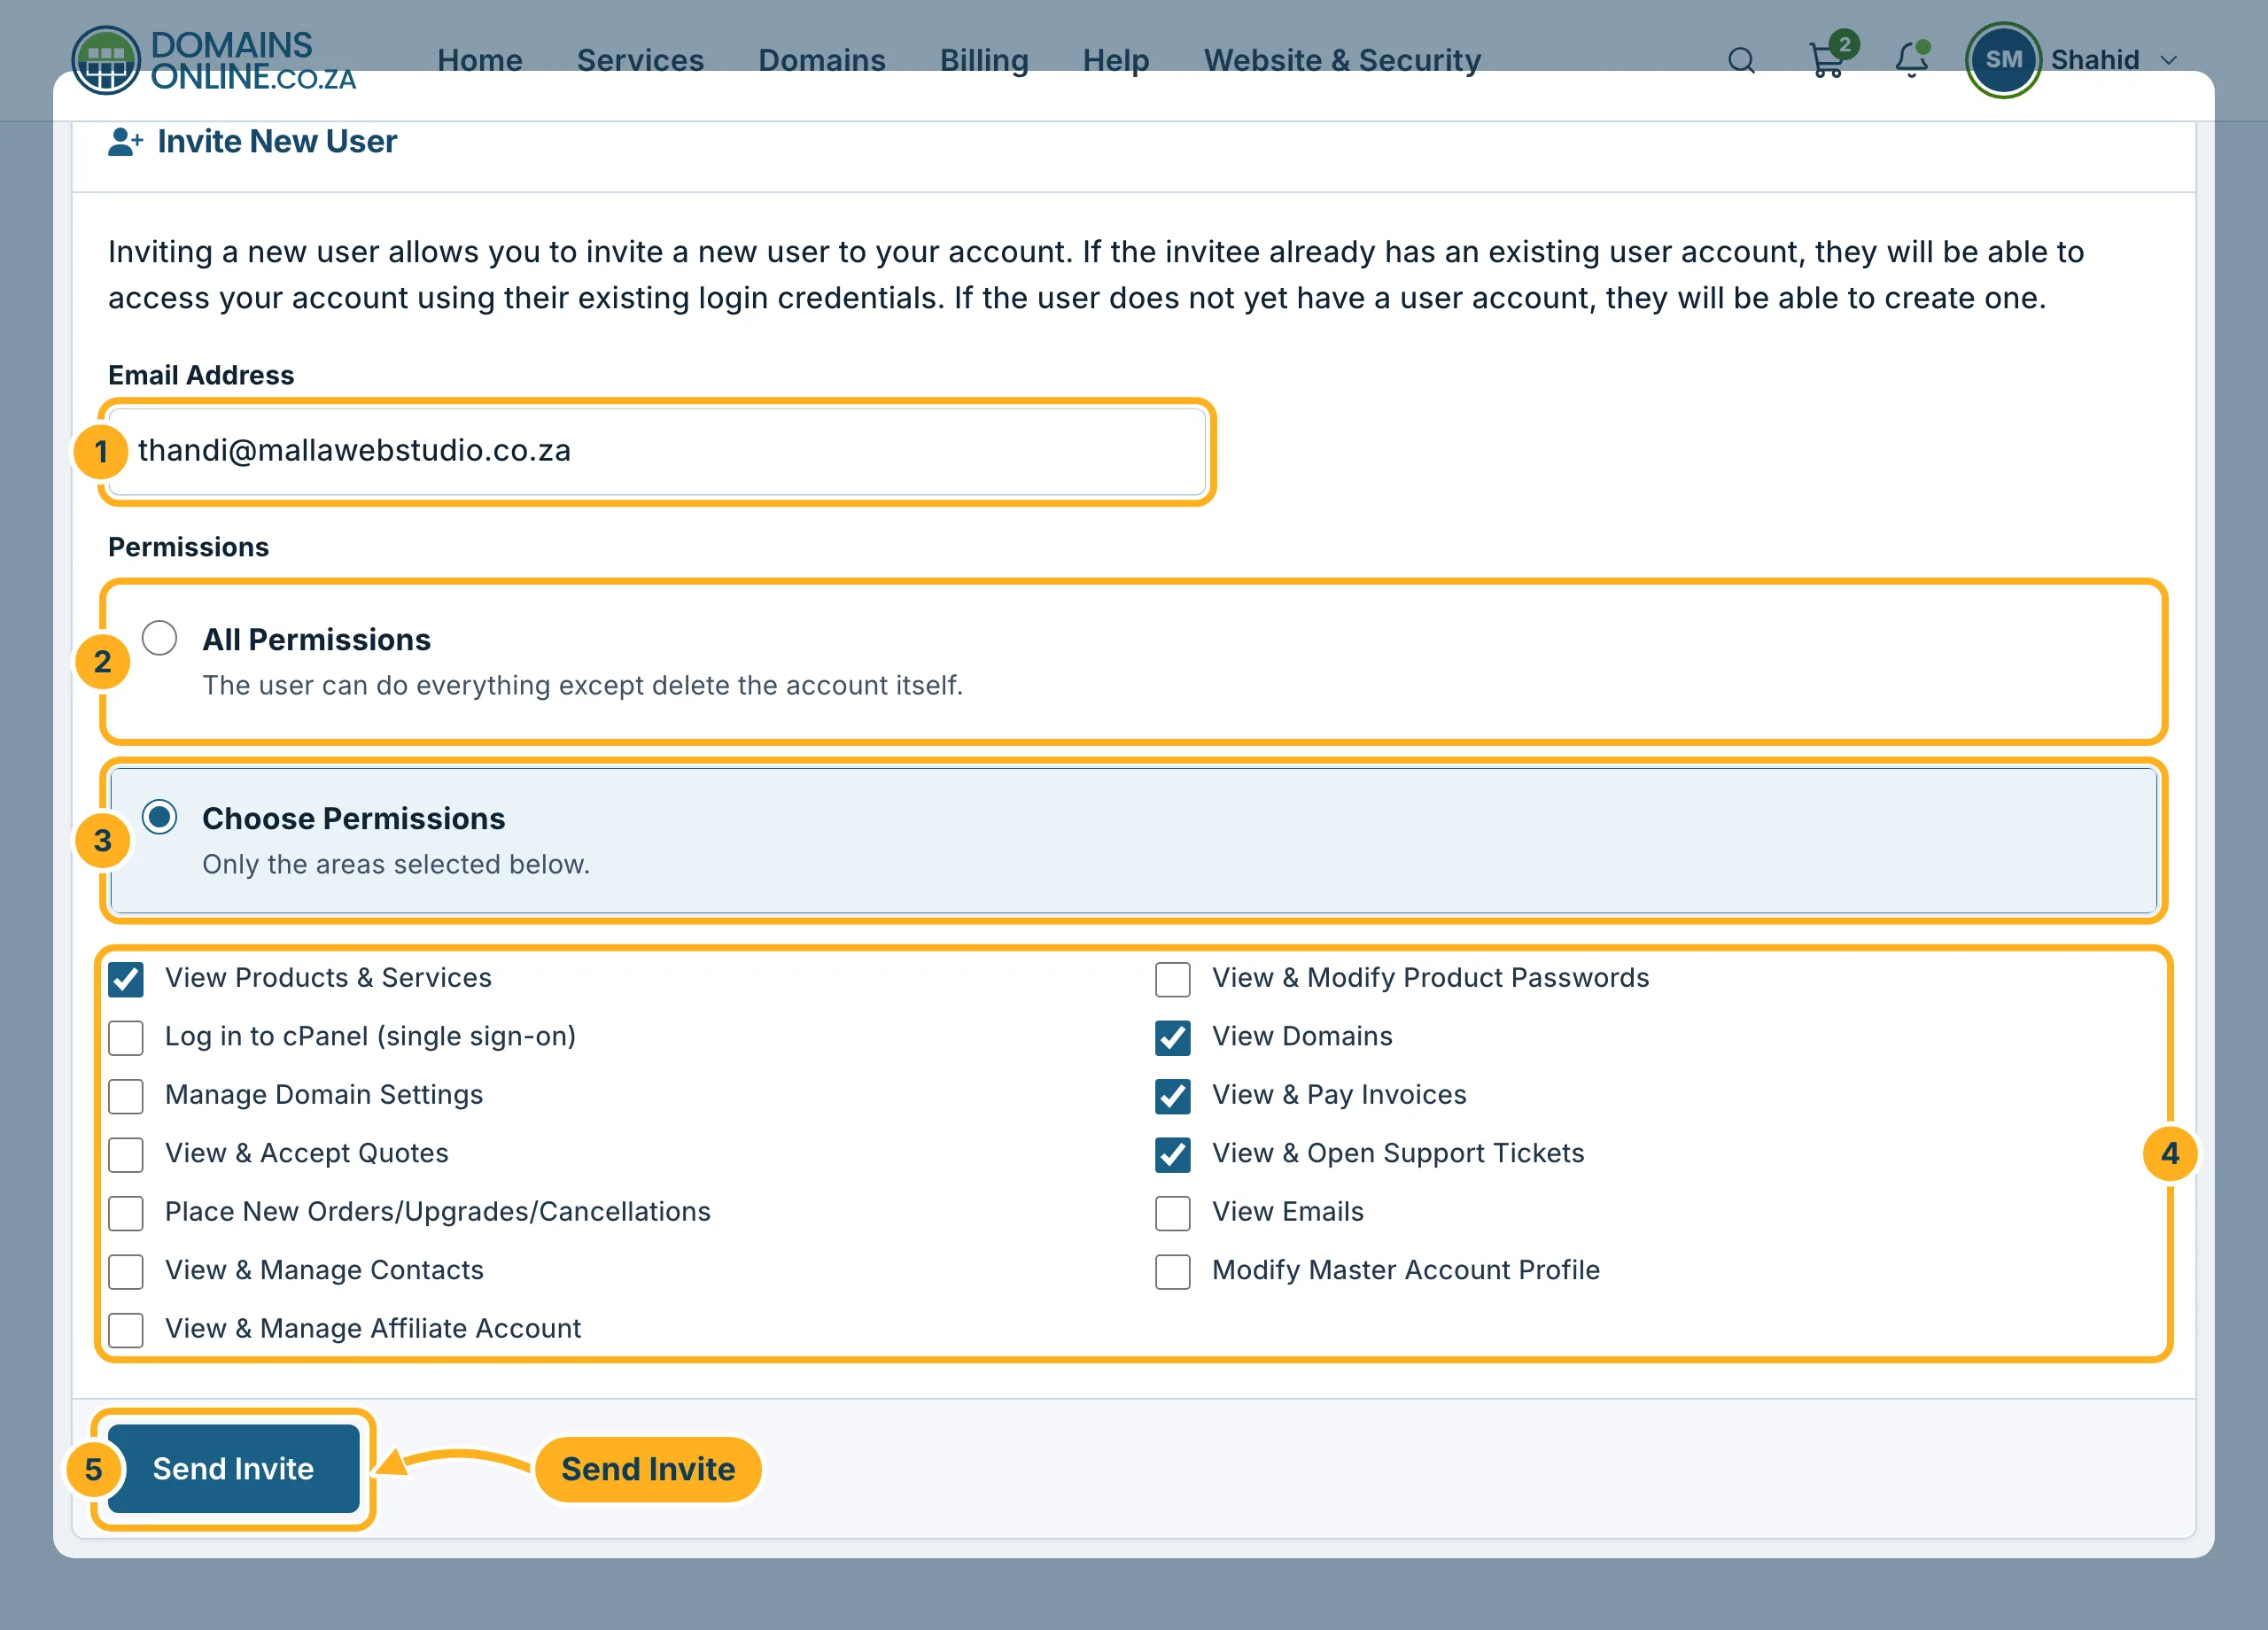
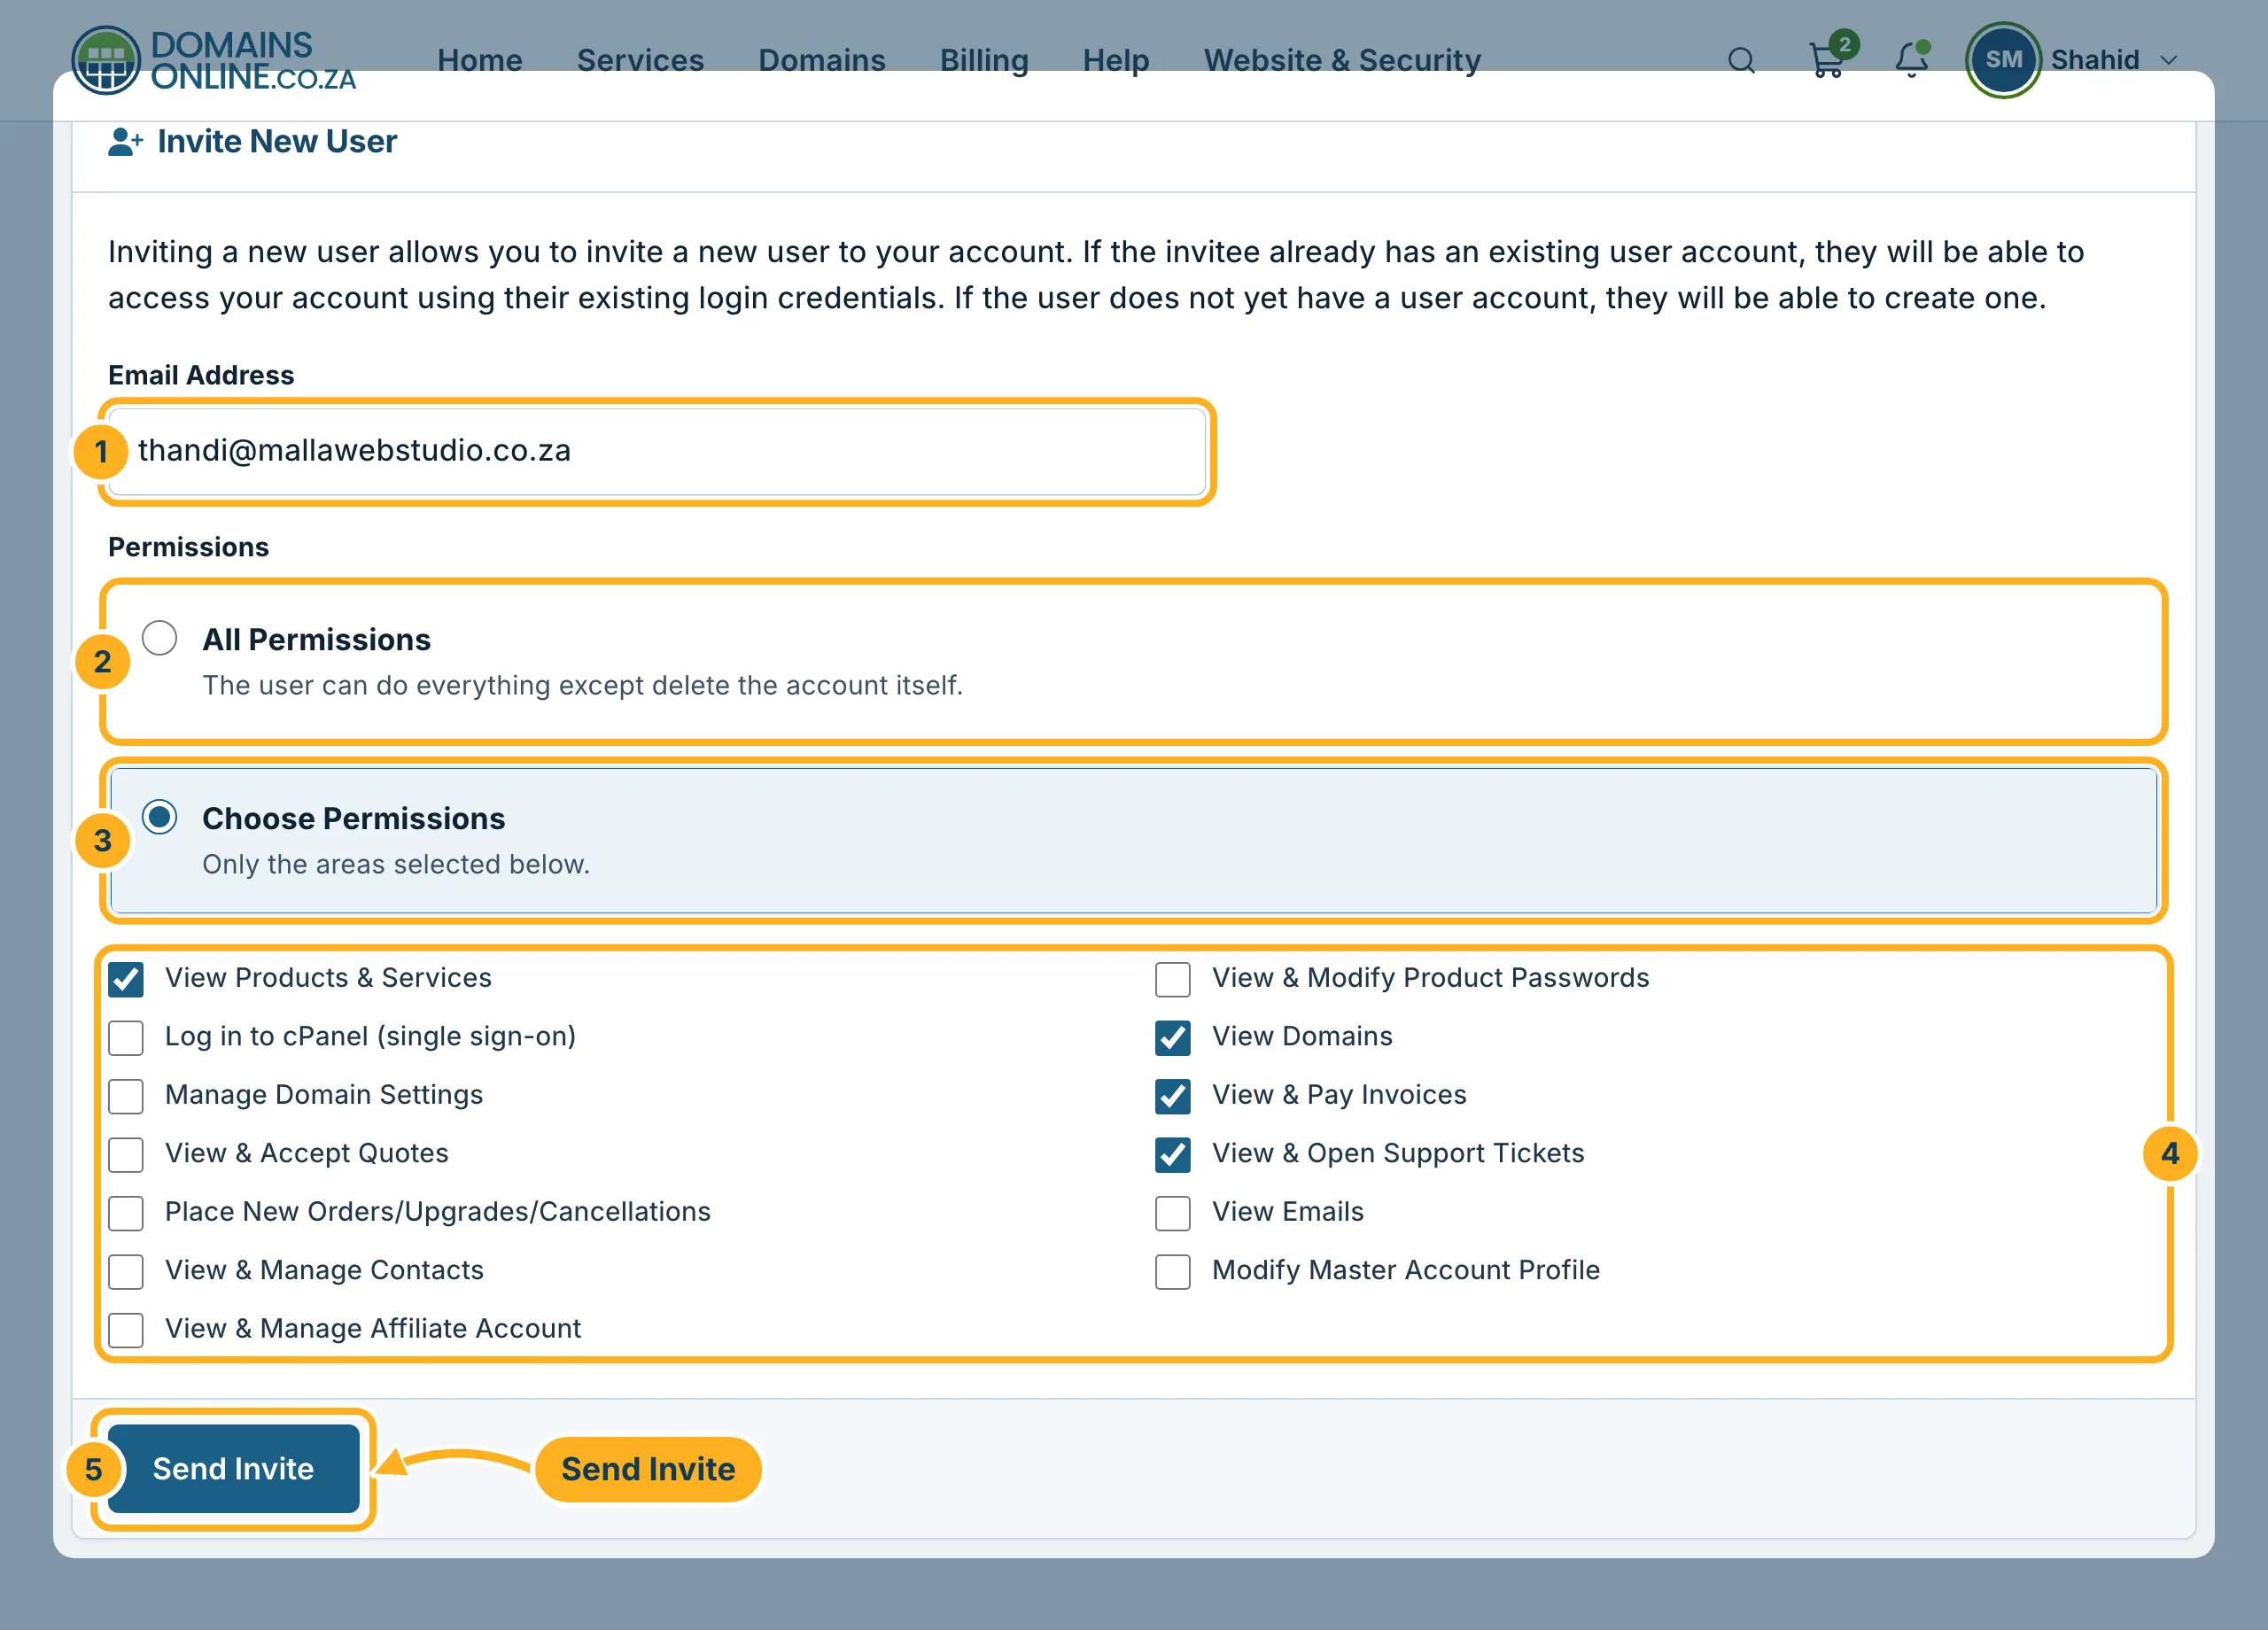
Under Invite New User:
- Type the person's e-mail address in Email Address.
- Choose All Permissions to let the user work with every area of your account,
- or choose Choose Permissions to allow only some areas,
- and tick those areas, for example View & Pay Invoices for your bookkeeper, or Log in to cPanel (single sign-on) for your web designer. Untick what the user should not see.
- Click Send Invite.
-
The person gets an e-mail with an invitation link. If they already have a DomainsOnline login, they use it to open your account. If not, they create a login.
Pending invites, permissions and removing a user
- Until the invitation is accepted, it is listed under Pending Invites. There you can click Resend Invite, or Cancel Invite if you change your mind.
- Once the user has accepted, they appear in the list of users. Click Permissions next to their name to change what they may do.
- Click Remove Access next to their name when they should no longer have access to your account. Their own login stays, but it no longer opens your account.
For the person you invited
If you were invited to several accounts, you choose which one to work in after signing in – see Switch between client accounts.
Something not working?
- “The email address you entered already has an active invitation”: the invite was already sent. Use Resend Invite under Pending Invites.
- The invitation e-mail doesn't arrive: ask the person to look in their spam or junk folder, and check the address you typed.
Related articles
- Add contacts (for example a billing contact)
- Switch between client accounts
- Change the e-mail address you sign in with
Need help? Open a ticket or call us on 082 412 6556.
