

With Softaculous in cPanel you install WordPress on your domain in a few clicks. Softaculous creates the database, installs WordPress and sets up your admin login for you.
Watch the video (2 min 23 s, with narration) – or follow the steps below.
https:// straight away. See Free SSL certificate (AutoSSL).Step by step
-
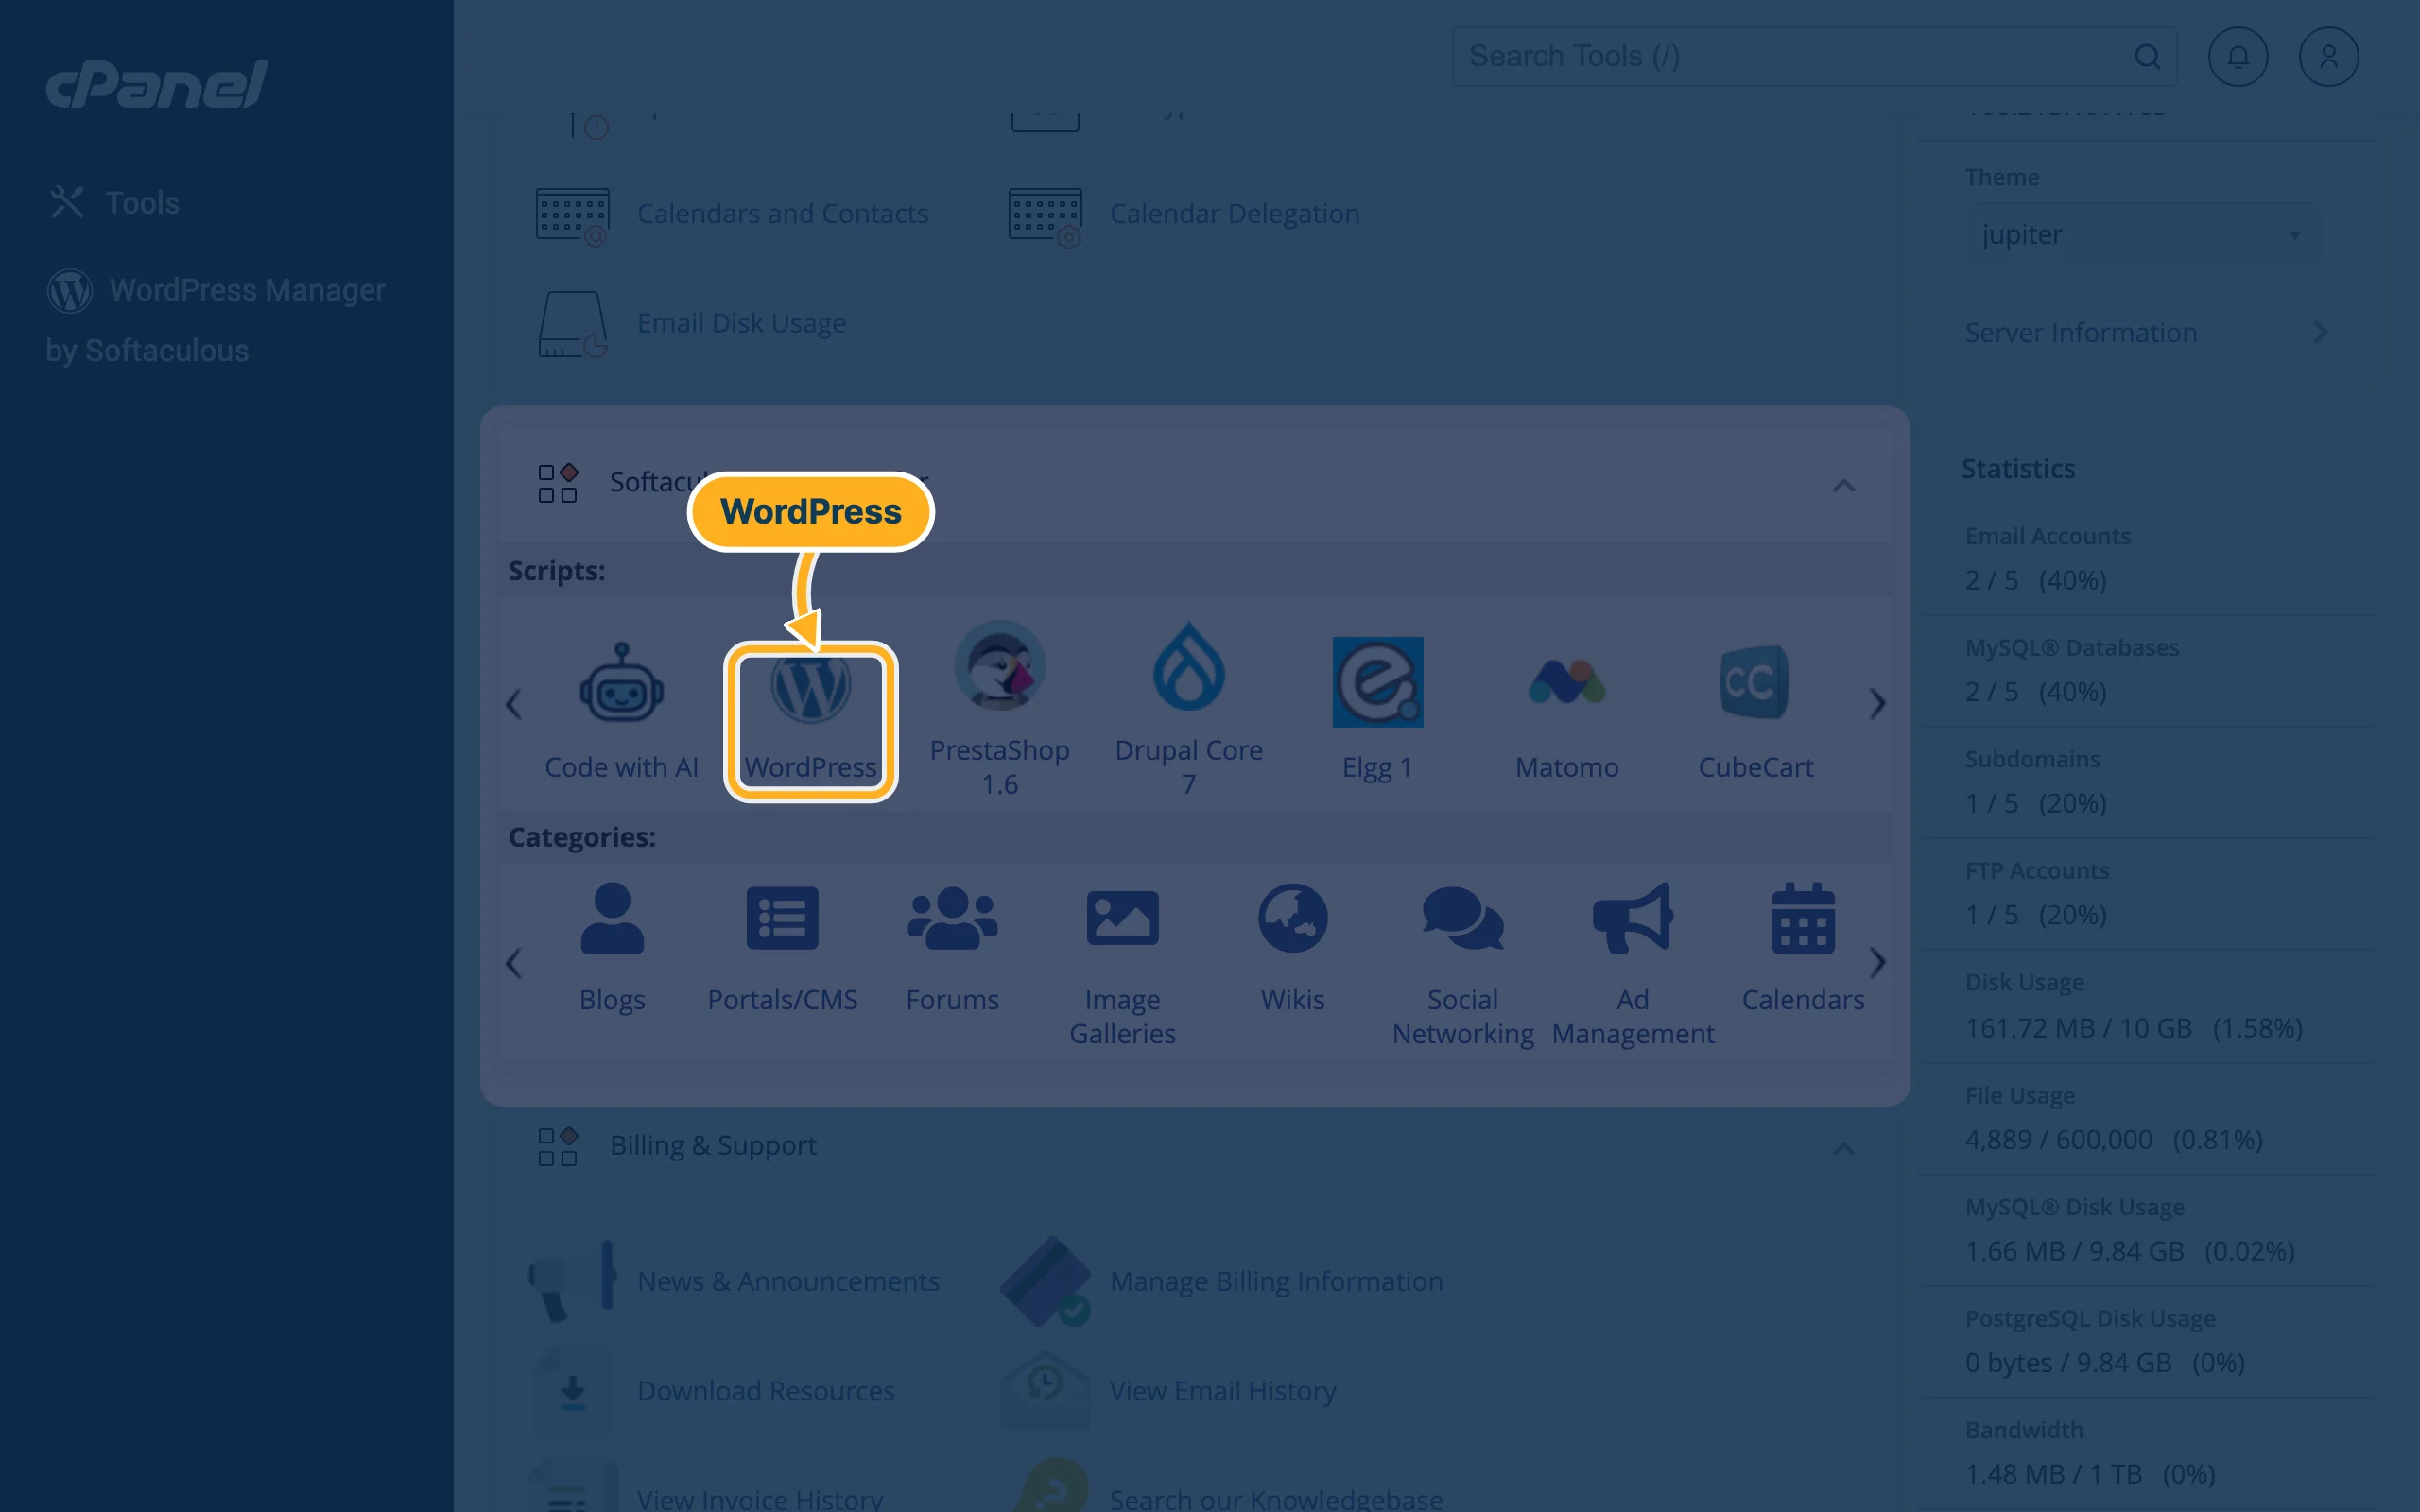
Open cPanel (see Log in to cPanel from the client area). In the section Softaculous Apps Installer, click WordPress.
-
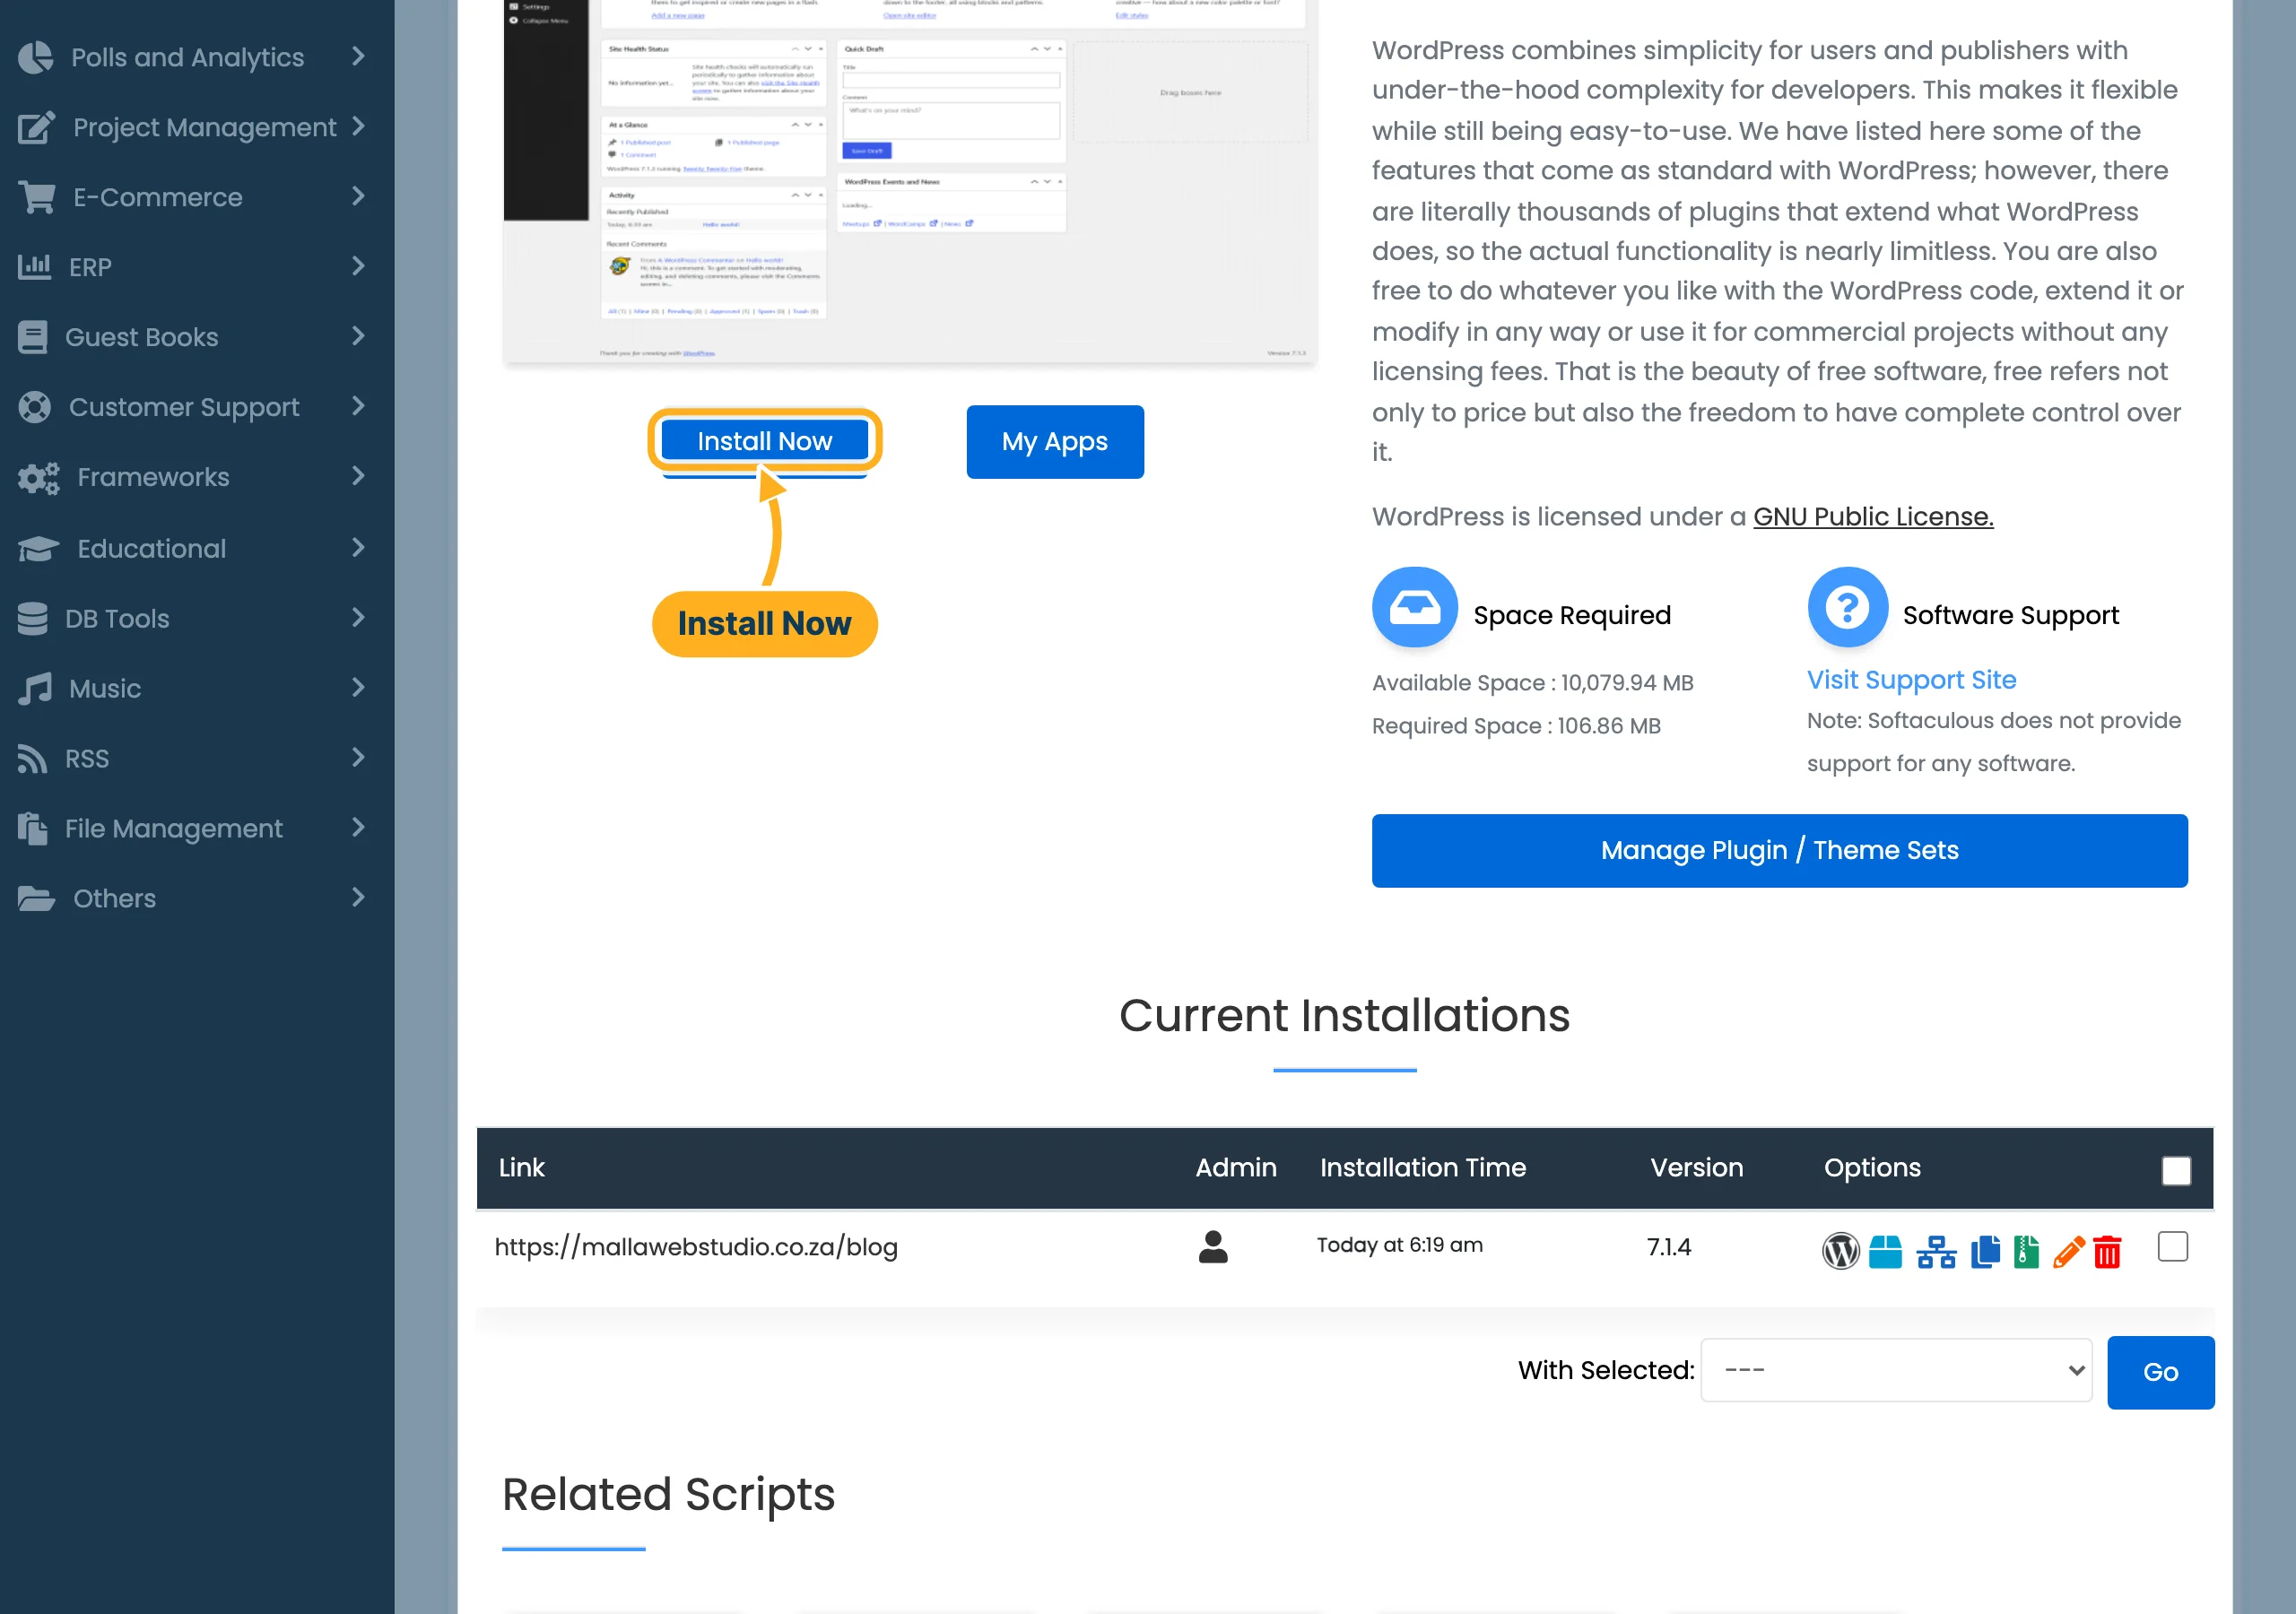
Softaculous opens the WordPress page. Click Install Now.
-
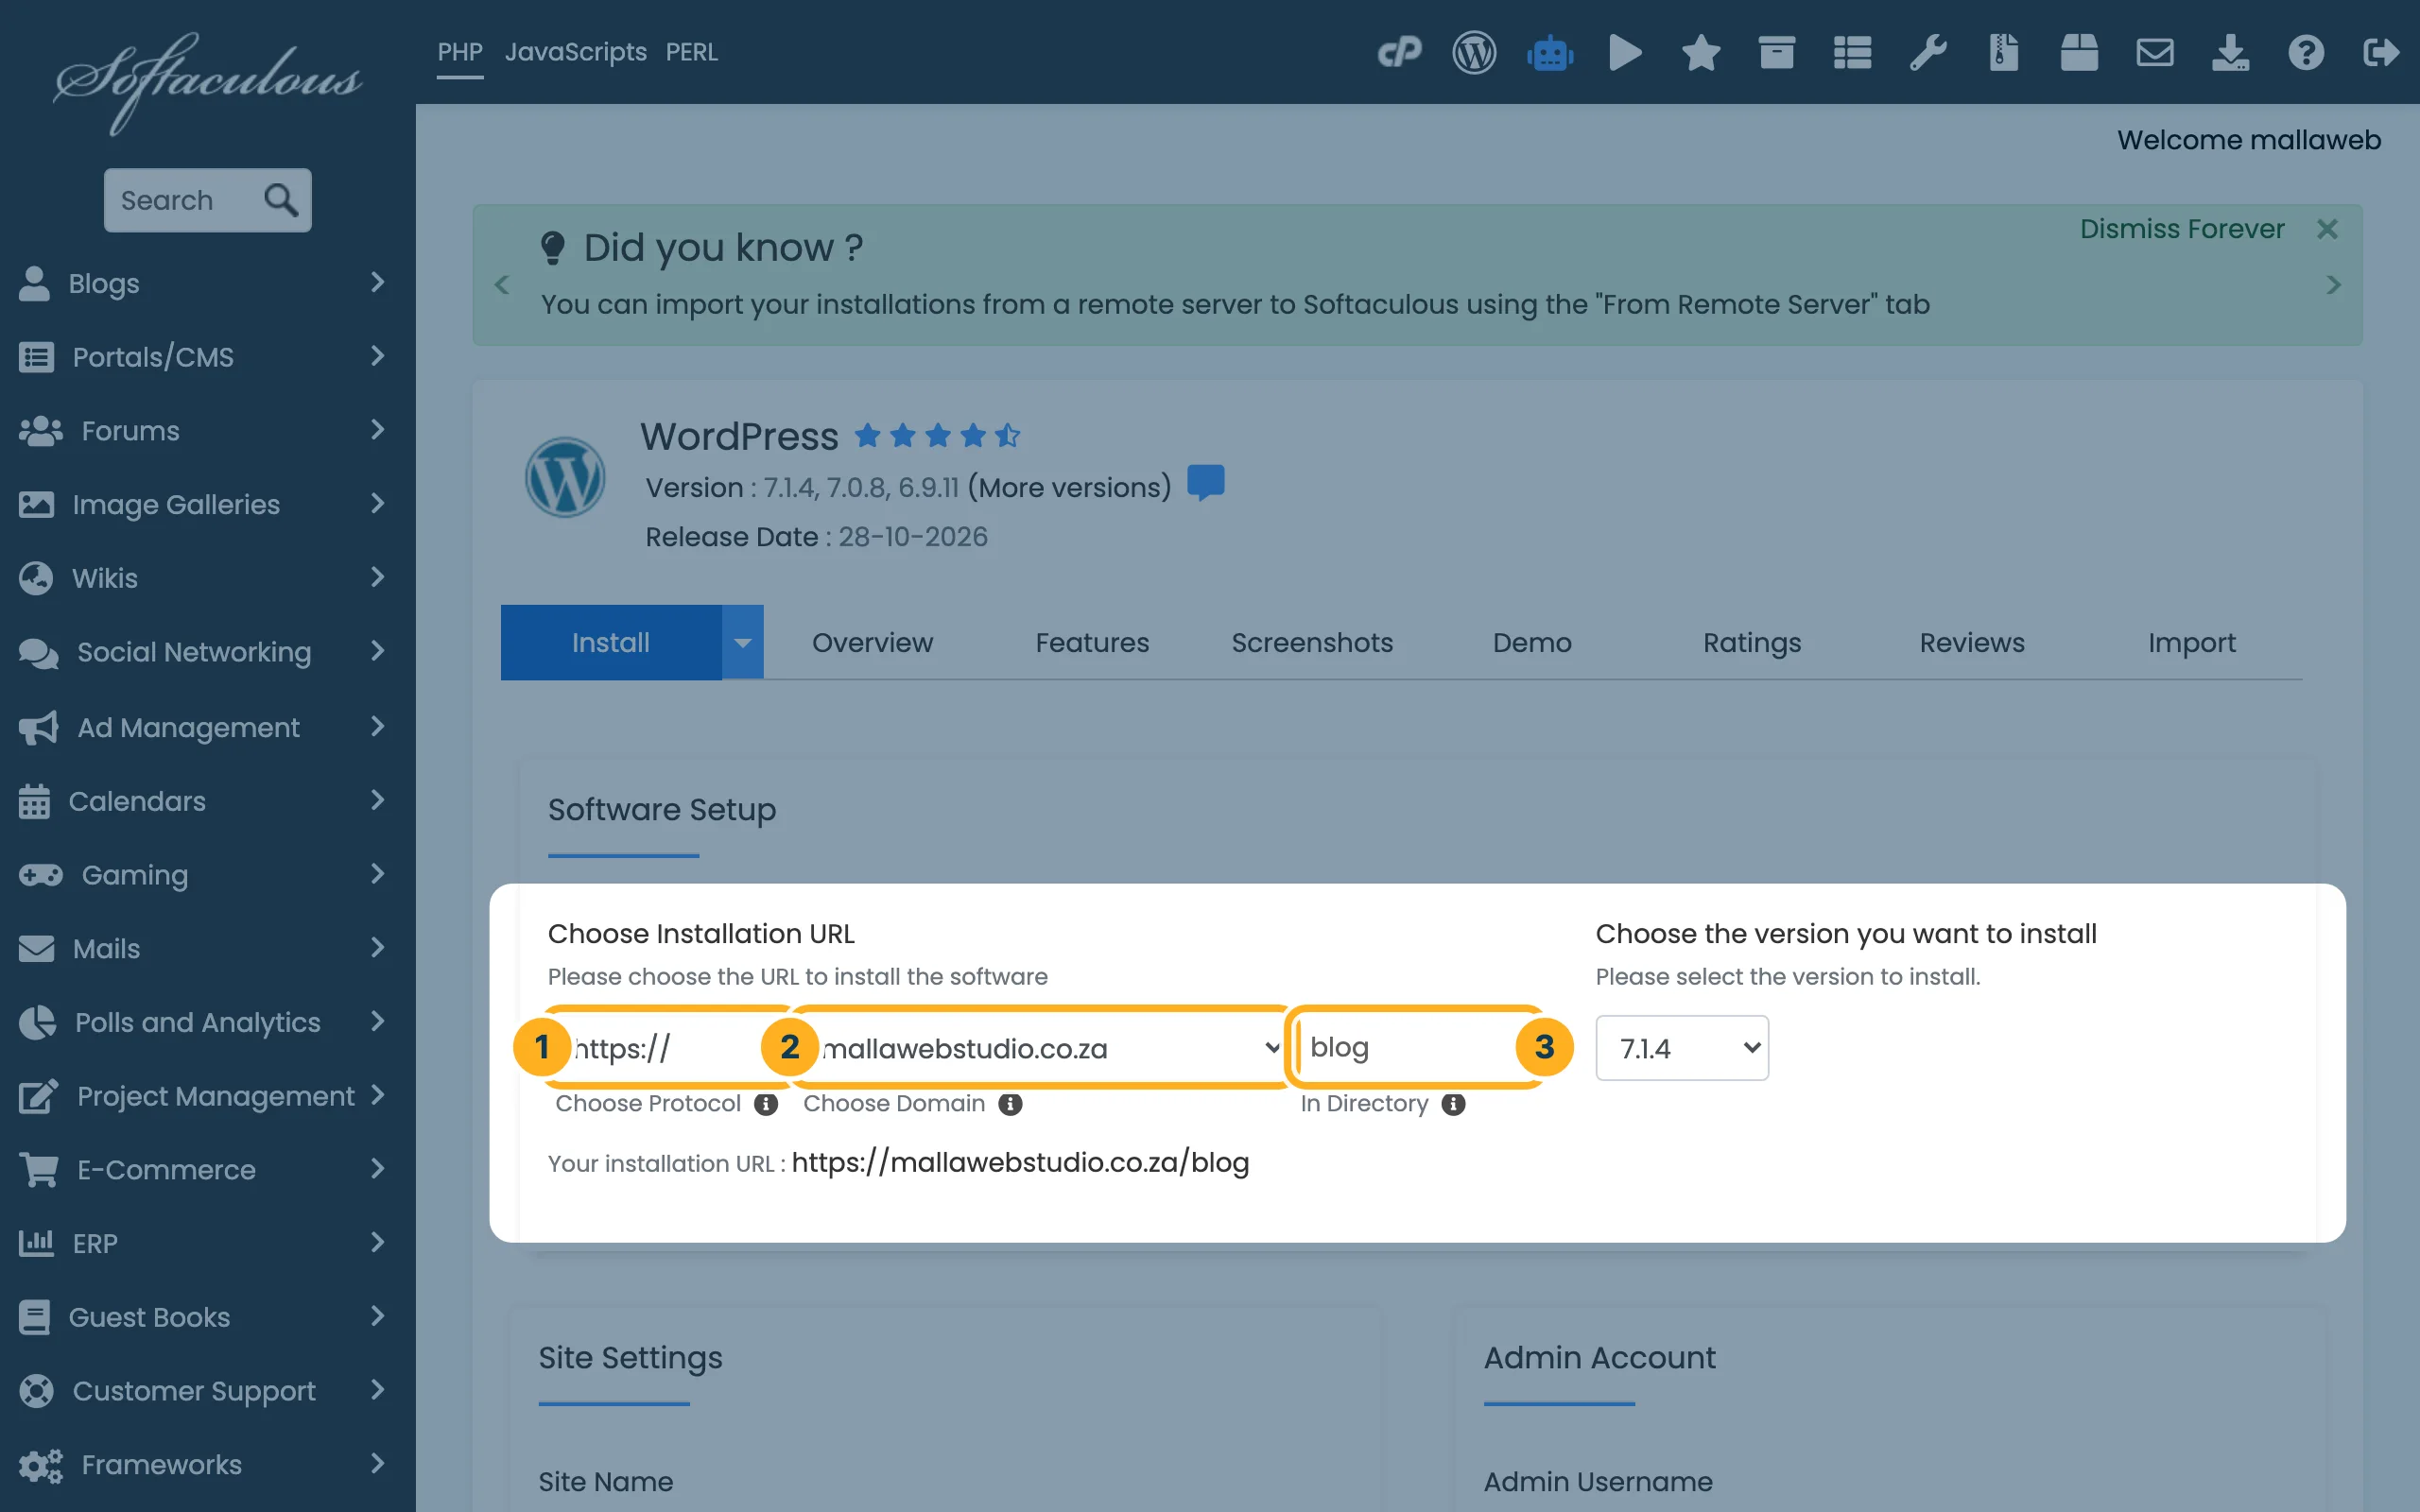
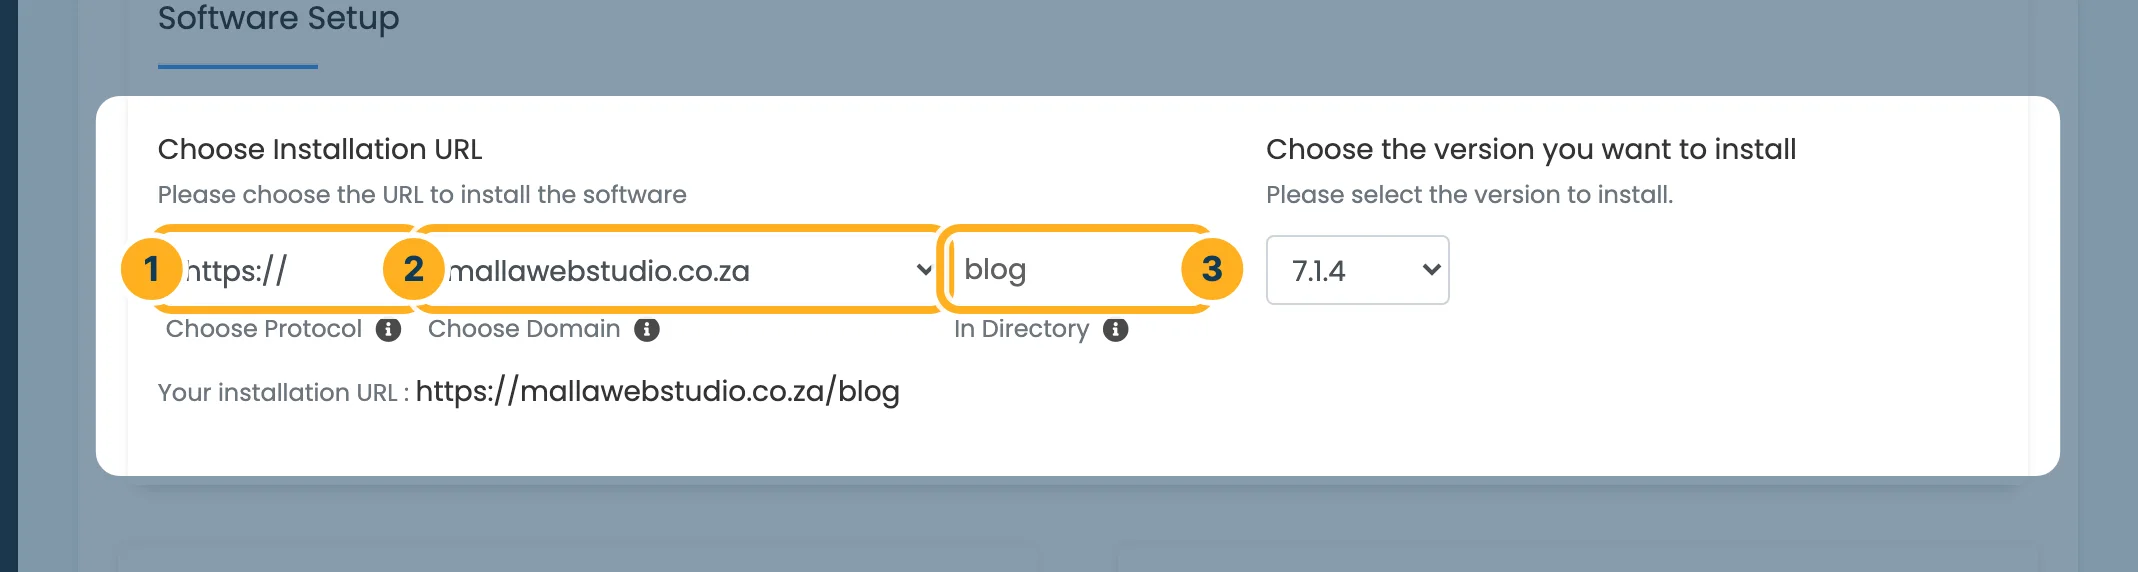
Under Software Setup, choose where WordPress goes:
- Choose Protocol – https:// once your SSL certificate is in place.
- Choose Domain – the domain or subdomain for the site.
- In Directory – leave it empty to put WordPress on the main address of the domain. Type a folder name, for example
blog, to install it in a sub-folder. The folder must not exist yet.
Your installation URL below the fields shows the address your site will have. The newest WordPress version is already selected on the right.
-
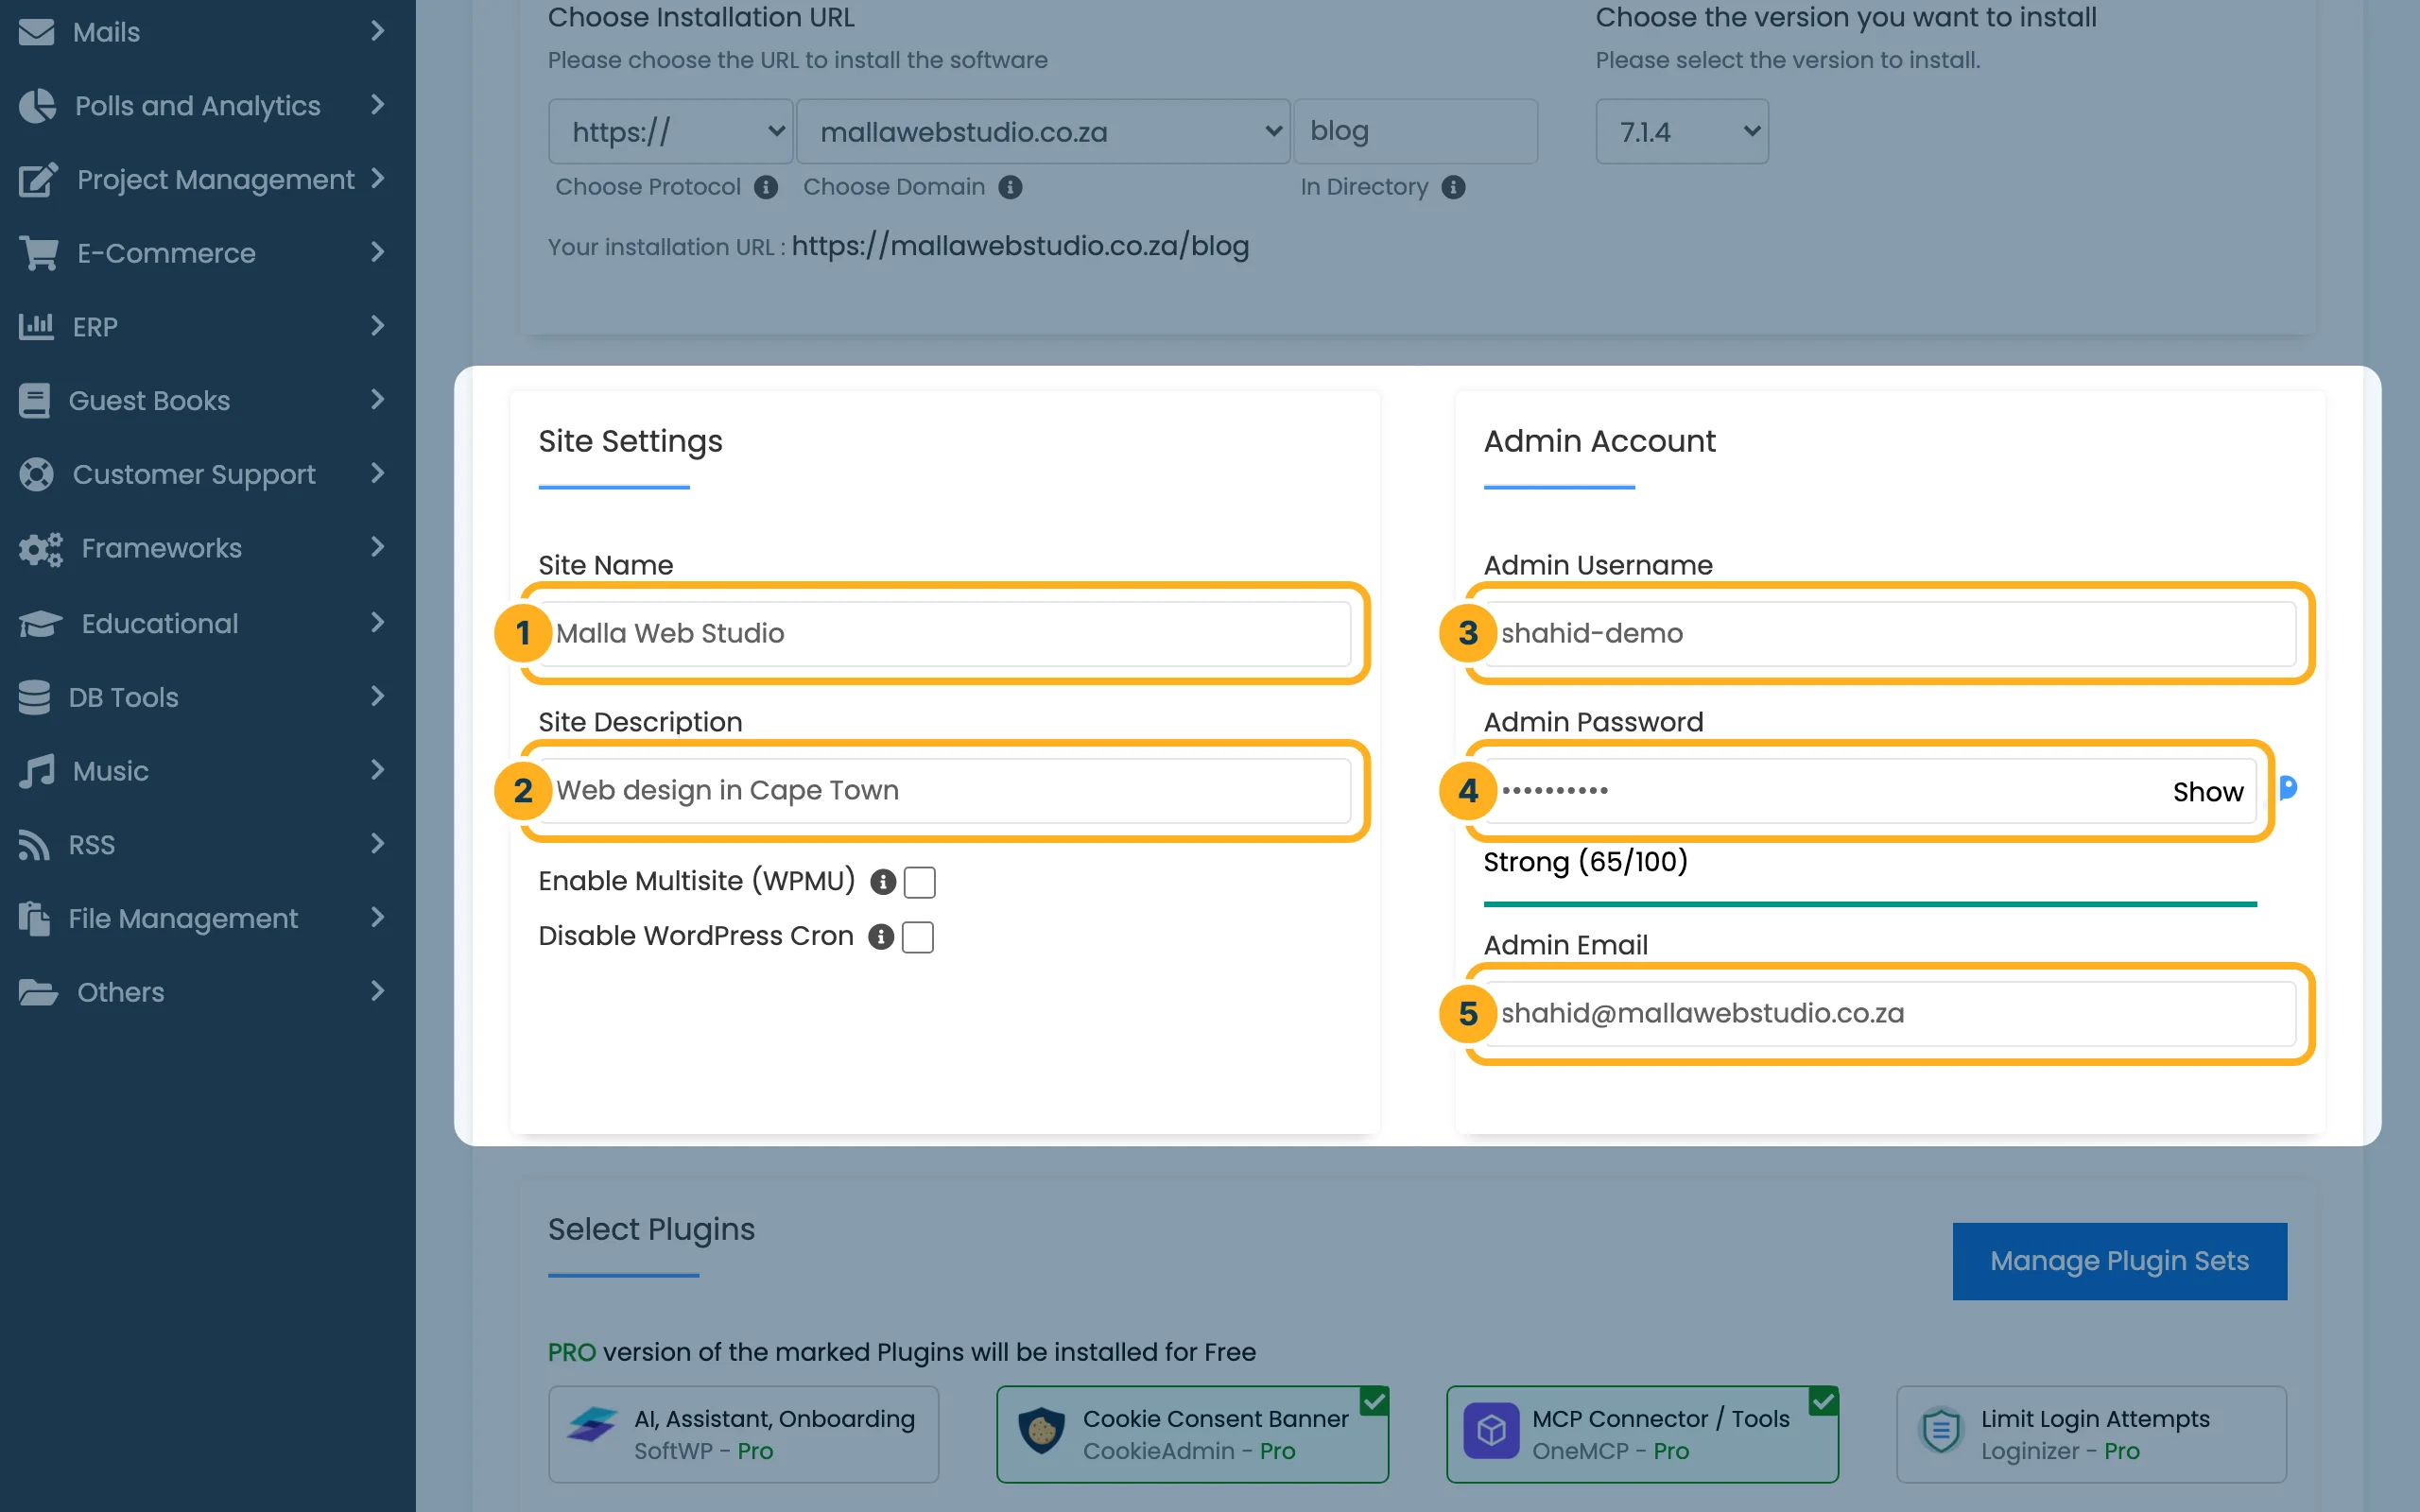
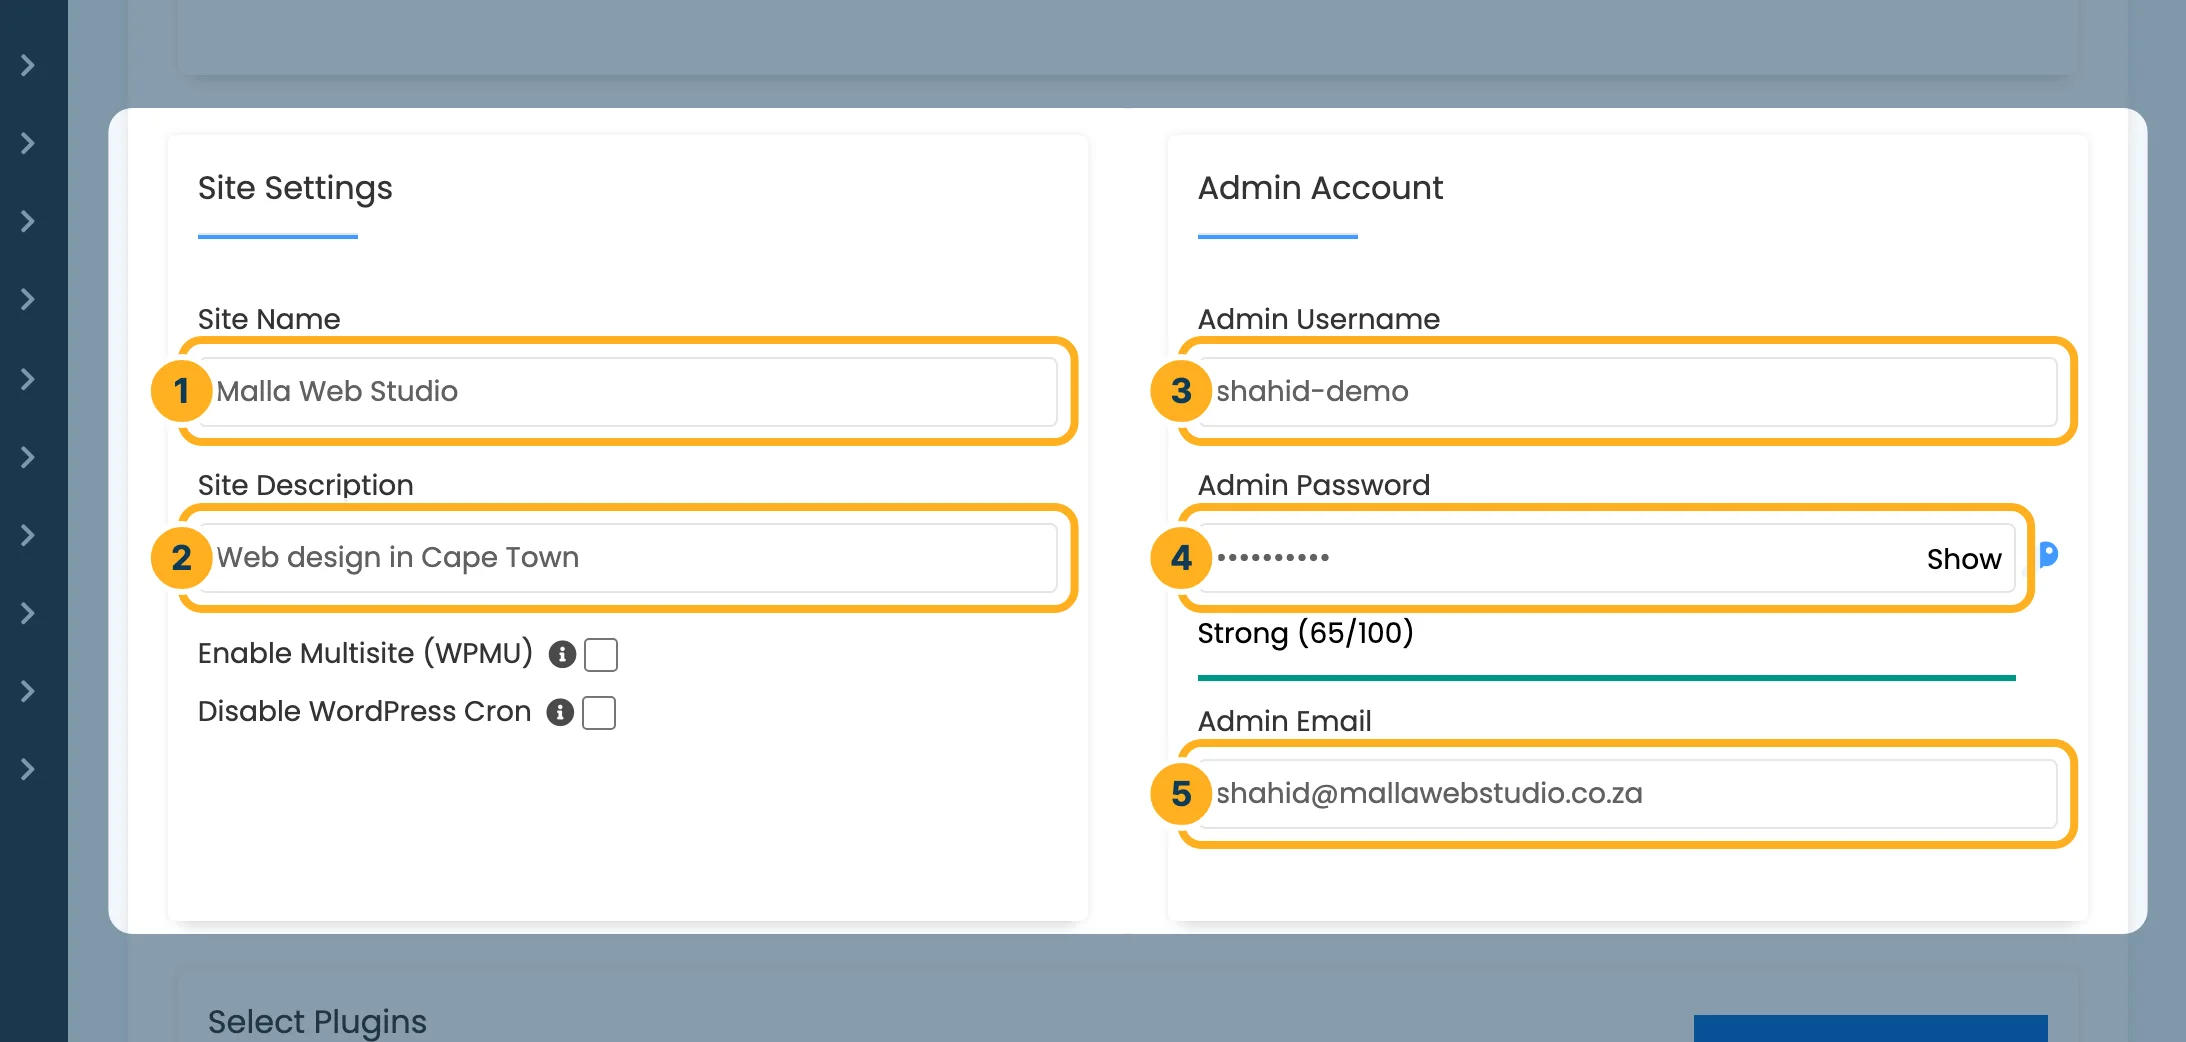
Fill in Site Settings and Admin Account:
- Site Name – usually your business name. You can change it later in WordPress.
- Site Description – a short line about your site.
- Admin Username – the name you sign in to WordPress with. Don't use “admin”: it is the first name attackers try.
- Admin Password – Softaculous fills in a strong random password. Click Show to see it and save it in your password manager, or type your own strong password (see Strong passwords).
- Admin Email – WordPress sends password resets and notices to this address.
-
Further down, under Select Plugins, some plugins are already ticked. Click a plugin to tick or untick it – you can also add or remove plugins later in WordPress. Under Extended Settings you can choose the language of WordPress. Advanced Options can stay as they are.
-
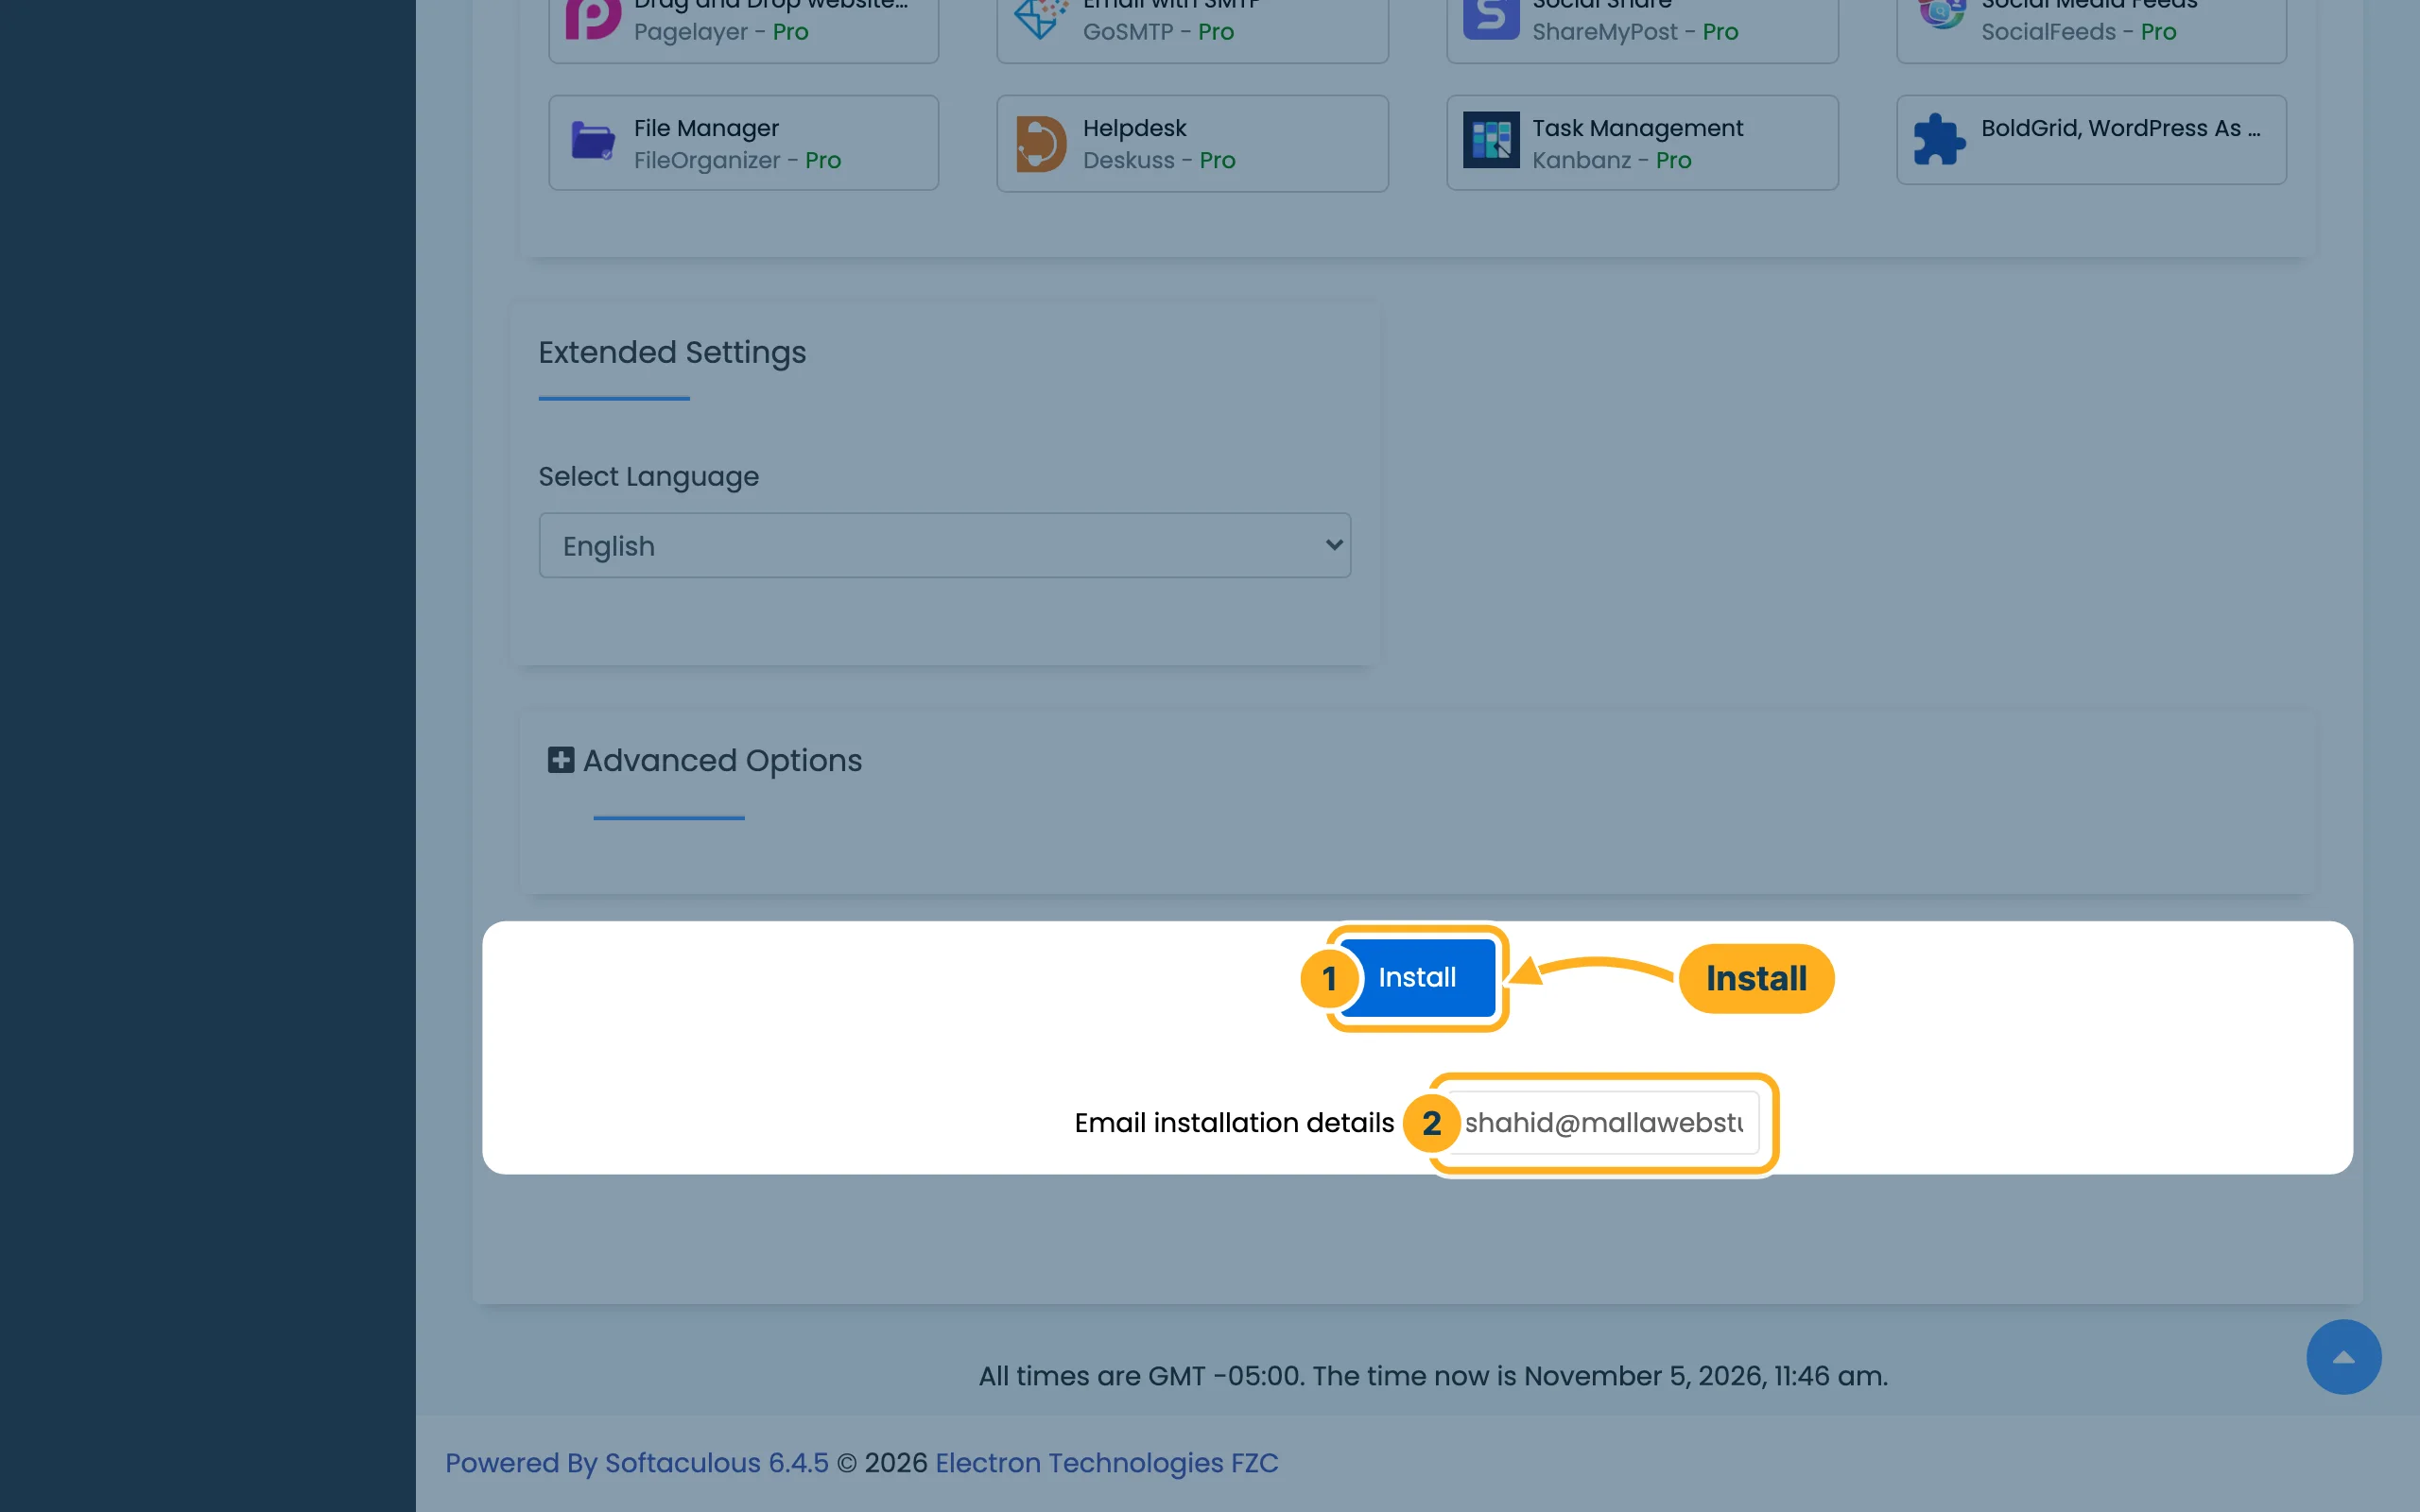
At the bottom of the page:
- Click Install.
- Optional: under Email installation details to, enter an e-mail address to receive a summary of the installation.
A progress bar shows the installation. Wait until it reaches 100 % and don't leave the page before.
-
When WordPress is ready, you see Congratulations, the software was installed successfully with the address of your site and the Administrative URL – the address of your WordPress dashboard, which ends in
/wp-admin/. Your new site is now also listed under WordPress Management: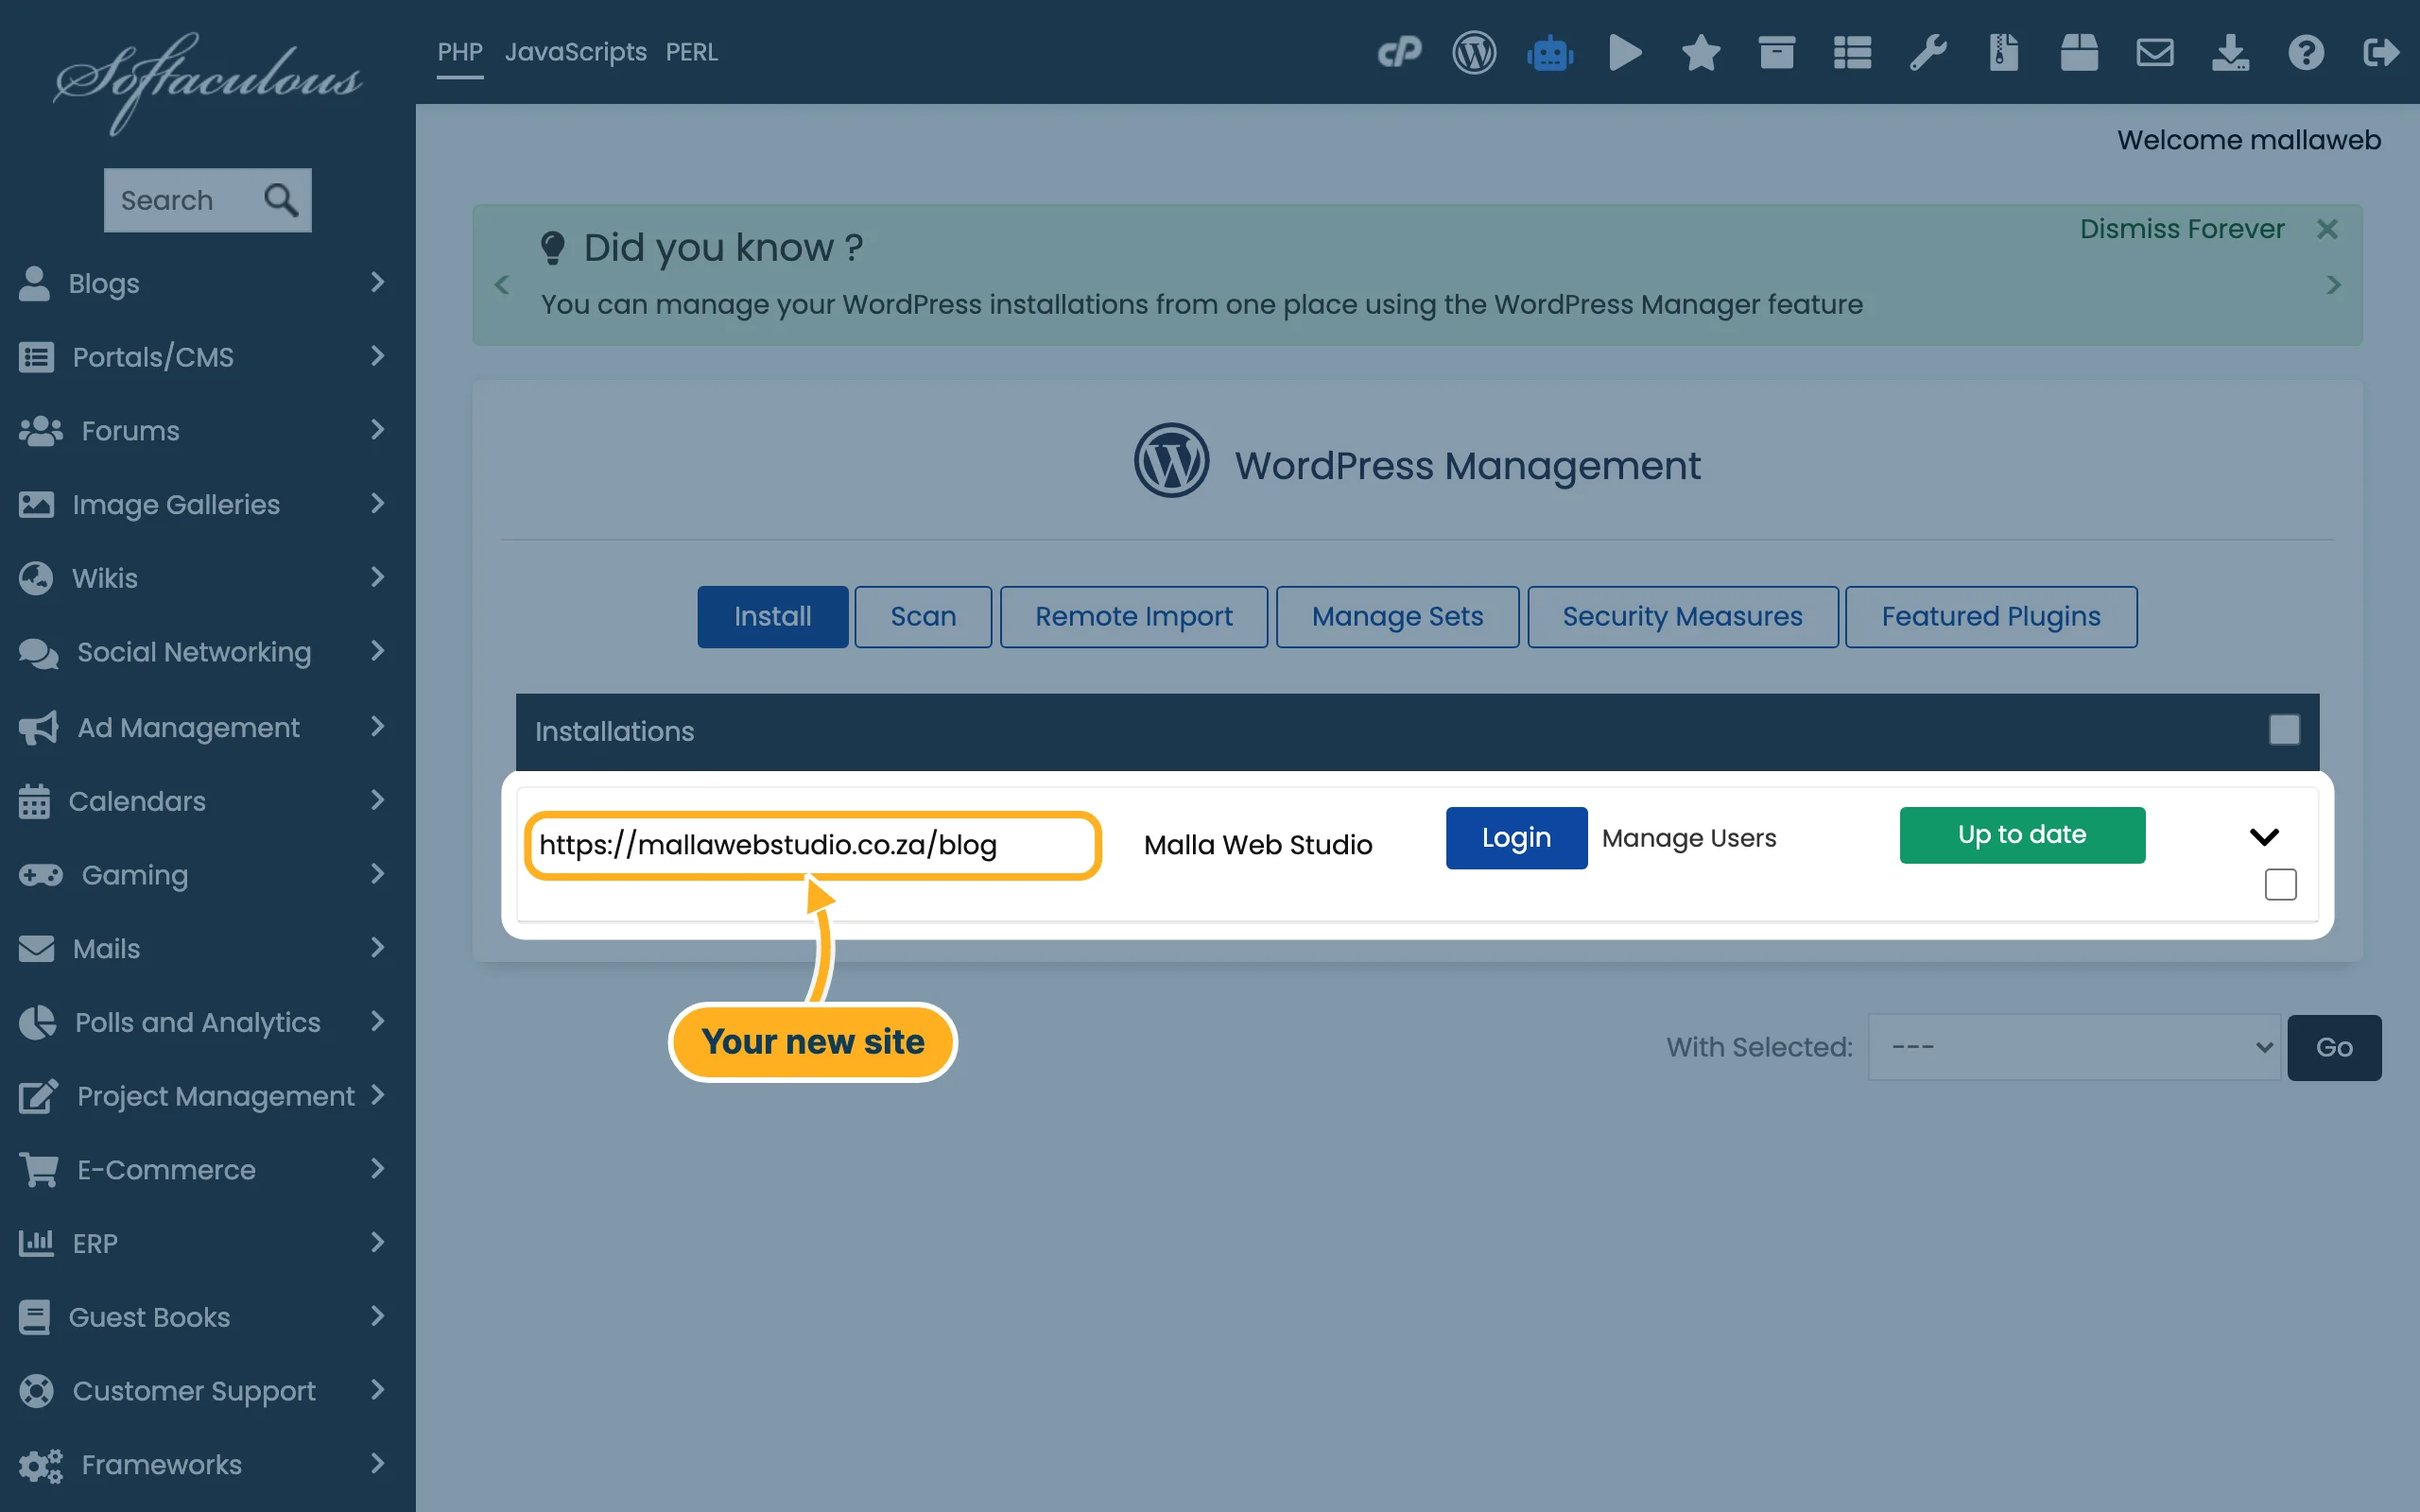
Something not working?
- Softaculous says the folder already exists: choose another name under In Directory, or remove the old folder in File Manager first – but only if you are sure you don't need its files.
- The browser shows a security warning on the new site: the SSL certificate for the domain isn't in place yet. See SSL warnings in the browser – causes and fixes.
- You don't know the admin password: you can still open the dashboard from Softaculous, see Log in to your WordPress dashboard, and set a new password with Reset your WordPress admin password.
Related articles
- Log in to your WordPress dashboard
- Back up and restore WordPress with Softaculous
- Free SSL certificate (AutoSSL)
Need help? Open a ticket or call us on 082 412 6556.
