

With your hosting you can create e-mail addresses on your own domain, for example accounts@mallawebstudio.co.za. You do this in cPanel, in a minute or two.
Watch the video (1 min 52 s, with narration) – or follow the steps below.
Step by step
-
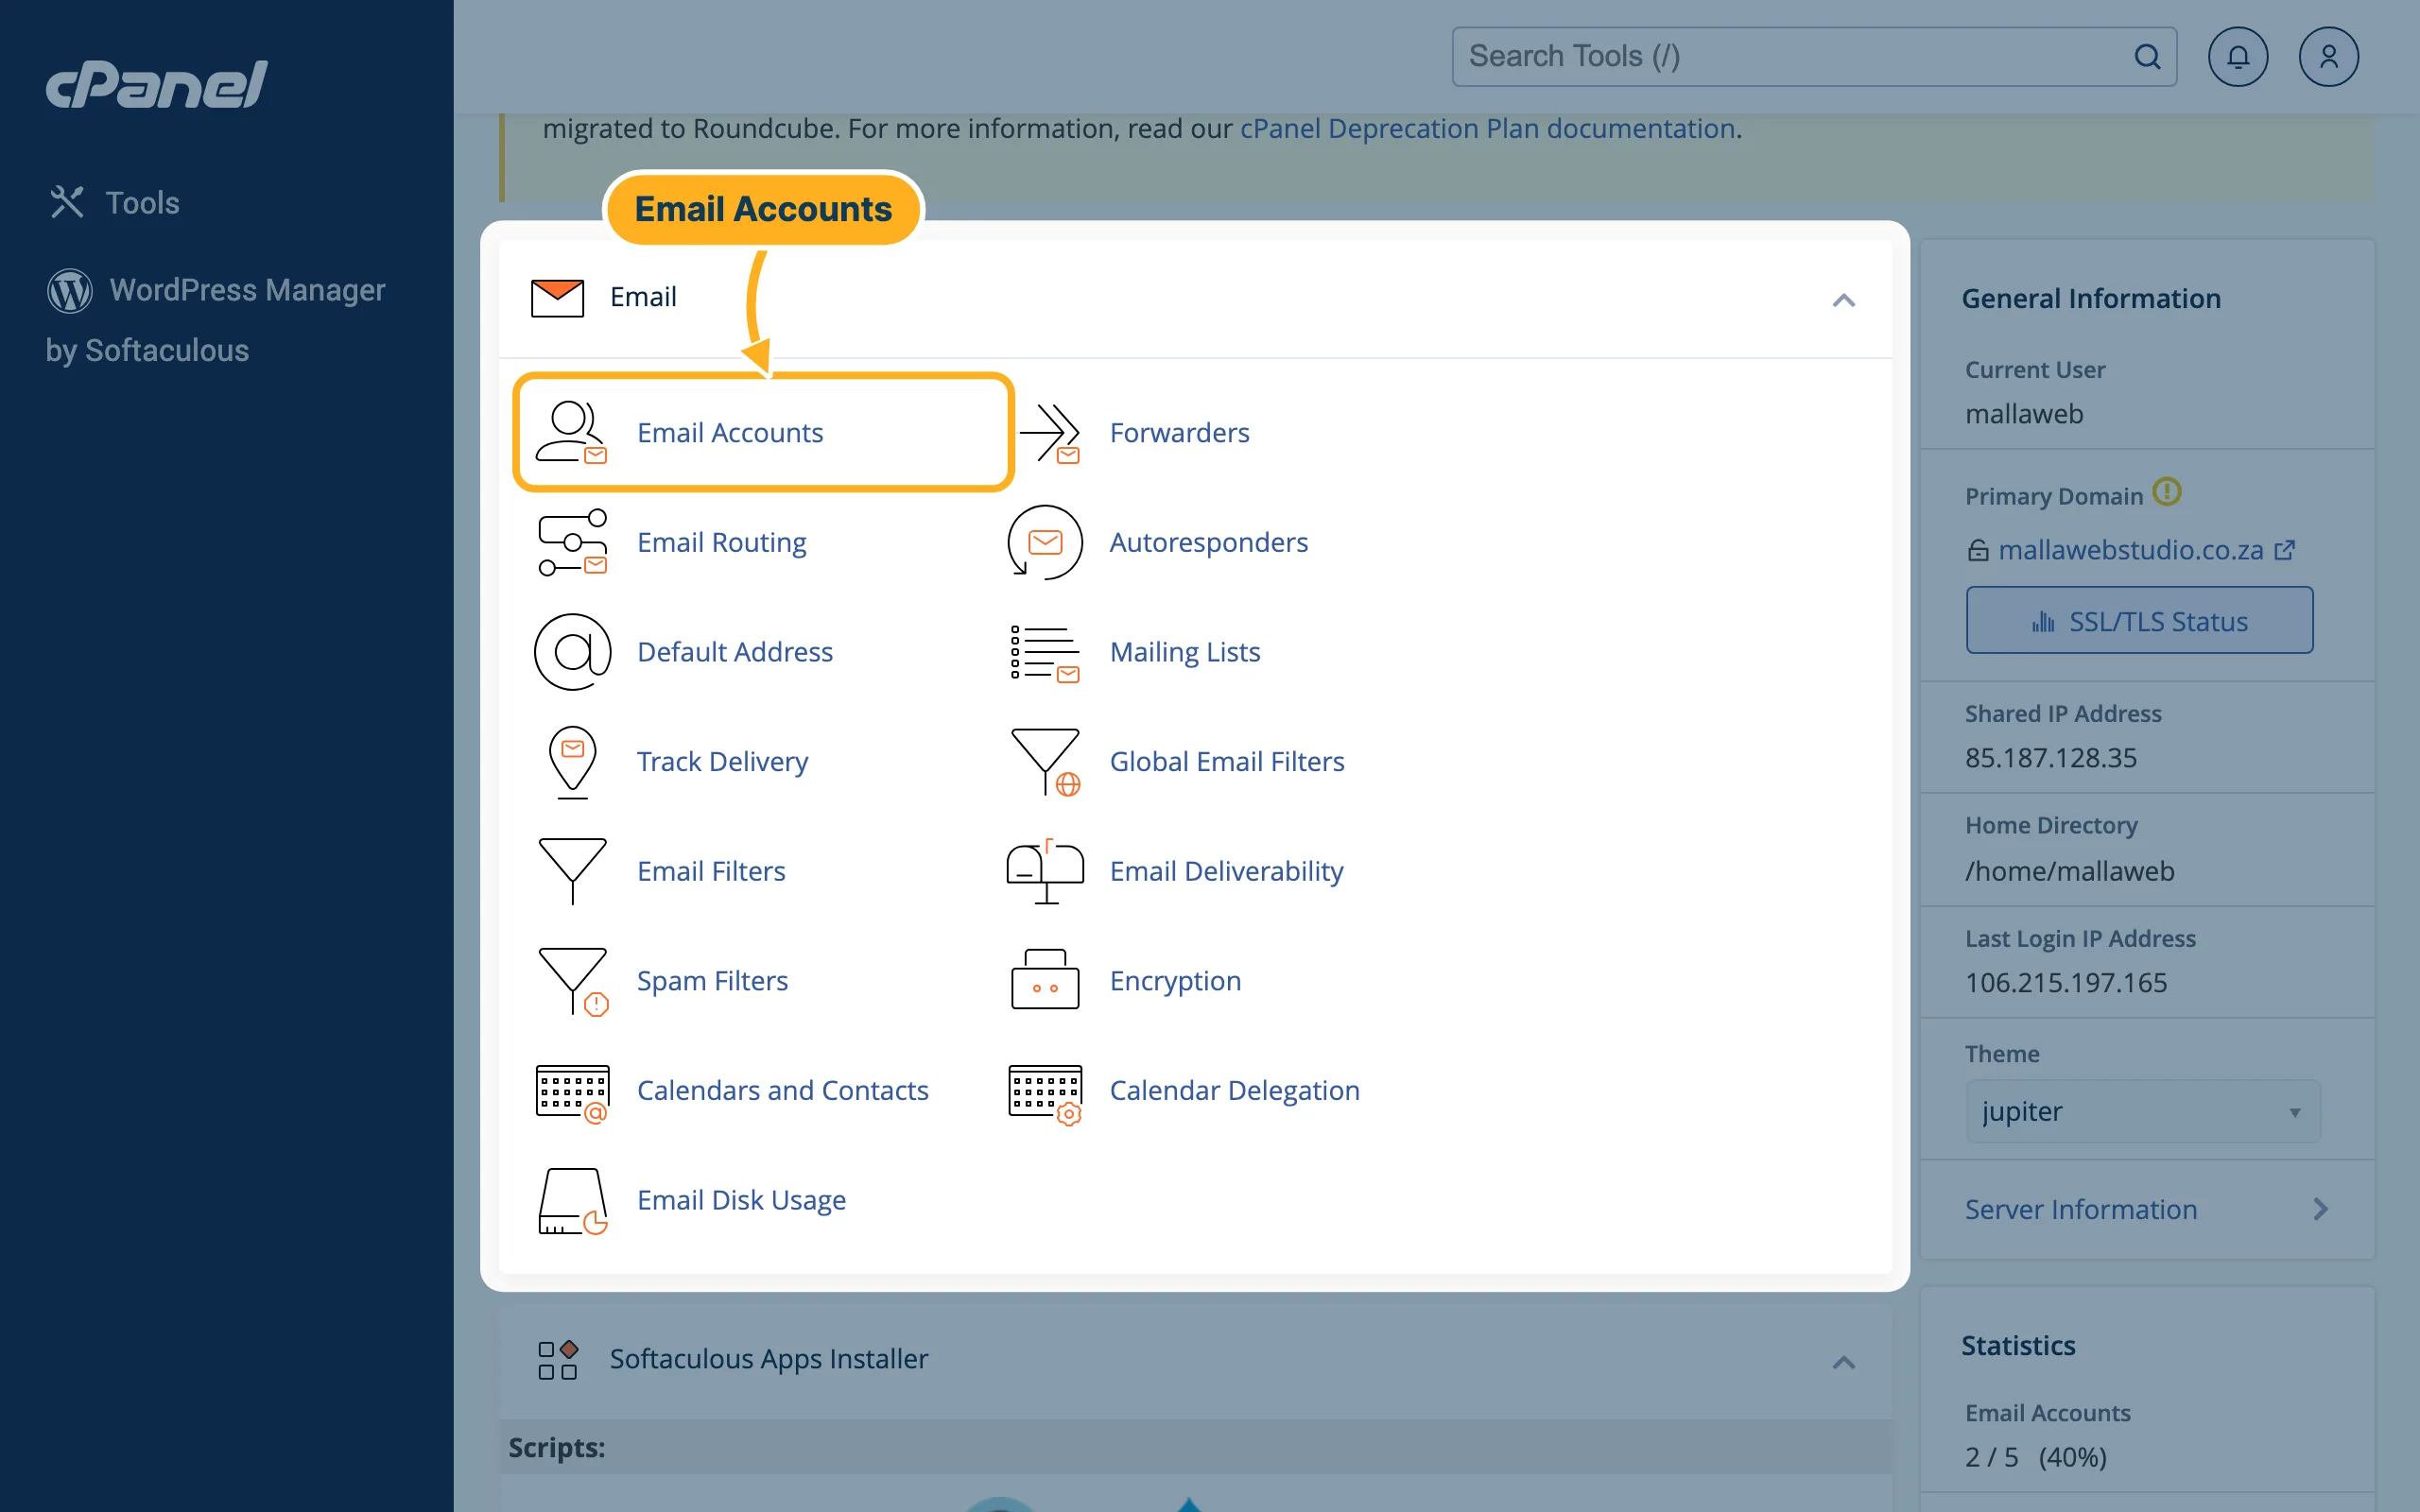
Log in to cPanel (see Log in to cPanel from the client area). In the Email section, click Email Accounts. Shortcut: on your hosting service page in the client area, Add a mailbox in the E-mail section opens this page directly.
-
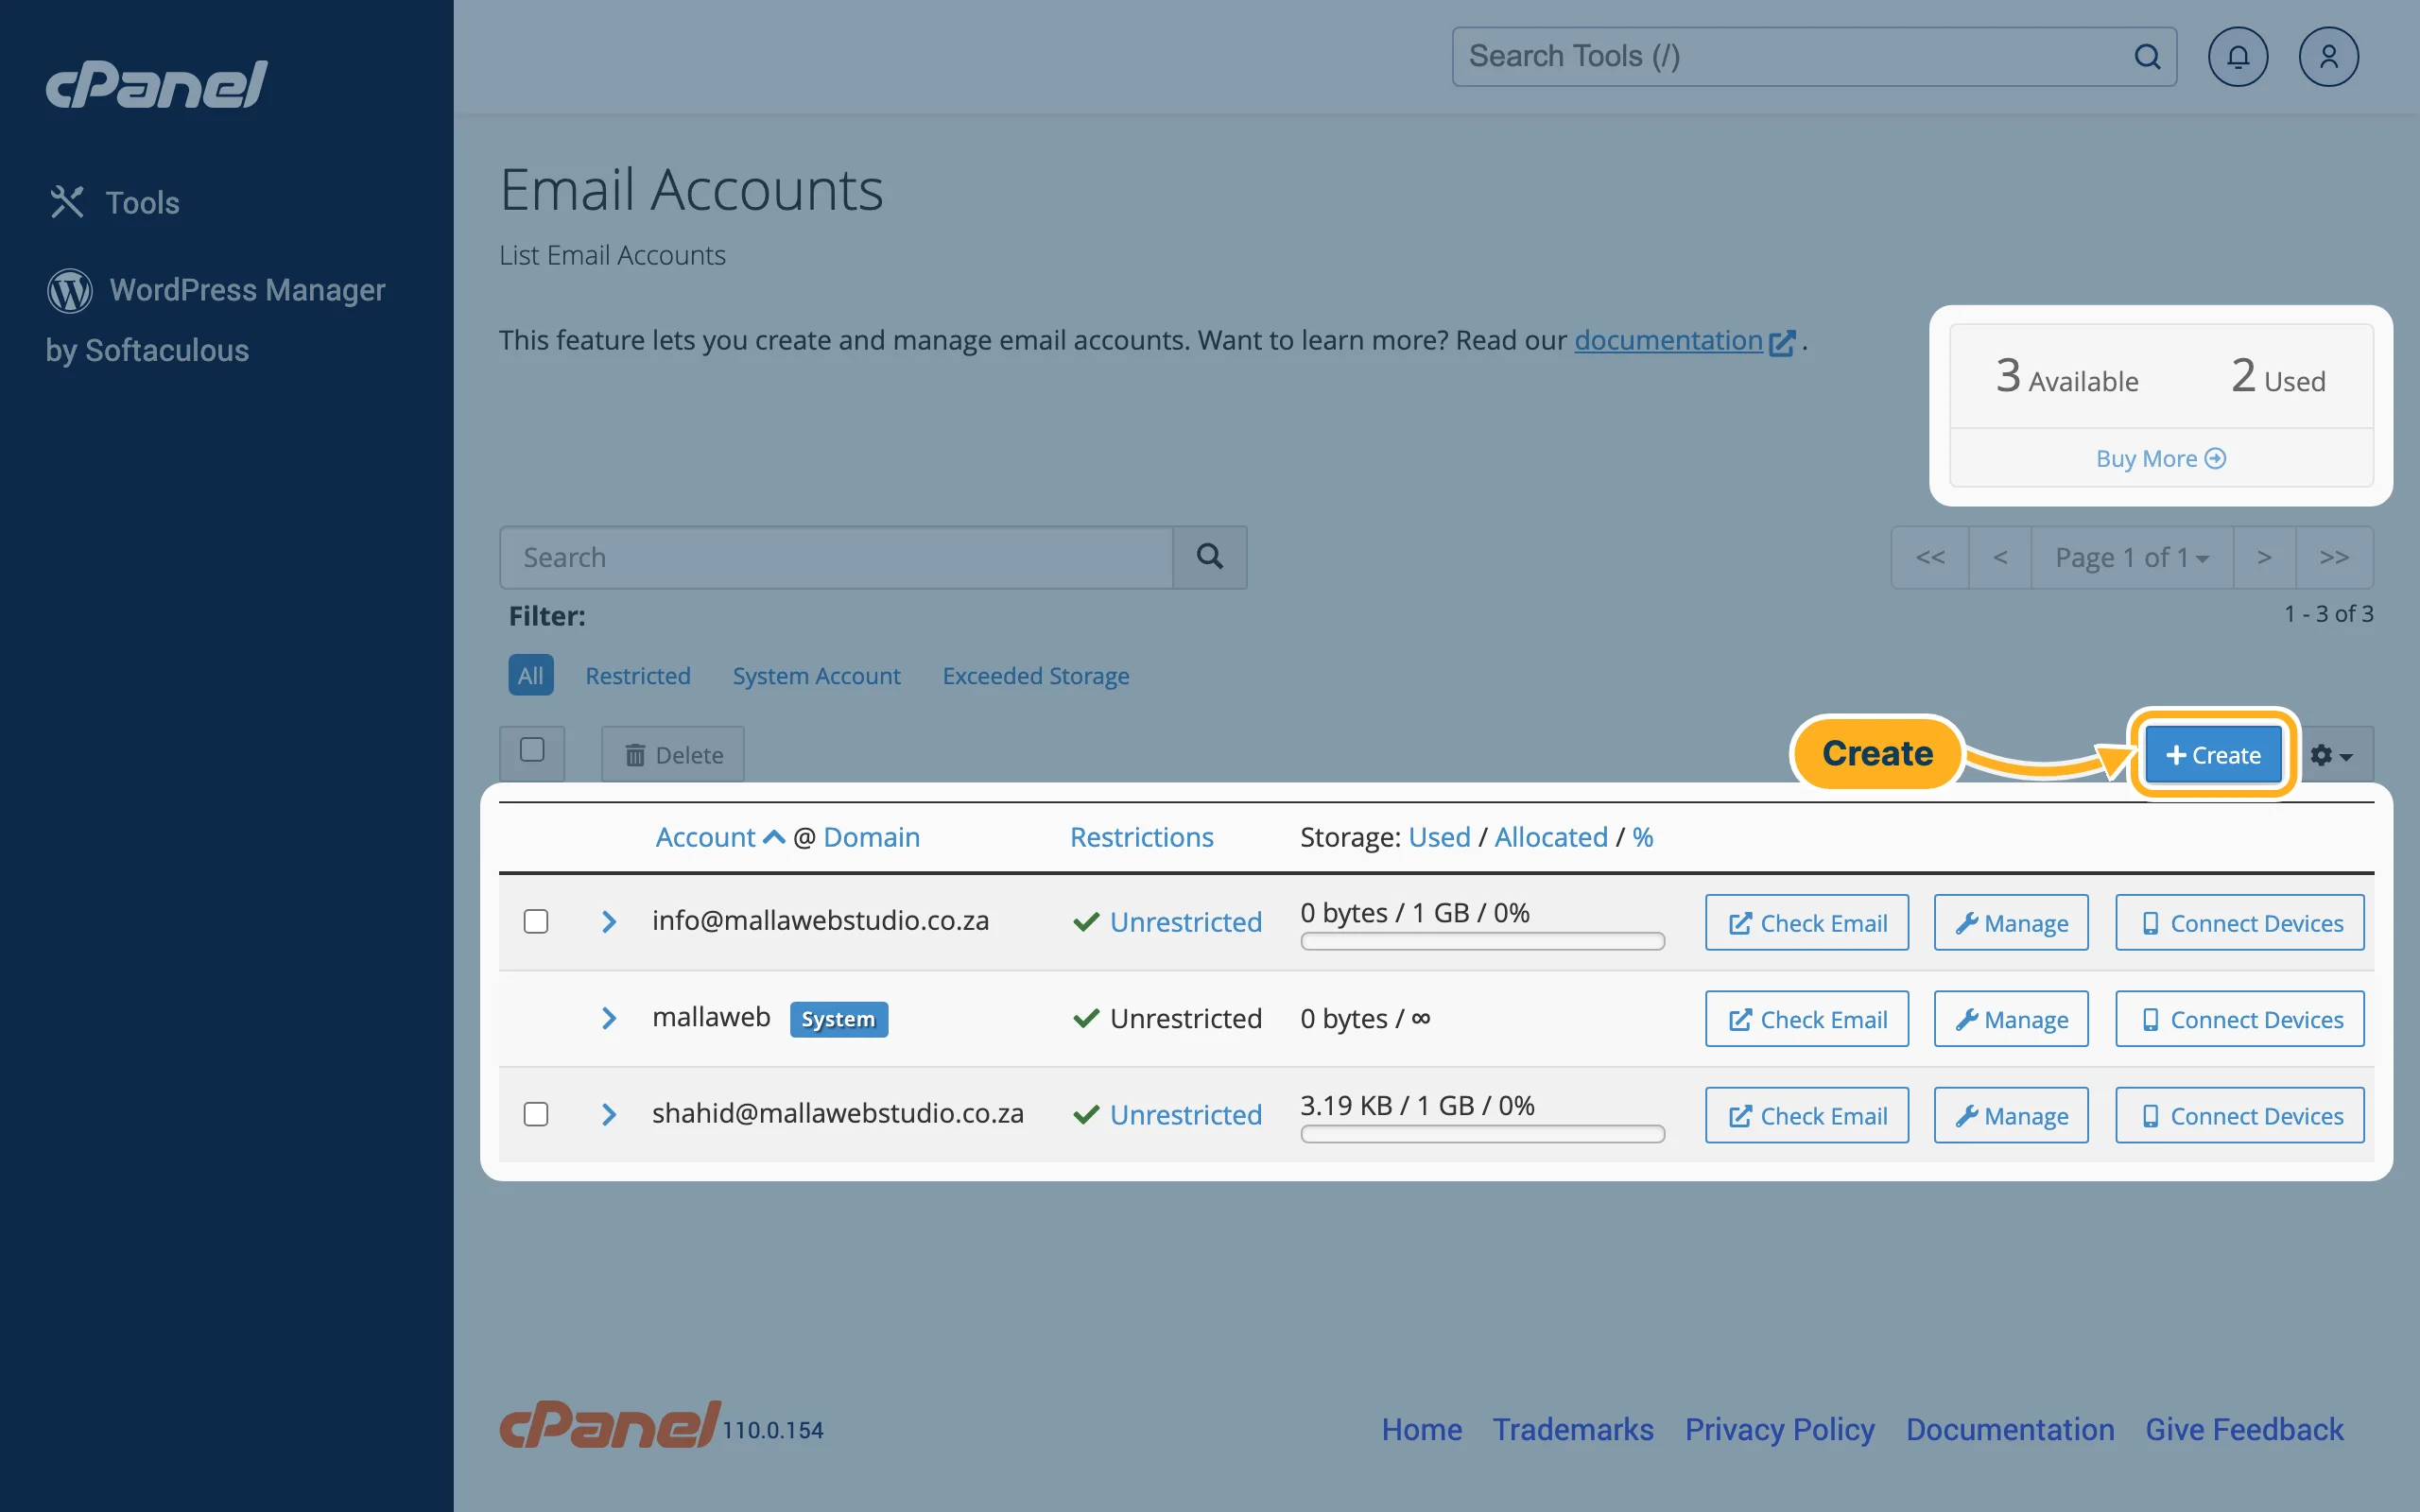
You see your mailboxes. Click Create above the list.
-
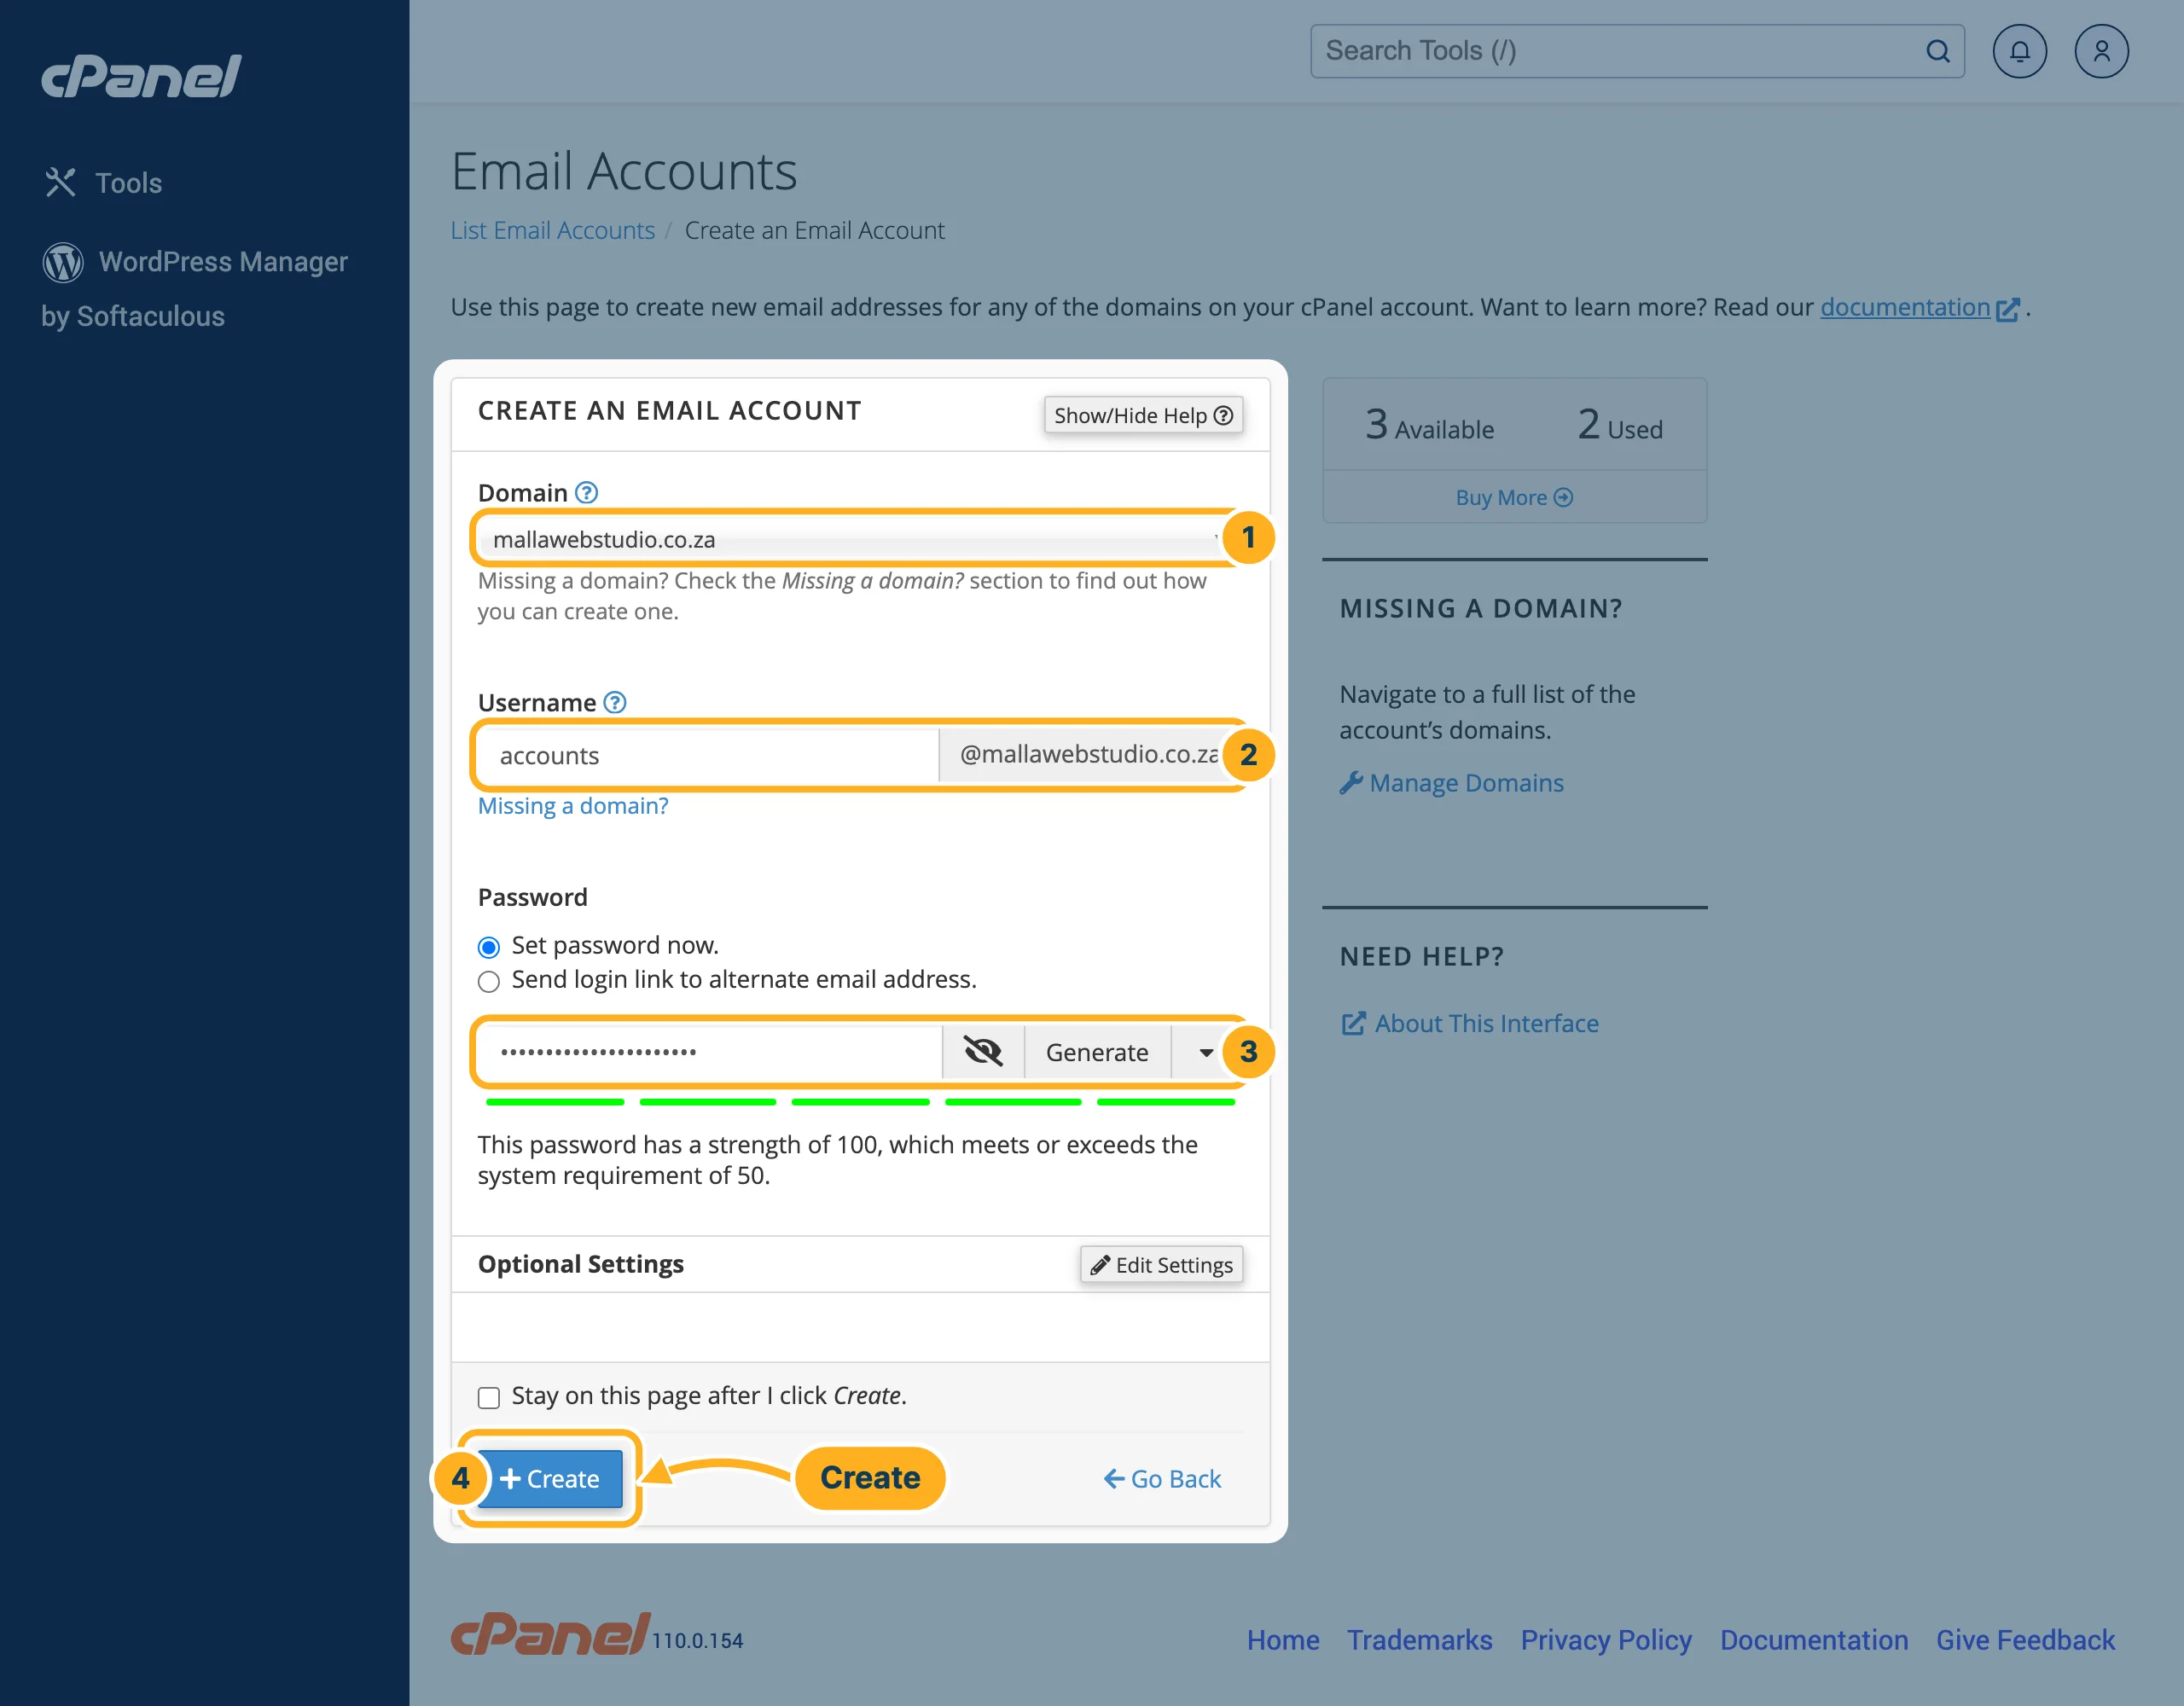
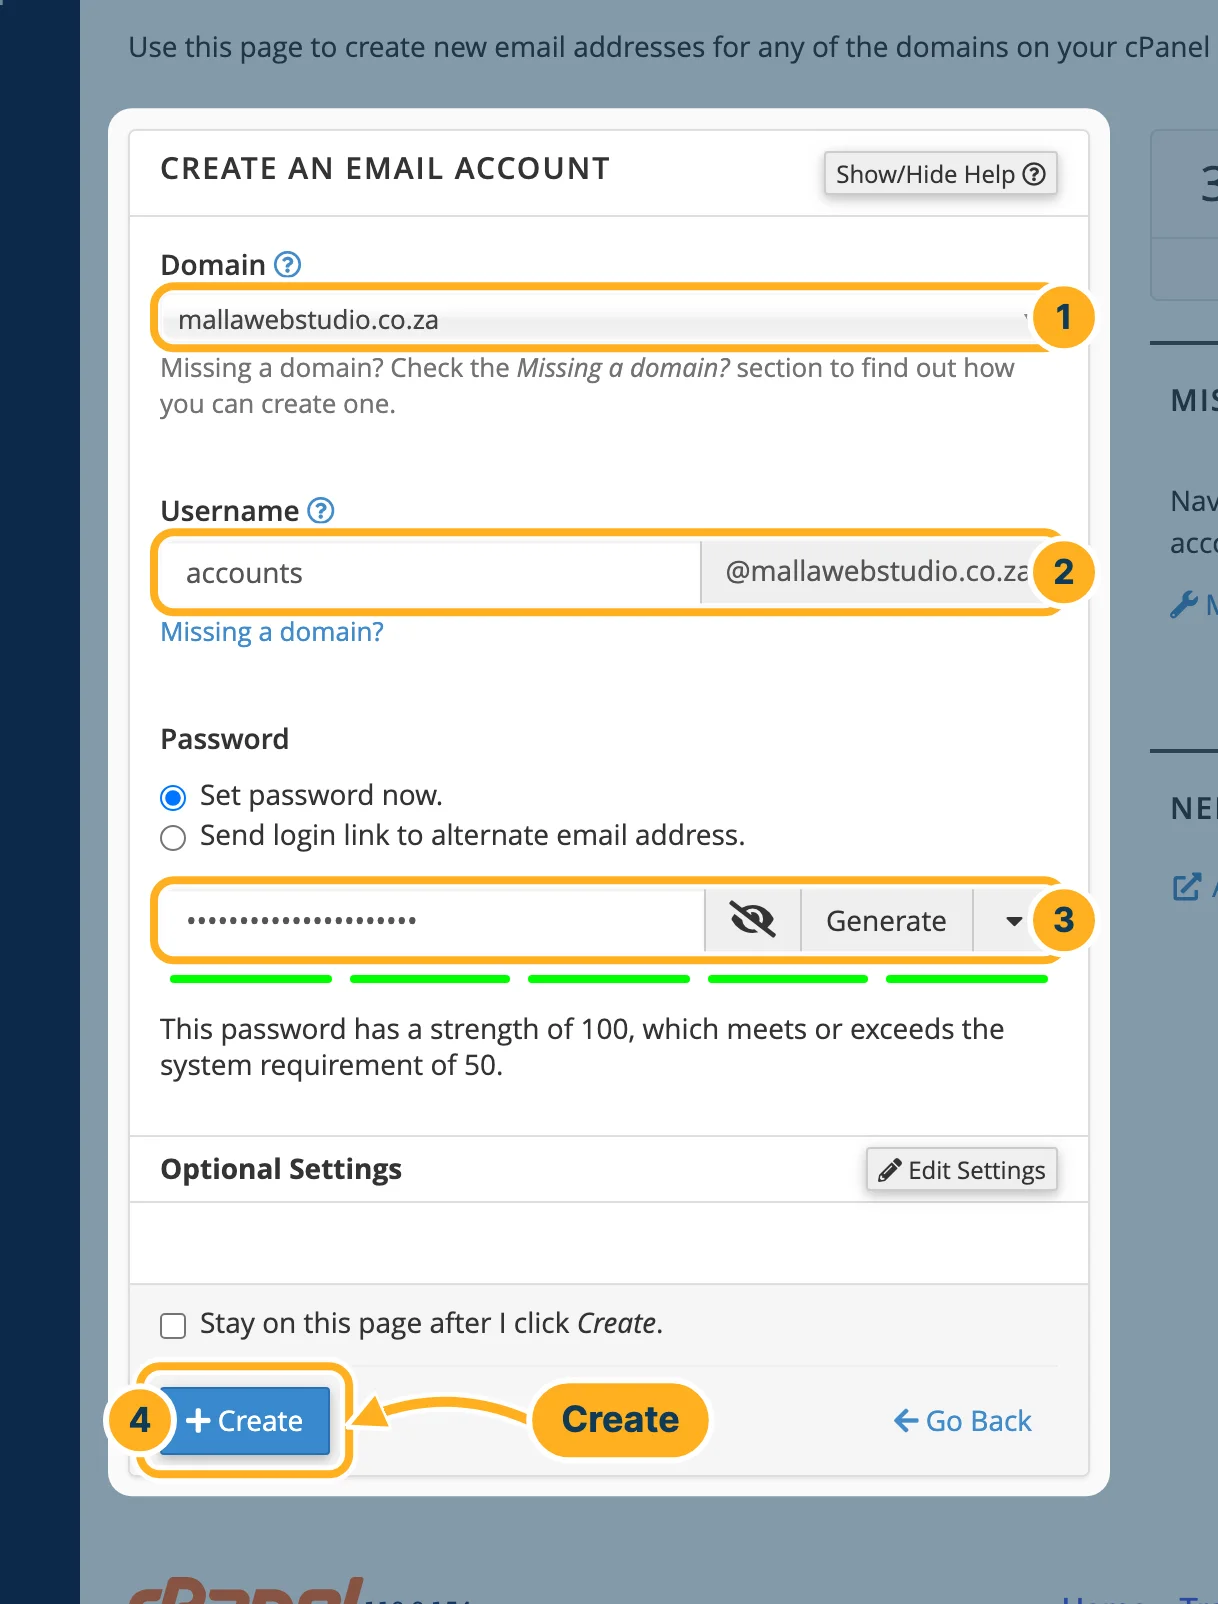
Fill in the form Create an Email Account:
- Domain – if you have more than one domain, choose the one the address should end with.
- Username – the part before the @, for example accounts. The domain is shown next to the field.
- Password – leave Set password now. selected and type a strong password, or click Generate to have one made for you. Keep it safe: you need it for webmail and for your devices. Below the field, cPanel shows whether the password is strong enough ("meets or exceeds the system requirement").
- Click Create.
-
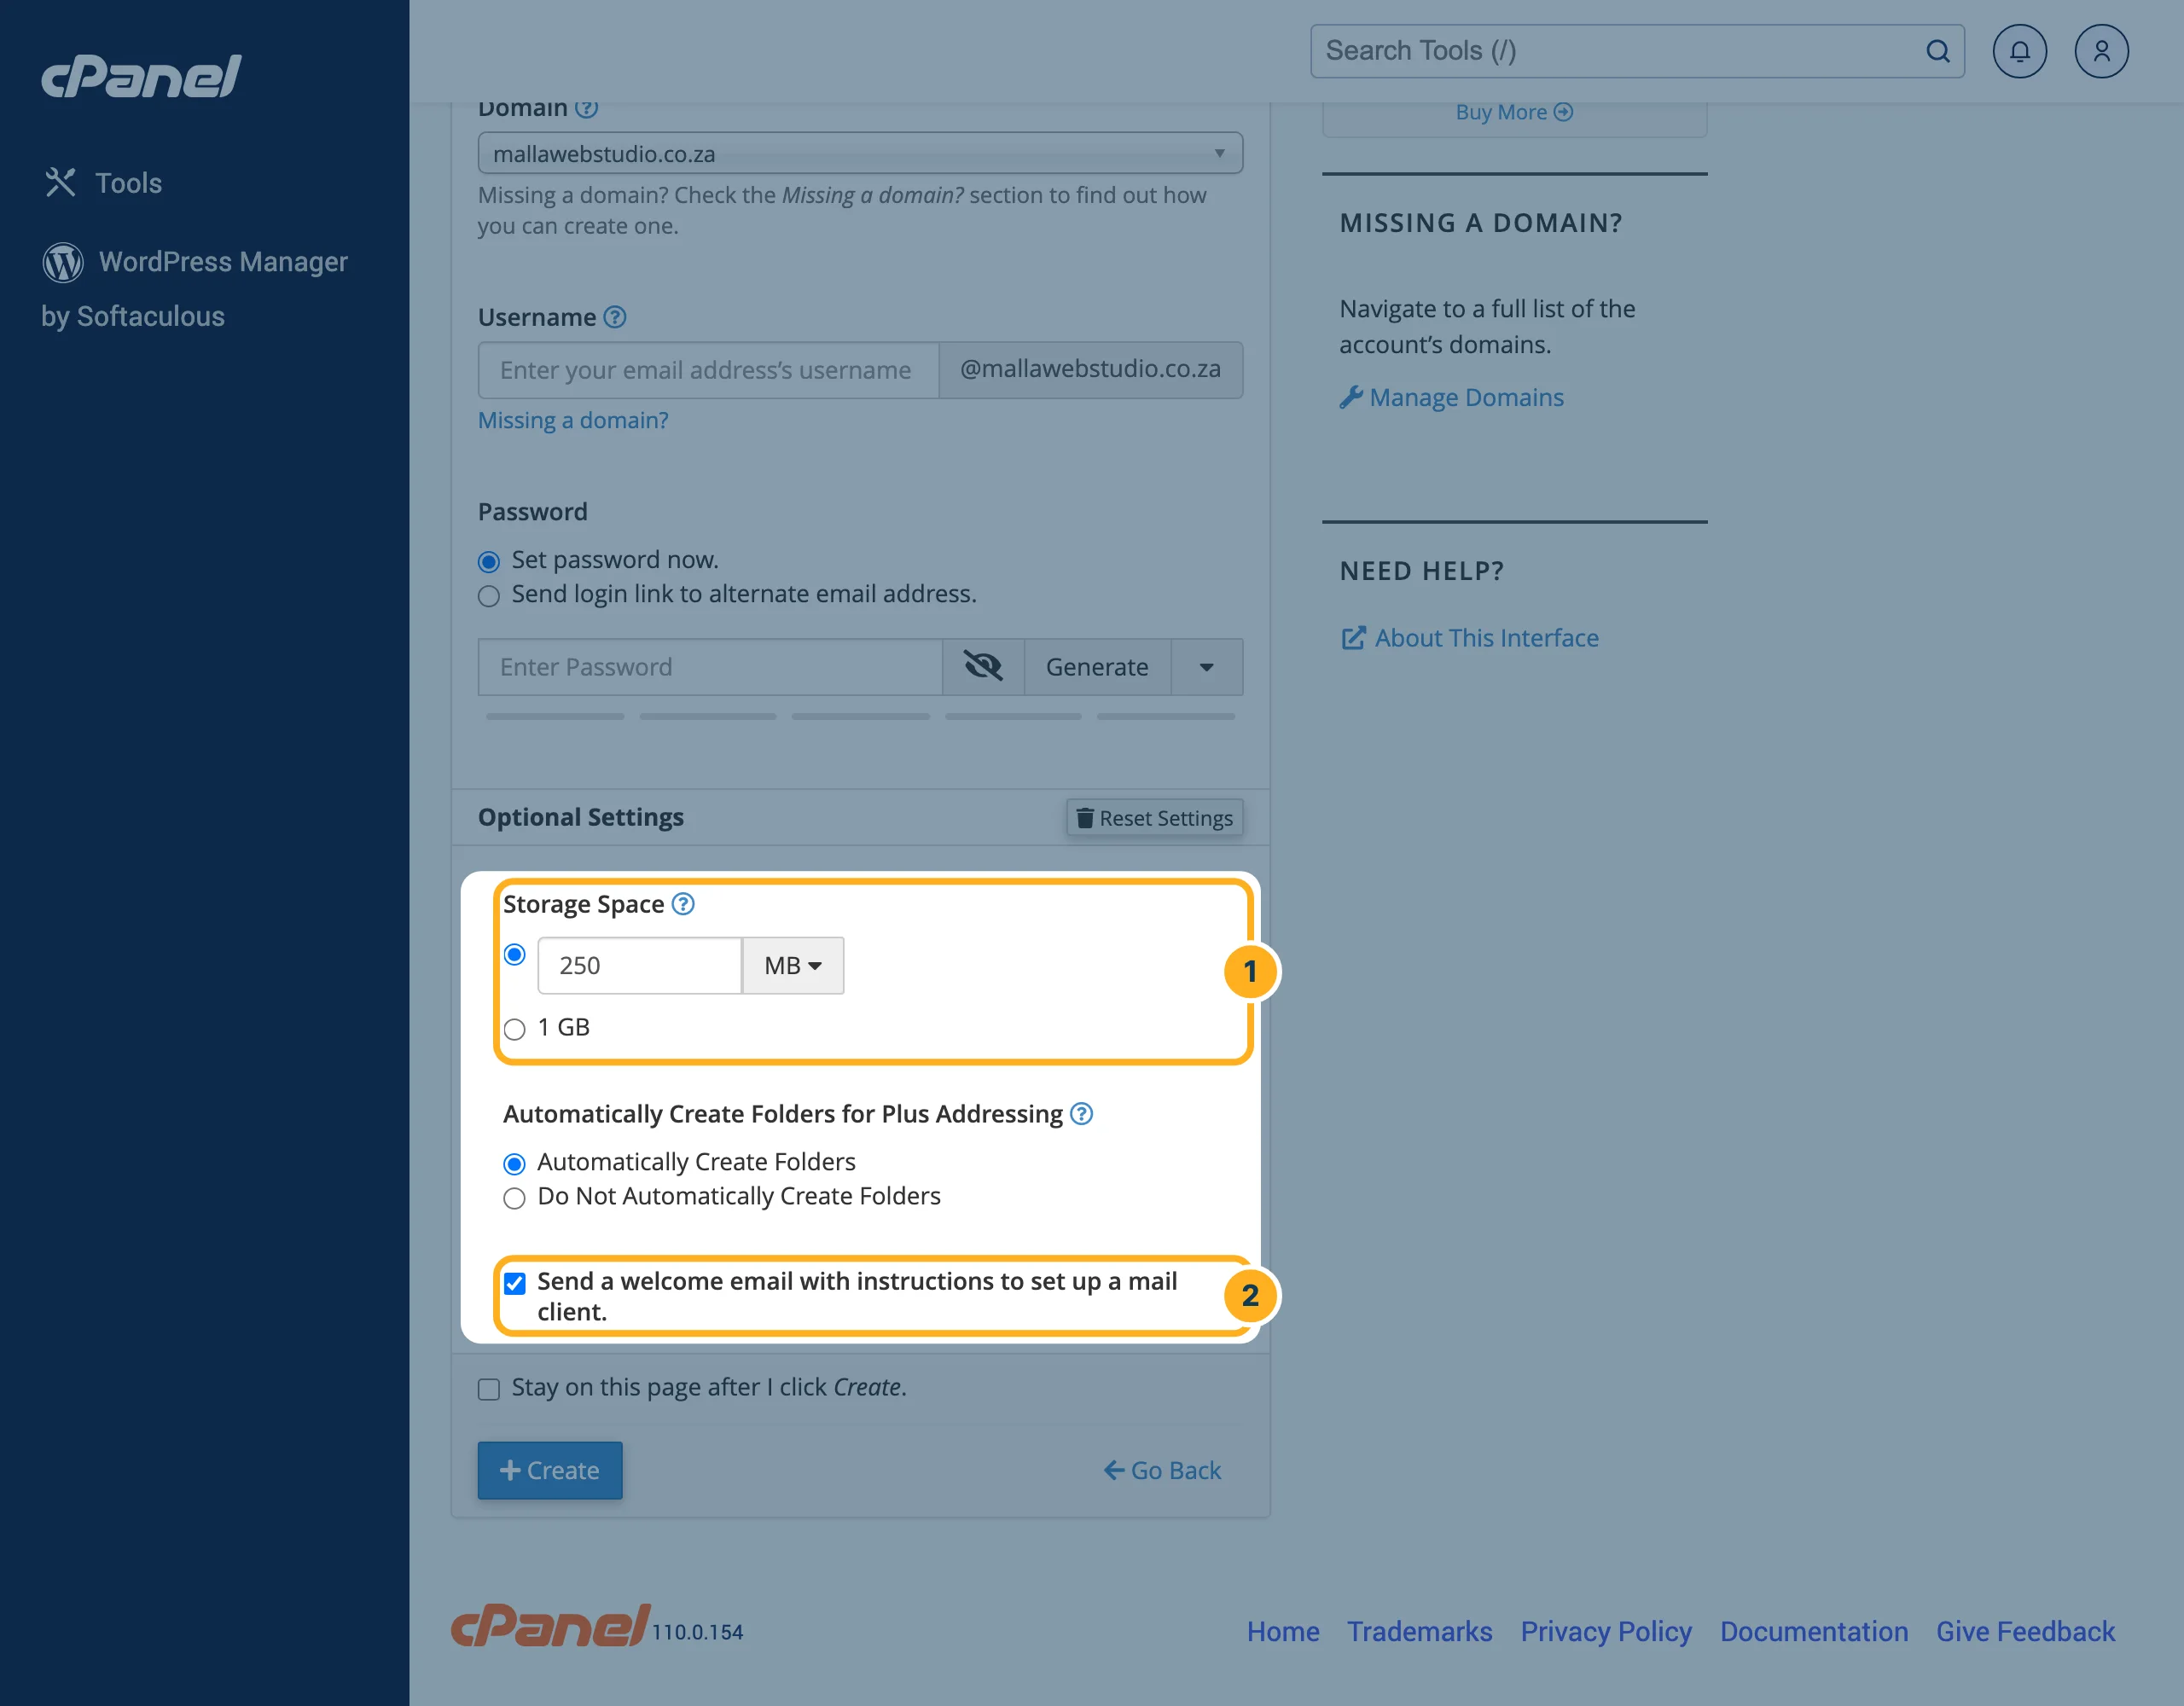
Optional, before you click Create: next to Optional Settings, click Edit Settings.
- Storage Space – how much mail the mailbox can hold. cPanel suggests 250 MB; the second option is the most your plan allows (1 GB on the Starter plan). You can change it later – see Mailbox size and storage.
- Send a welcome email with instructions to set up a mail client. – ticked: the new mailbox receives an e-mail with the settings for phones and computers.
cPanel takes you back to the list, where the new address now appears. You can read its mail straight away with Check Email (see Read your mail in webmail) or set it up on your phone or computer with Connect Devices (see E-mail settings for your devices (IMAP, SMTP, ports)).
Something not working?
- “You have reached the maximum number of accounts and can’t create any more”: all mailboxes of your plan are in use. Delete one you no longer need, or use a forwarder instead of a mailbox – see Forward e-mail to another address.
- “Enter a stronger password”: cPanel only accepts strong passwords. Make it longer and mix upper- and lower-case letters, numbers and symbols, or click Generate. See Strong passwords.
- Your domain isn't in the Domain list: the domain has to be added to your hosting account first – see Add another domain or a subdomain.
Related articles
- Read your mail in webmail
- E-mail settings for your devices (IMAP, SMTP, ports)
- Mailbox size and storage
Need help? Open a ticket or call us on 082 412 6556.
