

With File Manager in cPanel you upload your website files in the browser – no extra program needed. Everything your visitors should see goes into the folder public_html.
Watch the video (1 min 26 s, with narration) – or follow the steps below.
Step by step
-
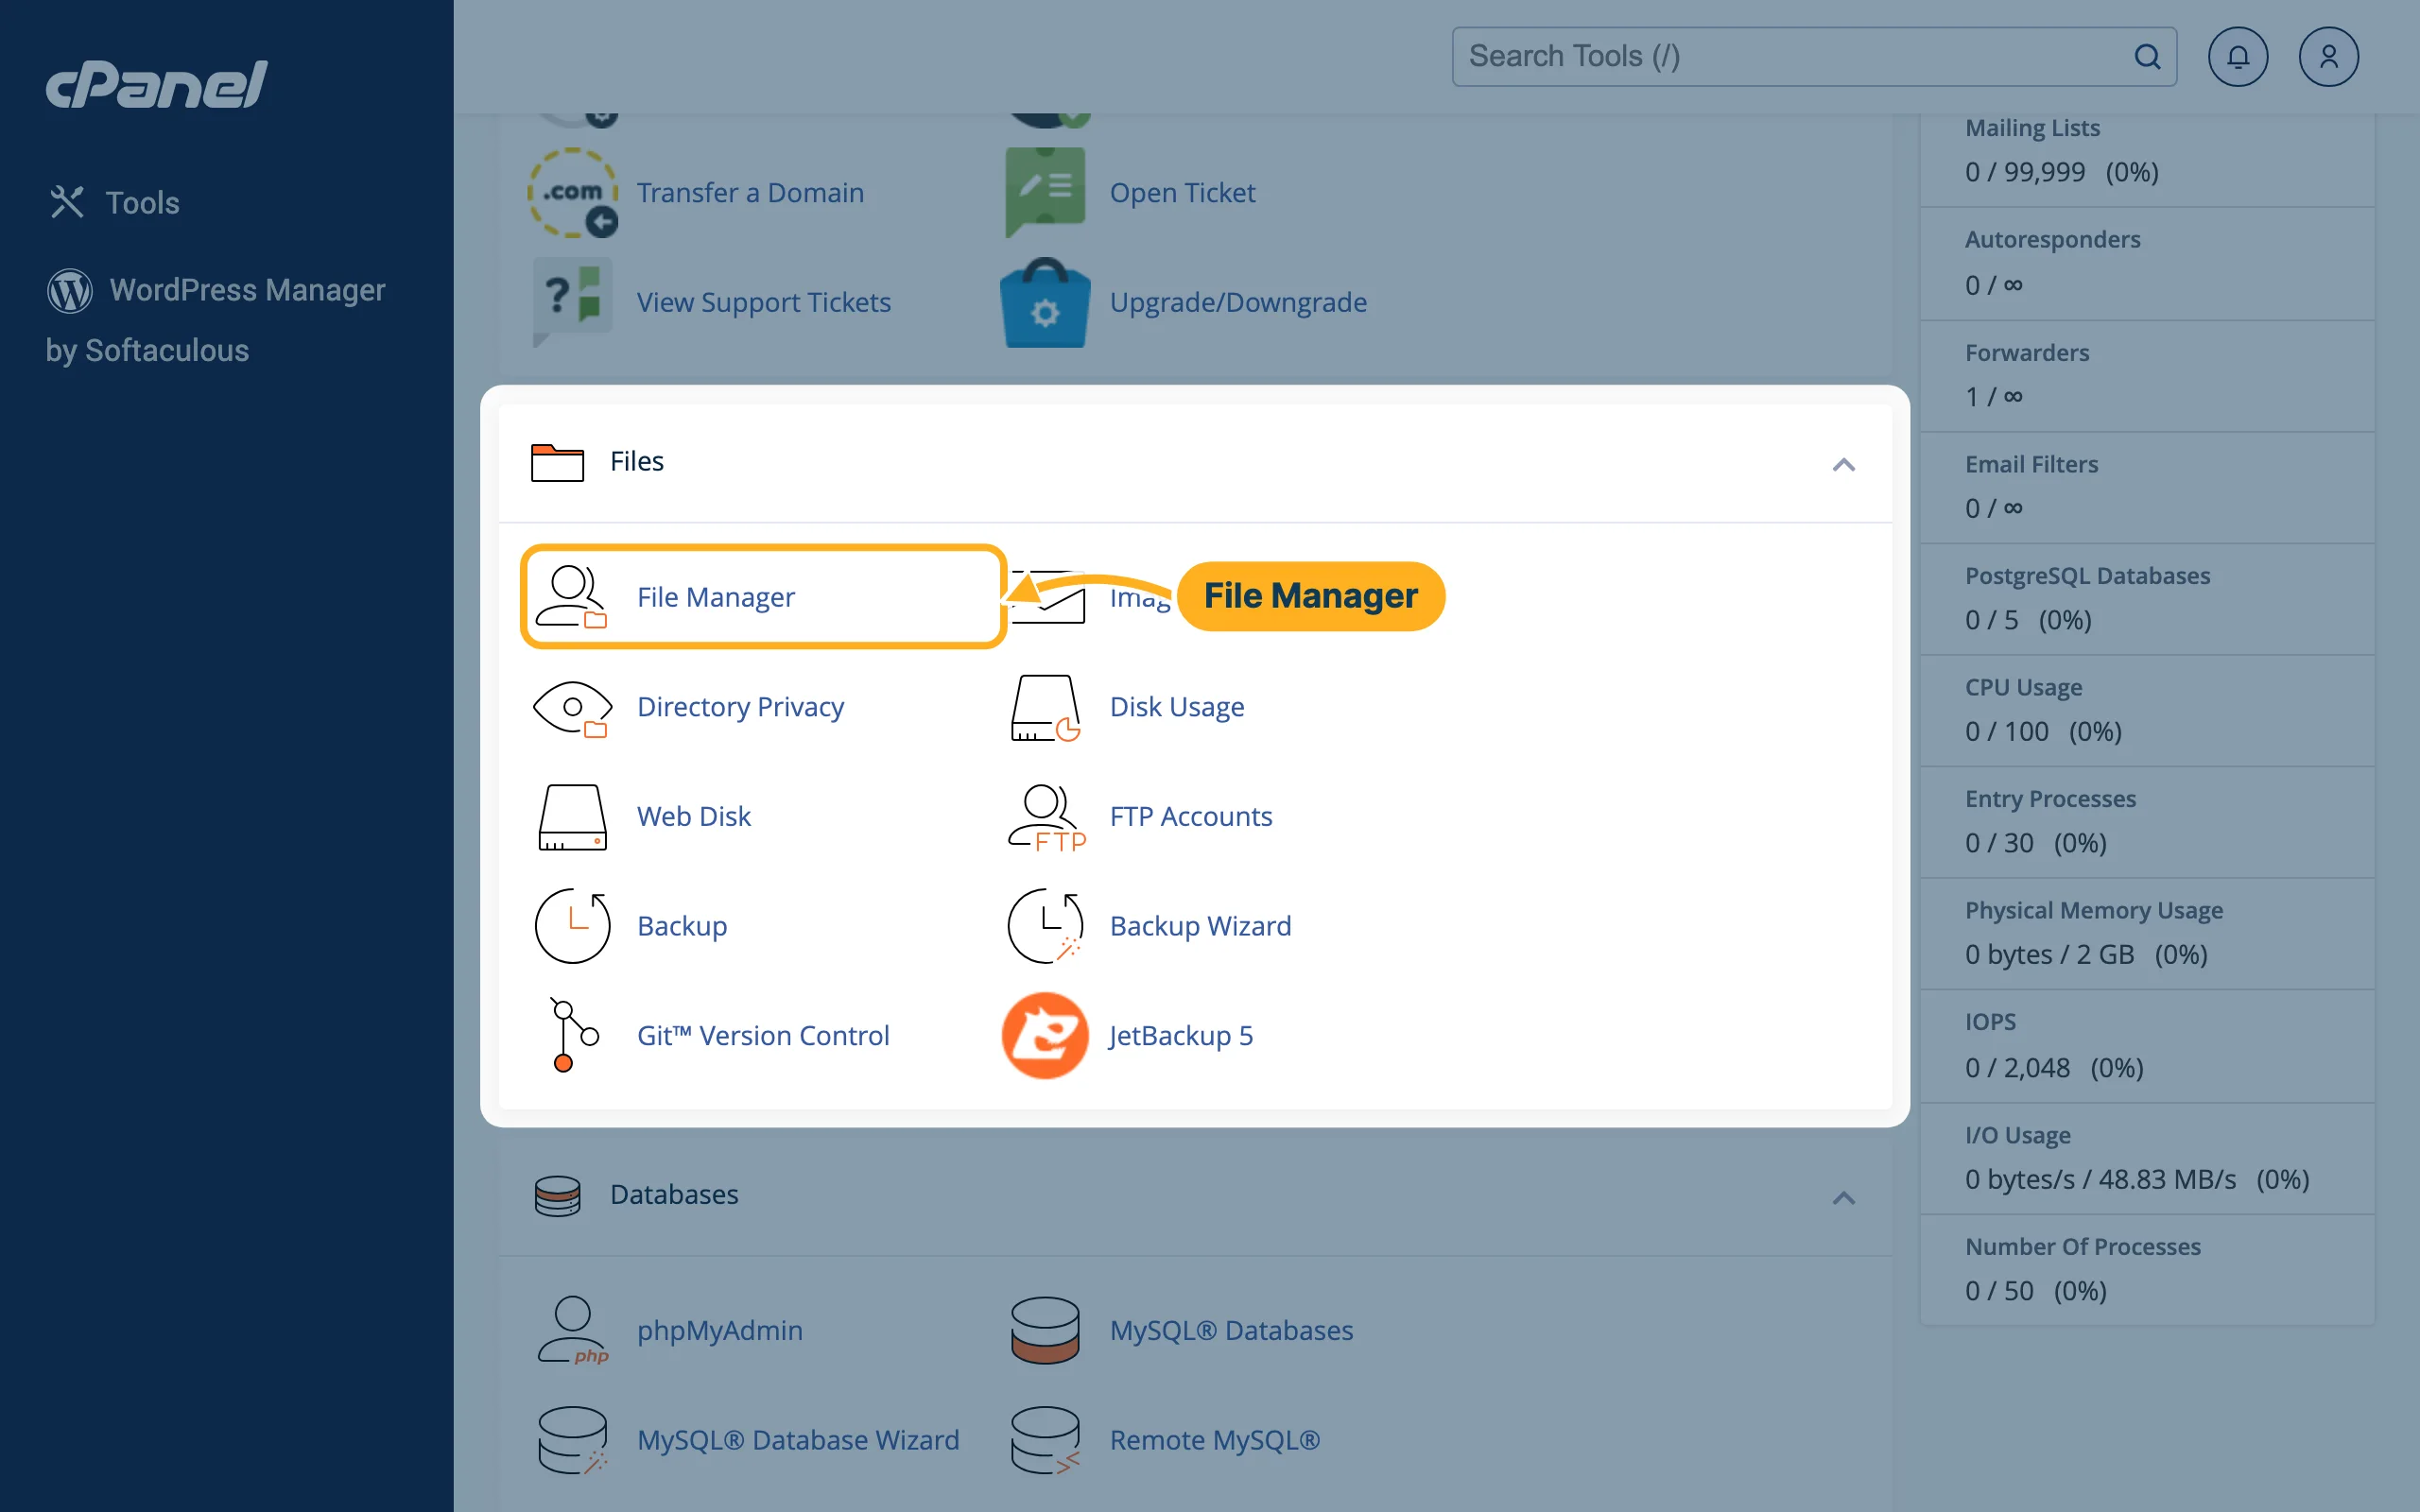
Log in to cPanel (see Log in to cPanel from the client area). In the section Files, click File Manager. It opens in a new tab. In the client area you can also click File Manager on your service page.
-
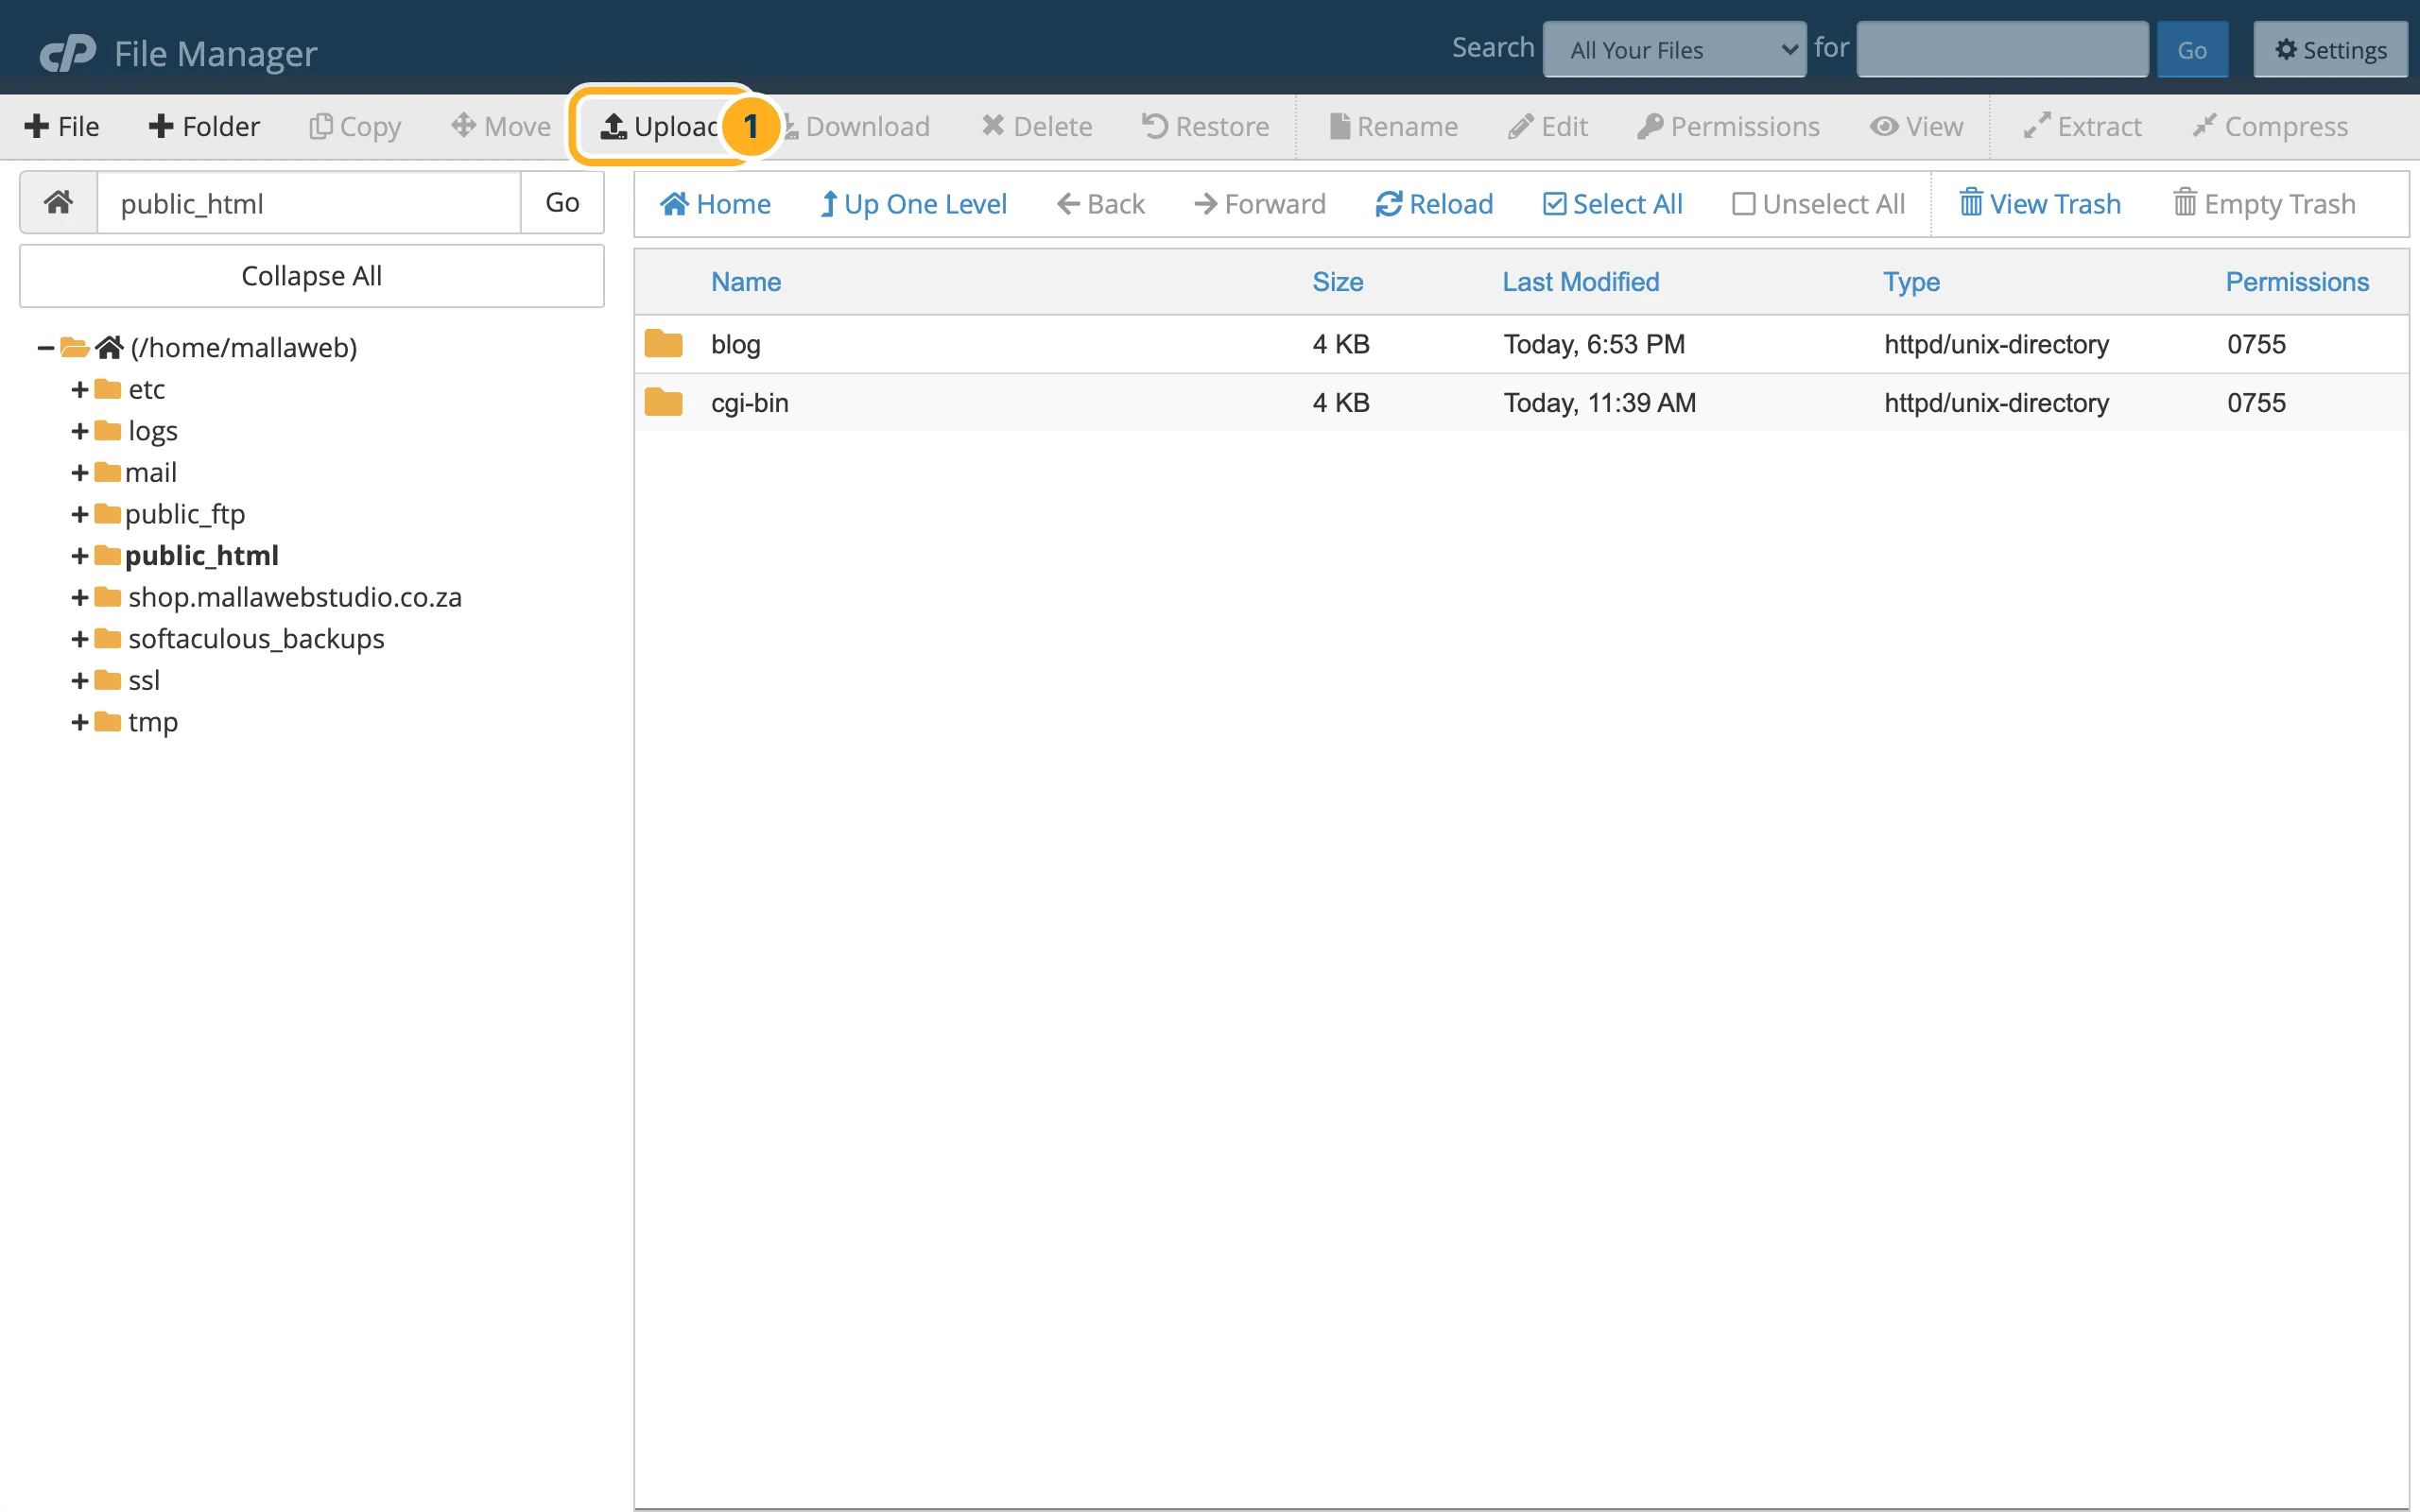
In the folder list on the left, click public_html. This is the folder of your main domain; the box at the top left shows which folder you are in. Then click Upload in the toolbar.
-
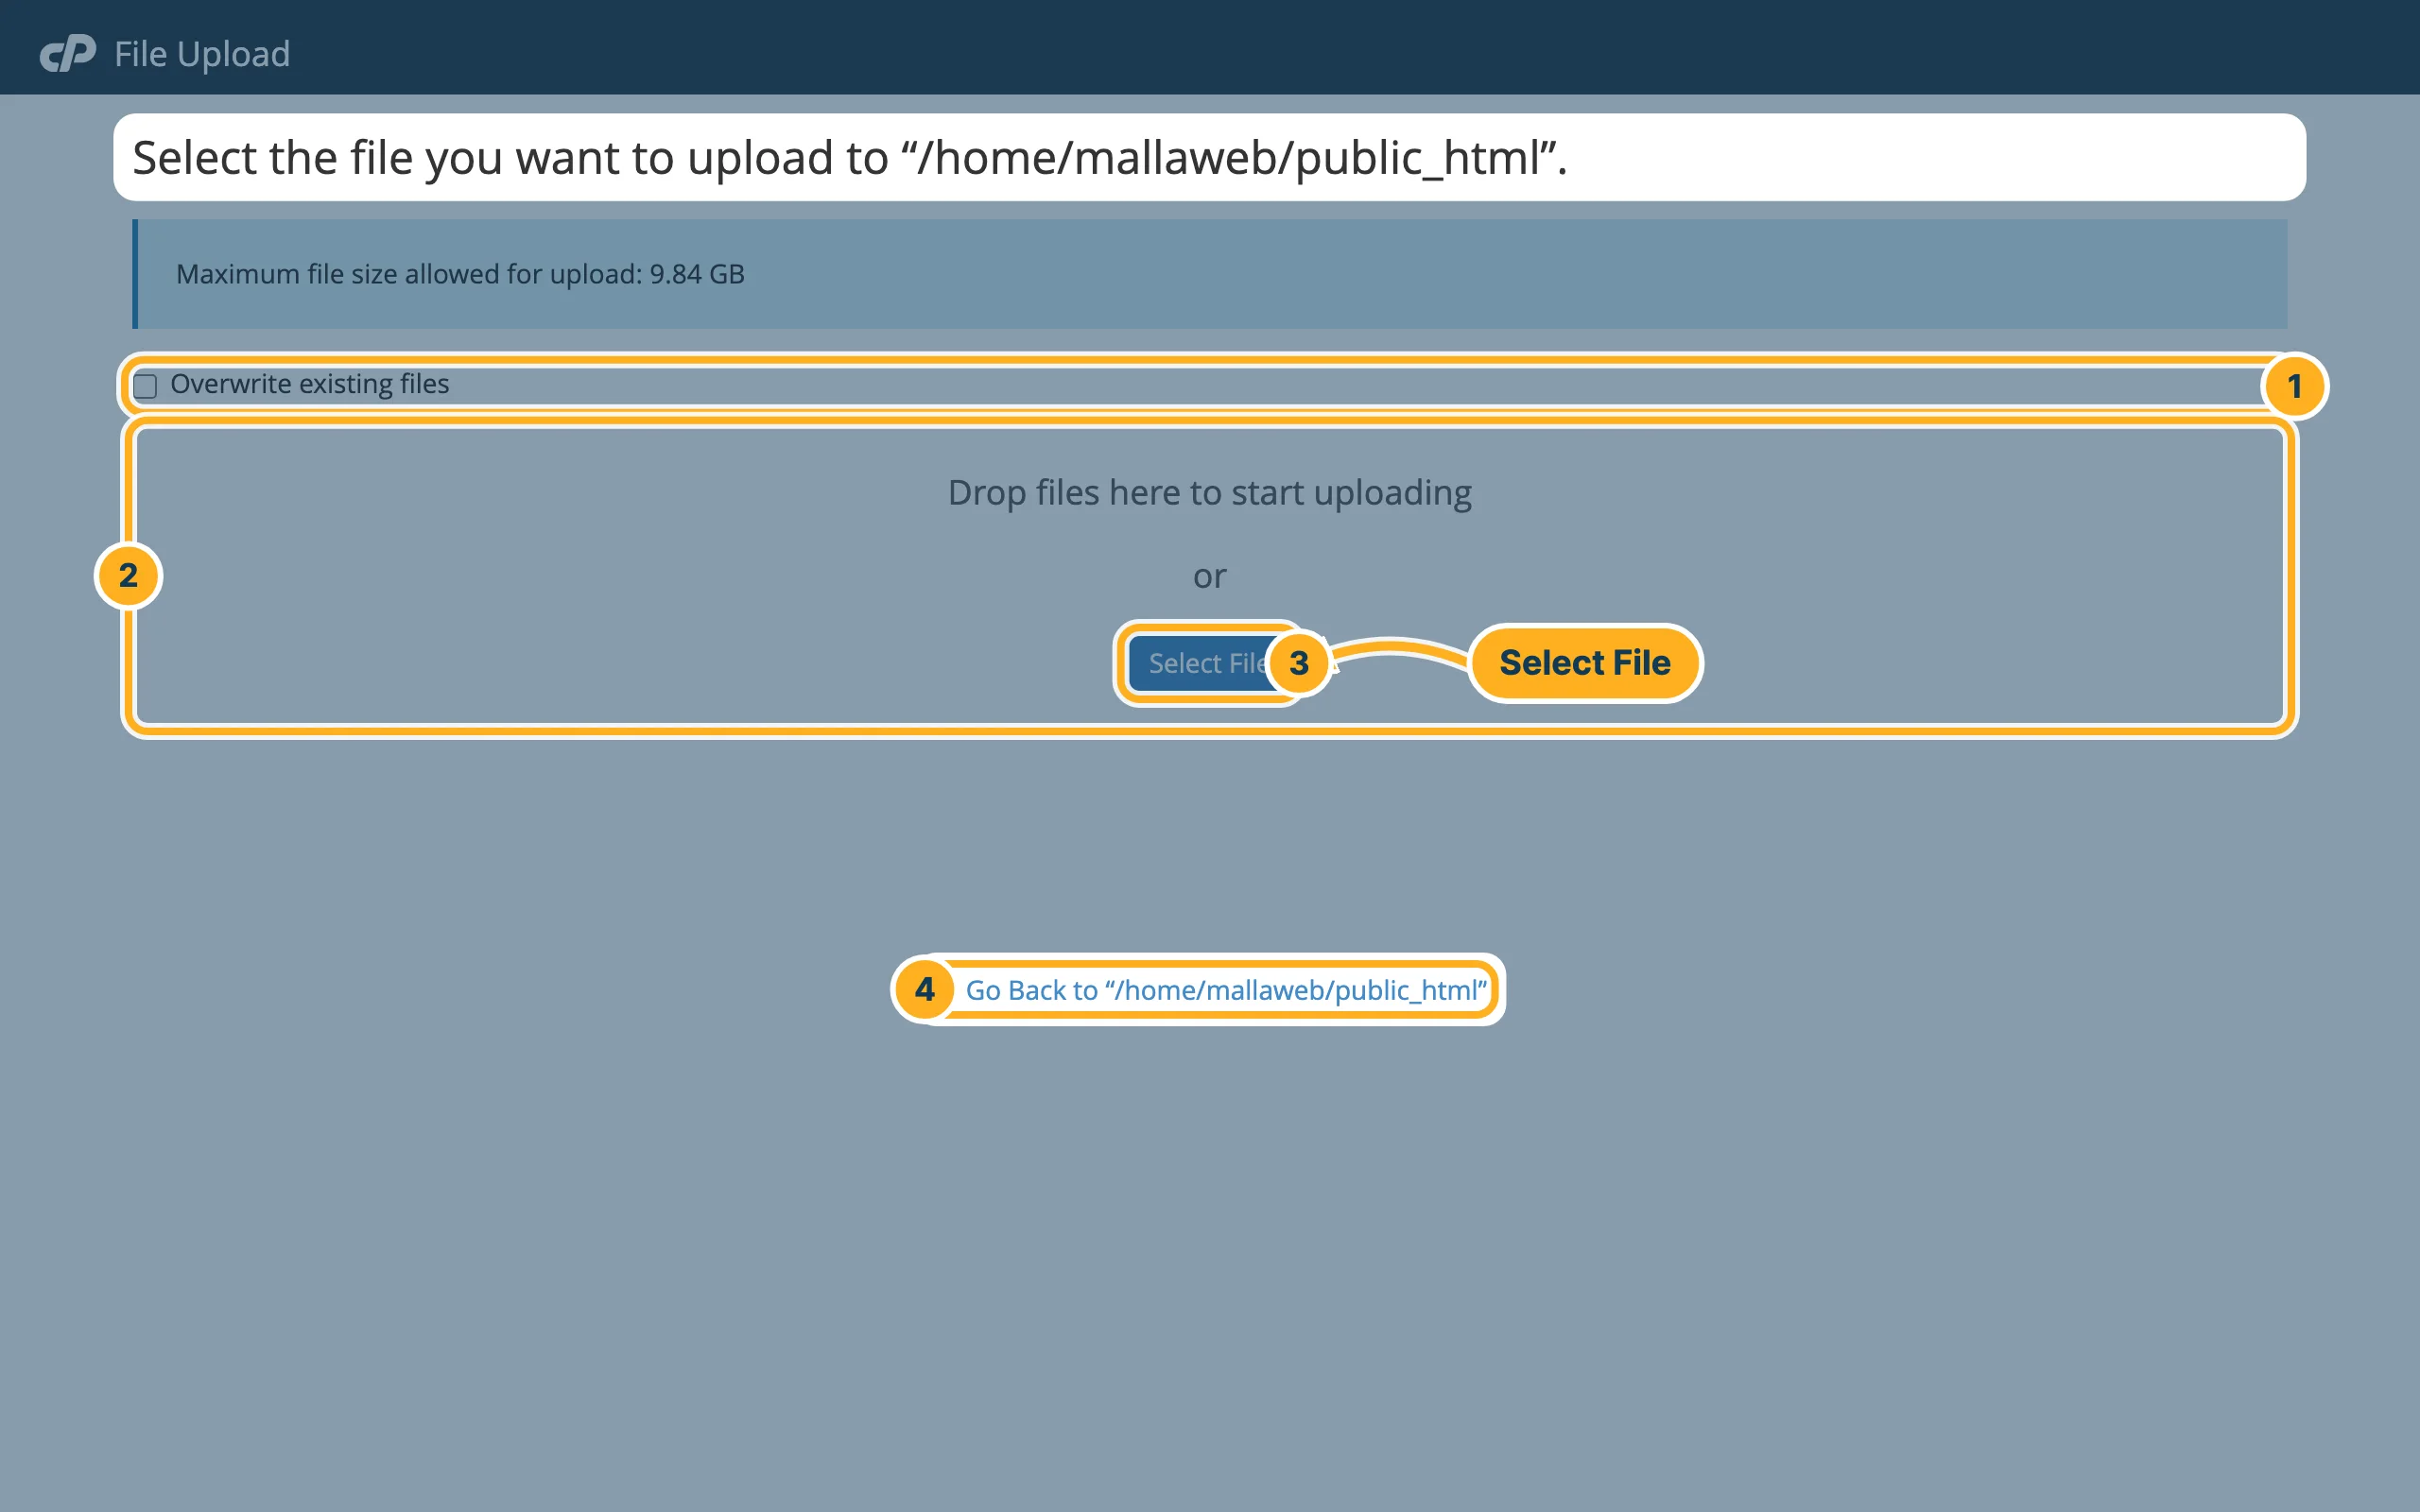
The page File Upload opens in a new tab. It shows the folder the files go to and the maximum file size you can upload.
- Tick Overwrite existing files if files with the same name should be replaced.
- Drag your files into the box Drop files here to start uploading,
- or click Select File and choose the files on your computer.
- When the upload is finished, click Go Back to “/home/…/public_html”.
Other things you can do in File Manager
- + Folder and + File create a new folder or an empty file.
- Select a file to Download, Rename, Edit, Copy, Move or Delete it. Deleted files go to the trash: View Trash shows them, Empty Trash removes them for good.
- The folder of a subdomain or extra domain has its own name next to public_html, for example shop.mallawebstudio.co.za. See Add another domain or a subdomain.
Something not working?
- Your site still shows the old page: reload it with Ctrl+F5 (Windows) or Cmd+Shift+R (Mac). Check that the start page is called index.html or index.php and lies directly in public_html, not in a subfolder.
- Many files or large files: an FTP program is often easier – see Create an FTP account and connect with FileZilla.
Related articles
- Create an FTP account and connect with FileZilla
- Check your disk space
- Install WordPress with Softaculous
Need help? Open a ticket or call us on 082 412 6556.
