

A redirect sends visitors from one address to another, for example from an old page to its new address. A custom error page is what visitors see when a page doesn't exist (error 404). You set up both in cPanel.
Watch the video (1 min 55 s, with narration) – or follow the steps below.
Add a redirect
Log in to cPanel (see Log in to cPanel from the client area). In the section Domains, click Redirects.
-
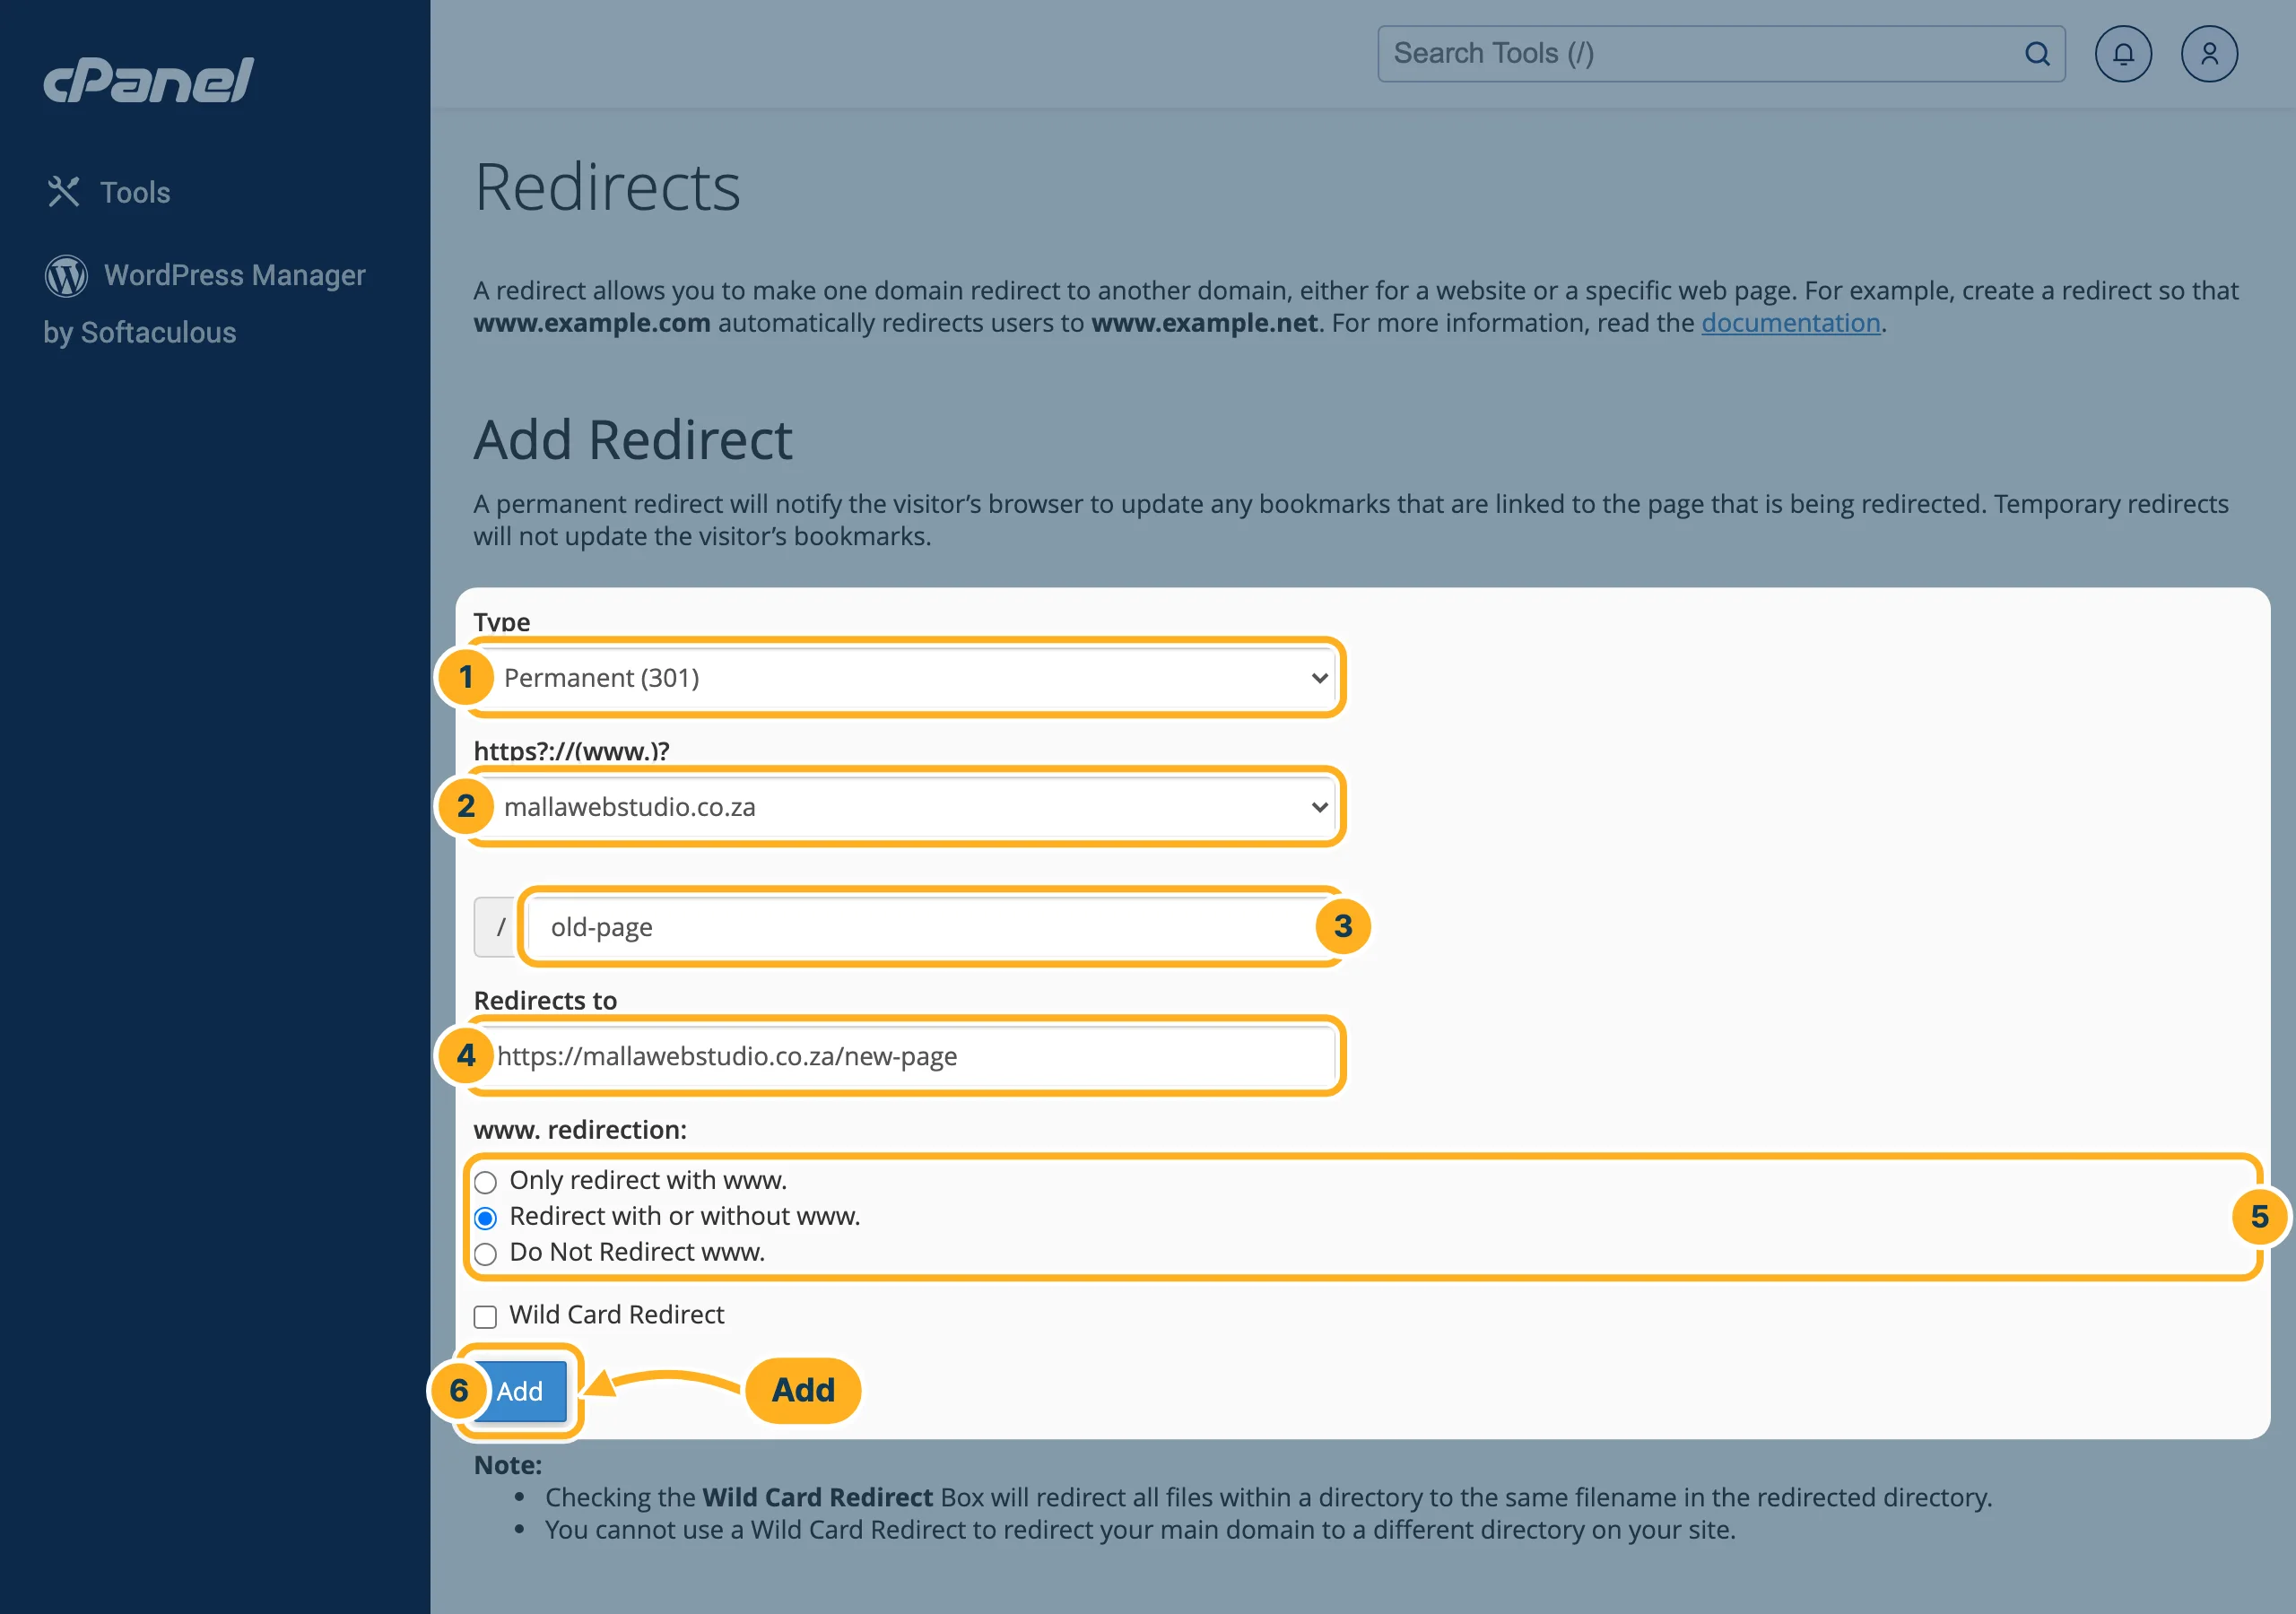
Under Add Redirect, fill in:
- Type – Permanent (301) for an address that has moved for good (search engines take over the new address), Temporary (302) for a short time.
- The domain the old address belongs to, for example mallawebstudio.co.za.
- The rest of the old address after the domain, for example old-page. Leave it empty to redirect the whole domain.
- Redirects to – the full new address, starting with https://.
- www. redirection – usually Redirect with or without www., so that both versions of the address are redirected.
- Click Add.
Your redirects are listed below the form under Current Redirects, where you can also remove them.
Make your own error page
-
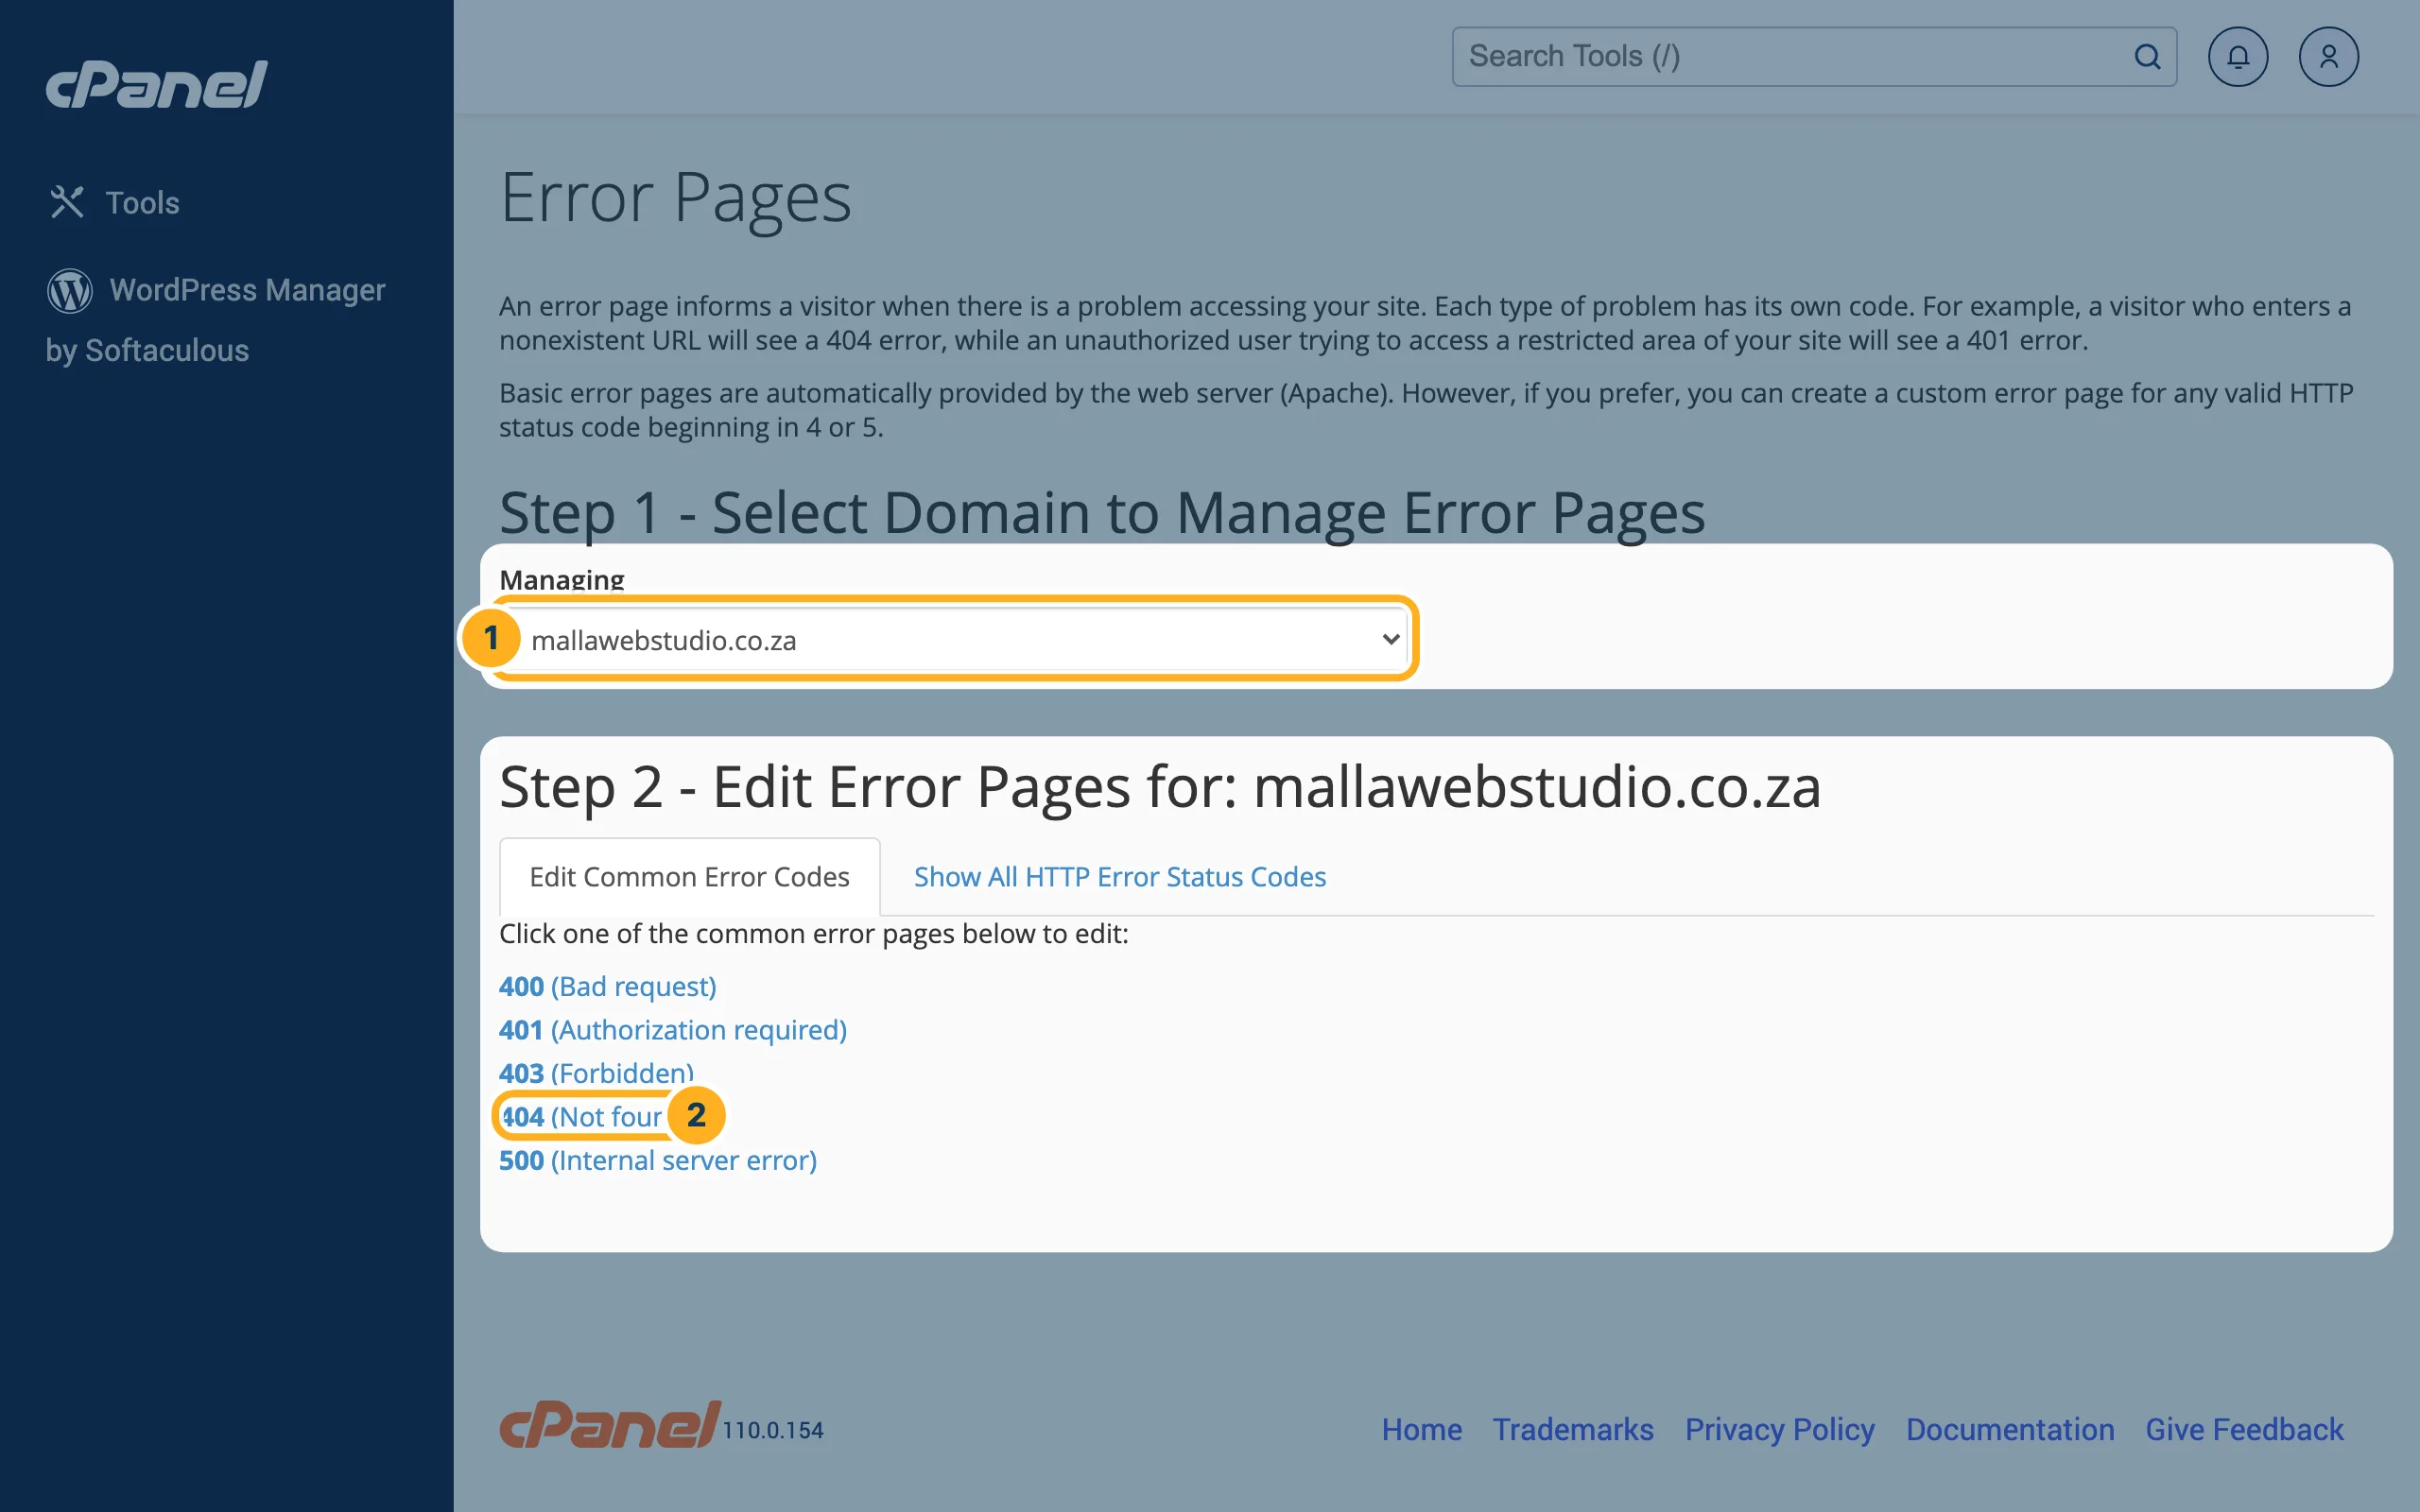
In the section Advanced, click Error Pages.
- Under Managing, choose the domain.
- Click the error page you want to change, usually 404 (Not found).
-
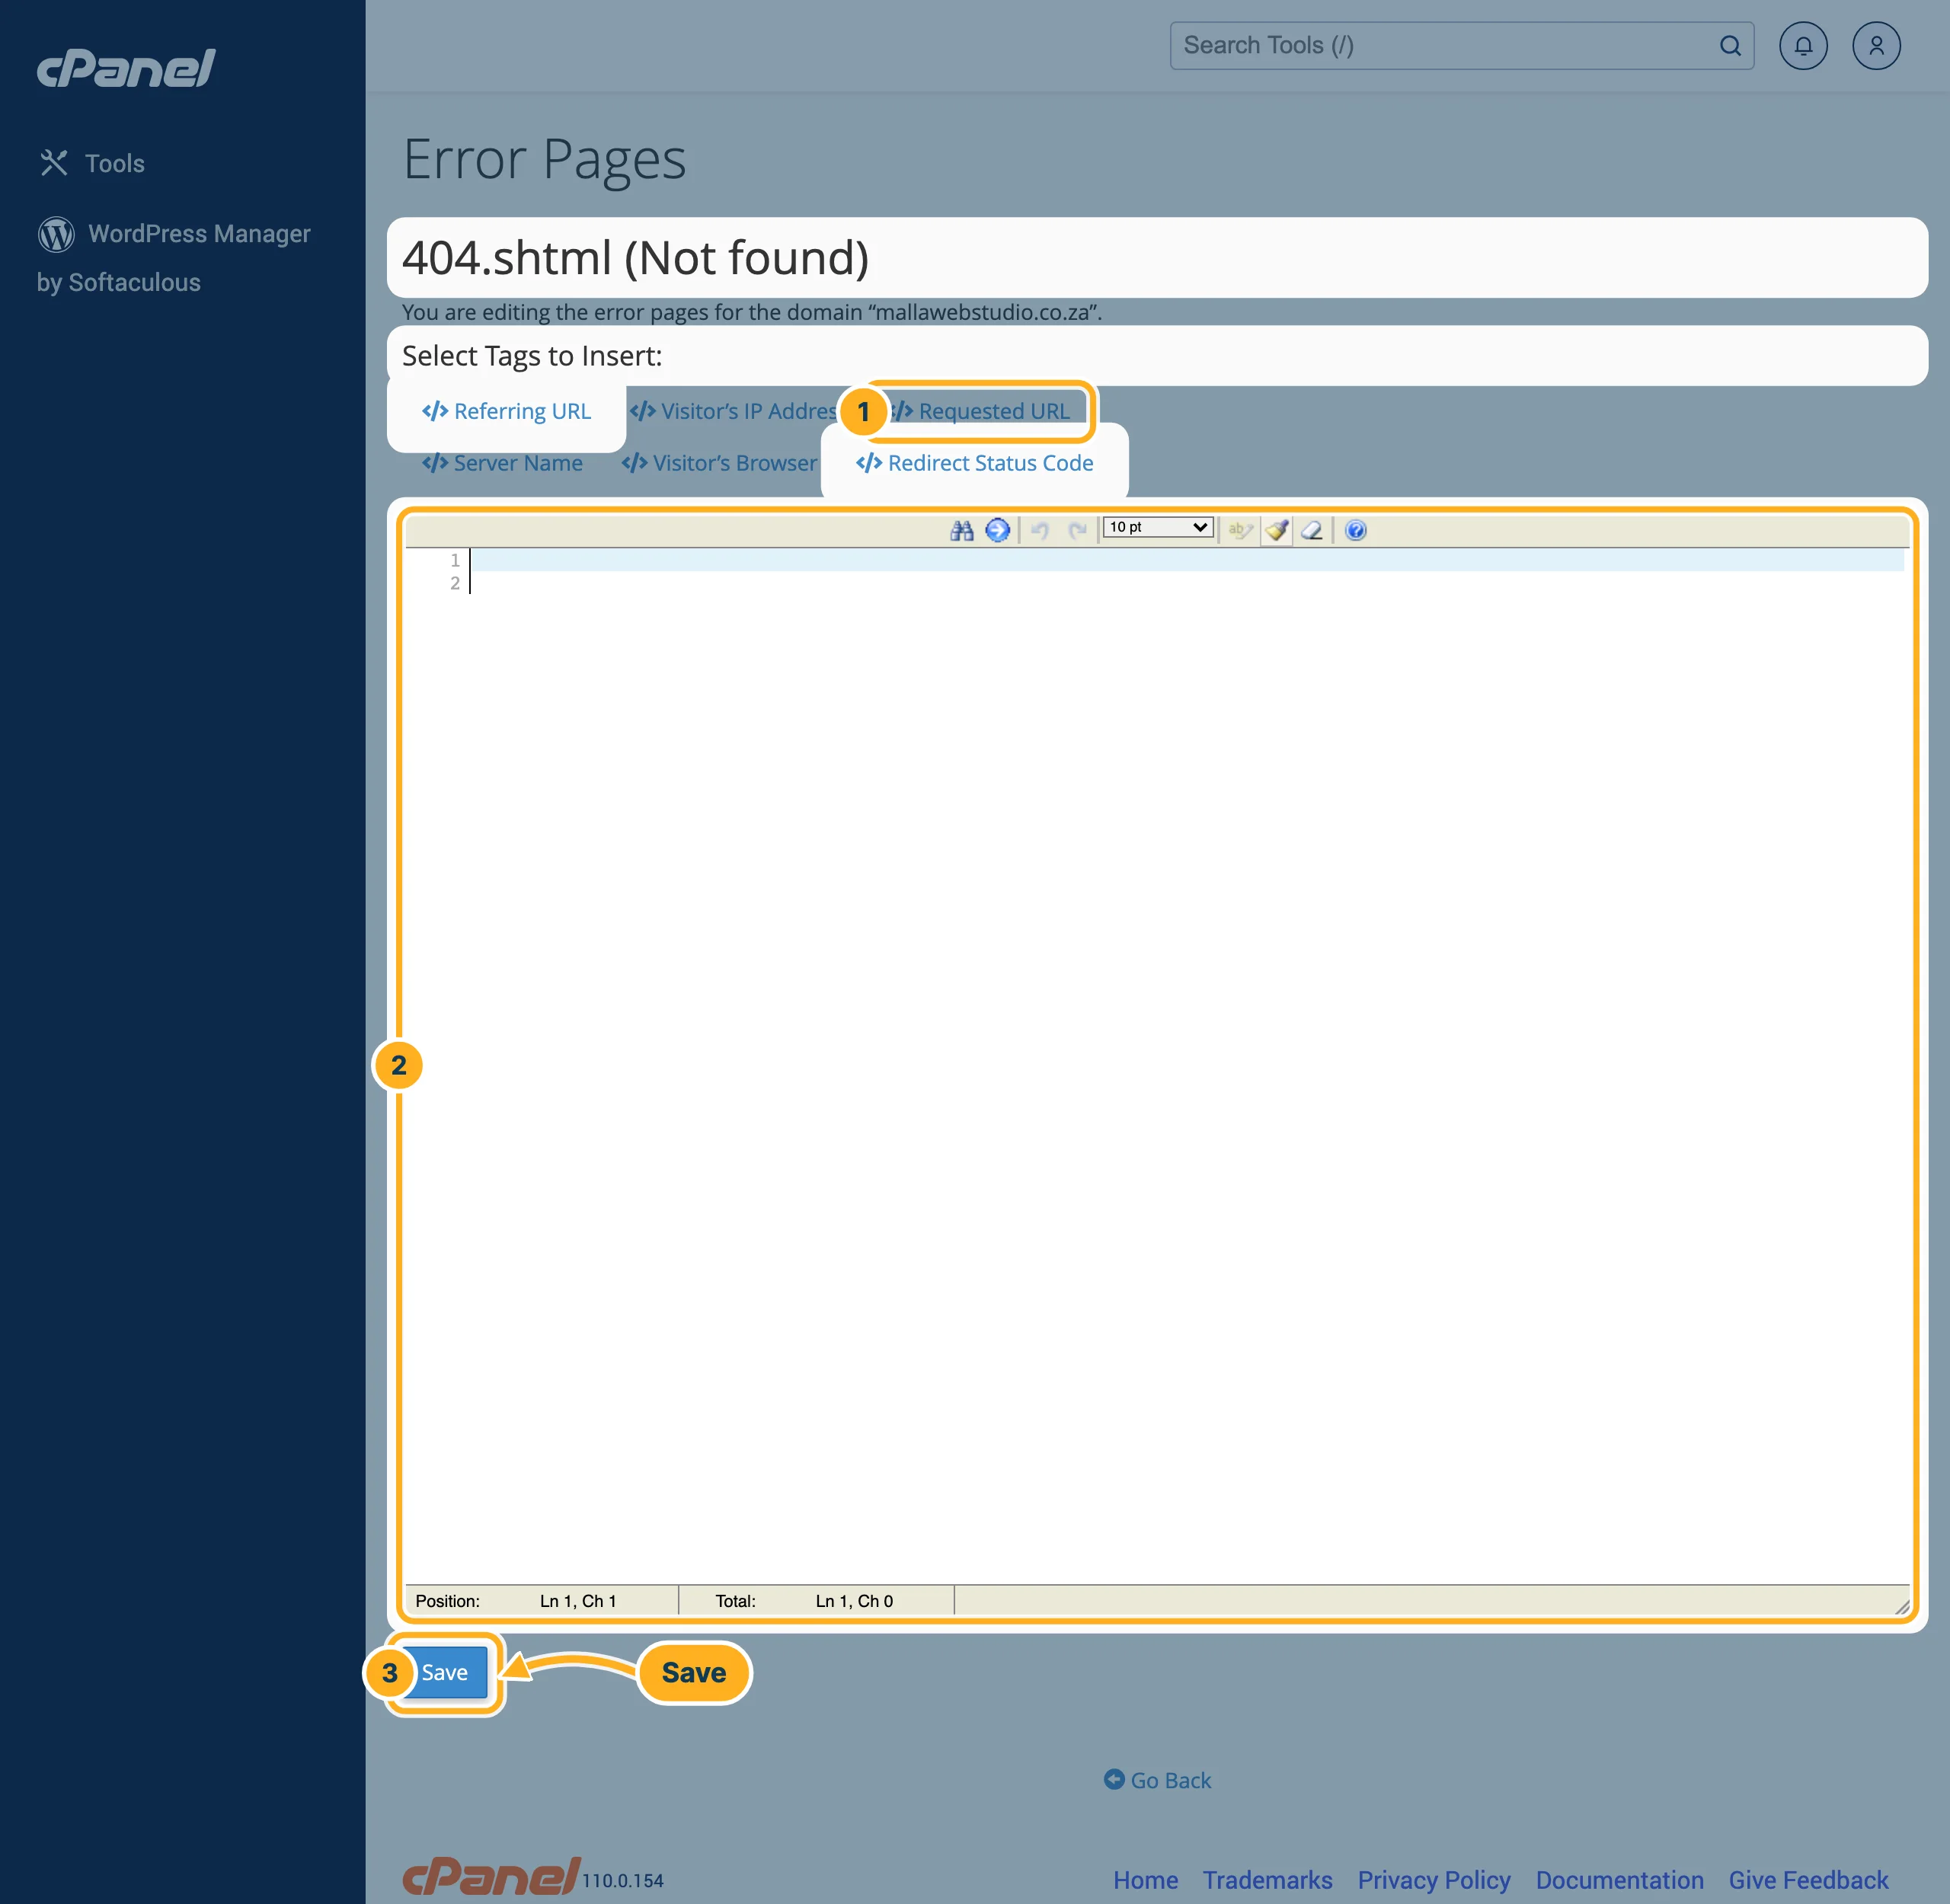
The editor for 404.shtml (Not found) opens:
- The buttons under Select Tags to Insert add details to the page, for example Requested URL (the address the visitor tried to open).
- Type the text or HTML of your error page in the editor, for example a short apology and a link to your home page.
- Click Save.
If you use WordPress or another program that has its own error page, you don't need this – the program shows its own page.
Related articles
- Always open your site with https://
- Add another domain or a subdomain
- Upload files with File Manager
Need help? Open a ticket or call us on 082 412 6556.
